Ji Youjia wanted to create a smart home. After I strongly advocated, let me use his garage door tester to achieve the following results. With one beat, please see Guan Haihan. Slight delays in handling are sufficient to deal with garage doors that have low real-time requirements. Of course, being able to remote control is just the first step in smart. According to the various sensor data fed back to the central controller for automatic adjustment is the goal of the smart home.
The existing Internet of Things solutions with a central controller are roughly the following:
1. Large-scale overall plan: similar to the renovation of all-inclusive. Advantages: Various sensor, switch and other node equipment options, product app, reliability assurance (at least after sales), worry and effort; Disadvantages: private communication protocol (cause it can not be linked with other manufacturers), if there is no reserved location and wiring The existing decoration is difficult to develop and the price is expensive.
2. Universal remote control program: similar to a half-fitting package. Advantages: coverage of inventory appliance market (infrared, radio frequency), finished product app, reliability is relatively high (see later maintenance); disadvantages: almost no feedback (no sensor, even if there is a single purchase, the price hehehe), no feedback that is nothing Only the remote control and the original remote-controlled appliances are useless.
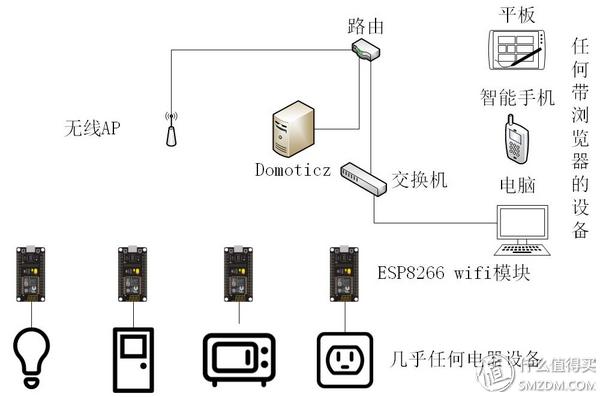
3. Open source platform + open source hardware: This is the clear package. Advantages: cheap, flexibility, flexibility, flexibility (almost any device can access the platform); disadvantages: toss , simple English, reliability (see your level). The platform has domoticz, OpenHAB; nodes can be various open source hardware such as arduino, esp8266.
4. IoCloud platform + open source hardware: similar to 3, you don't need to write your own code (you want to play well), but the home sensor data and control are uploaded to someone else's server... I can only Ha ha ha. Kingspeak abroad, domestic music networking.
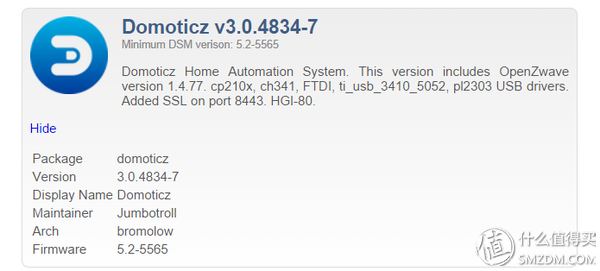
The open source platform domoticz can be installed on linux (Raspberry Pi, Qunhui, etc.) or windows. The user interface only needs to support the html5 browser. Push and warning can be implemented with other push apps or emails. The programming supports lua, bash, python, etc. , and even blockly (modular programming google development, now used for makeblock children's toys and mit development of the lazy Android application development app inventer). Compared to openhab, the domoticz interface is more friendly (in the final analysis, it is the programming level), and the learning cost is low. The following picture is from the network.
Various monitoring and sensor data

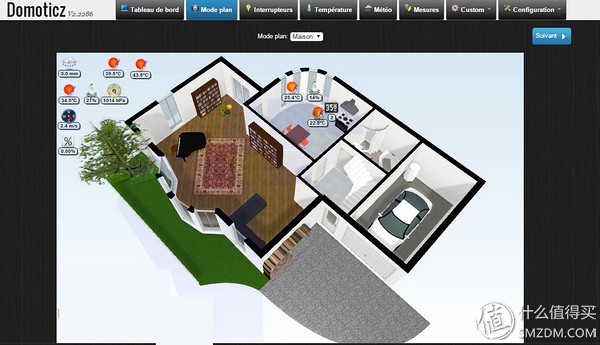
Home floor plan to make your own? no problem
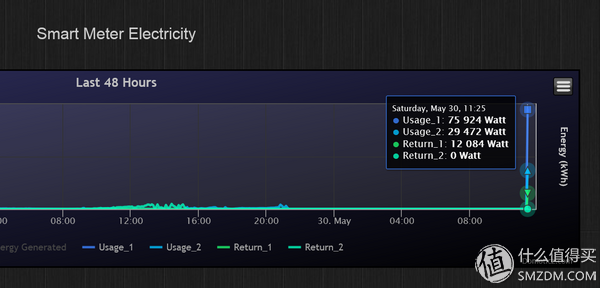
Data is displayed as a chart
Blockly modular programming, children can get started ifttt

Is there an idle old tablet at home? Minutes to become the center console 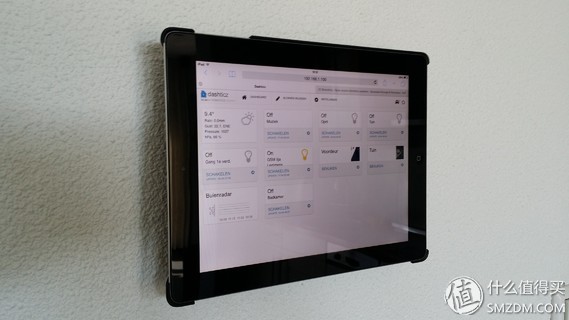
Installation of domoticz
Put the official crisis first
Here are two ways to install (win is too simple not to say), one is the group Hui nas, the family has a group of Hui can be used. There is domoticz in the group's kit (it may need to add the source of the kit) but the version is lower, and it is recommended to add it manually using the already compiled kit in the wiki.
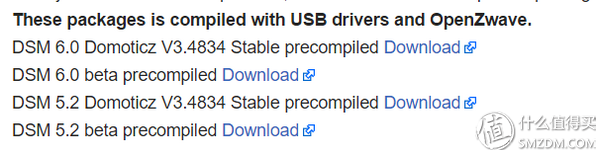
According to the system version of their own group Hui choose stable stable, because it is now n54l black dress 5.2 version, then choose ds3615 download
The group's installation will not be described in detail. Remember to trust the "any issuer".
If you are afraid of nassiness with important information, personal advice is to buy a raspberry pie . Second generation is enough (wireless if you want to buy an adapter) is better than three generations. Wiki also provides two ways to install

Burn the image directly into the sd card or install it in an existing raspberry pie system. The specific steps are not explained any more. Either one needs to set the Linux base time zone and use static ip (recommended).
Domoticz settings
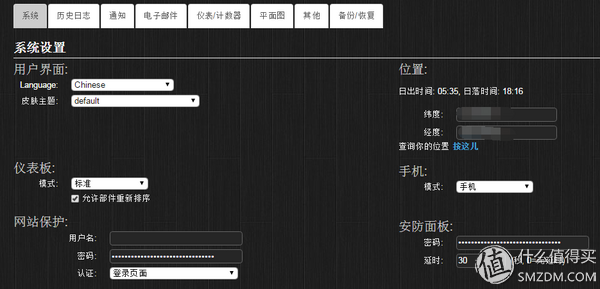
If the installation is successful, you can see the user interface by entering http://:8080

Ta-da! ! The settings can be changed to Chinese, and the suggestion is English. After all, most of the information is in English. Wait until after all of the tossing or familiarization is complete. There is also a longitude and latitude that needs to be set. The sunrise and sunset times and the weather forecast rely on this, and other settings will be discussed later.
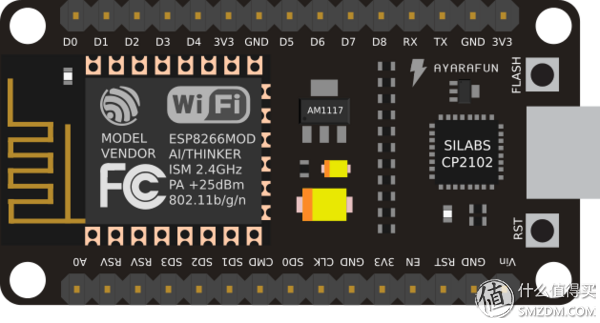
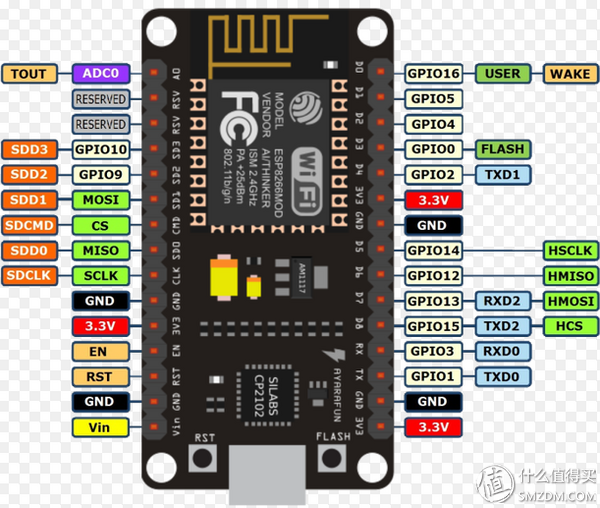
Nodemcu said plainly is an esp8266 ultra-small development board (some foreigners call it arduino killer), can power microusb (esp8266 native 3.3v power supply), comes with cp2102 (plug and burn) and reset button. Although the volume is almost twice as large as esp8266 (in fact, the size of the arduino mini), it is much smaller than the smallest system. Incidentally, esp8266 was developed by the Chinese people.
Nodemcu firmware burning
Also give two options: First, burn nodemcu official firmware
Finding the port

Select the required module in cloud compile and send it to your mailbox after compiling

There are programming tools and firmware links with commonly used modules
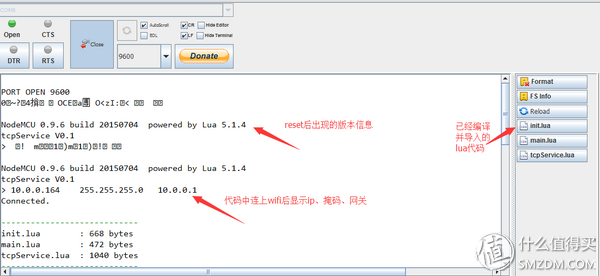
Esplore debugging environment developed with the old hair choose a good port reset module, you can see the module communication information. The official firmware is lua language. It may be difficult to get started, but it is very powerful once it is used. (I heard that there is a better micro-python??)
Interested in how foreigners can change their coffee pots to smart, a total of three parts covering the hardware part and the software part of the detailed (including esp code and domoticz code, are lua).
Of course, if you think the code is too complicated, here is also a fool firmware espeasy
The latest firmware is R120

Double-click flash.cmd to select the port number, flash size (in case of nodemcu is 4096) and the version number


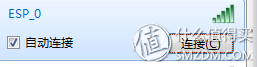
Burning is completed. Press reset or plug in to restart the module, find esp_0 in the wifi list, default password configurep, default gateway 192.168.4.1
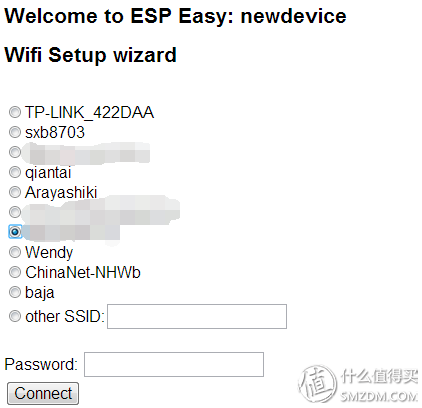
Enter the gateway, select wifi with domoticz same LAN and fill in the password
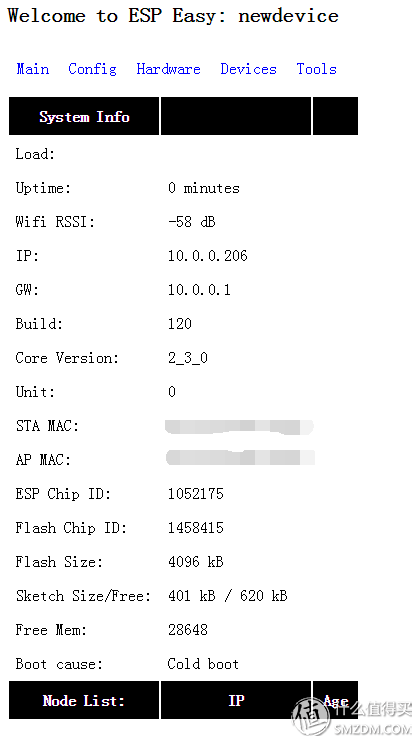
To the route to view the ip assigned to the esp

Enter the esp
Initial setting, enter config, fill in domoticz ip and port, also can name the device

Here basically completed the hardware and software platform construction, watching the complex is actually skilled in the matter of 10 minutes, not to mention adding nodes can simply brush a nodemcu.
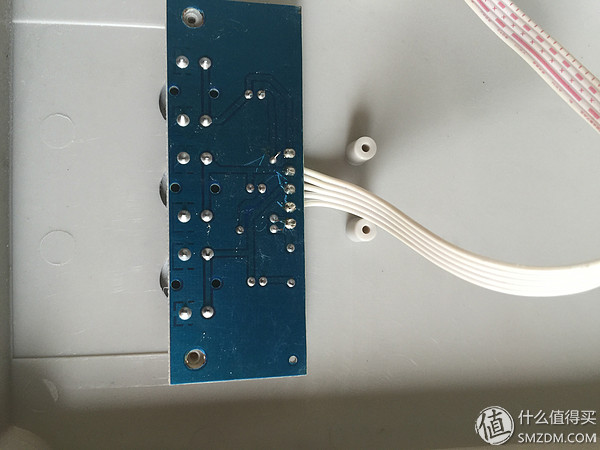
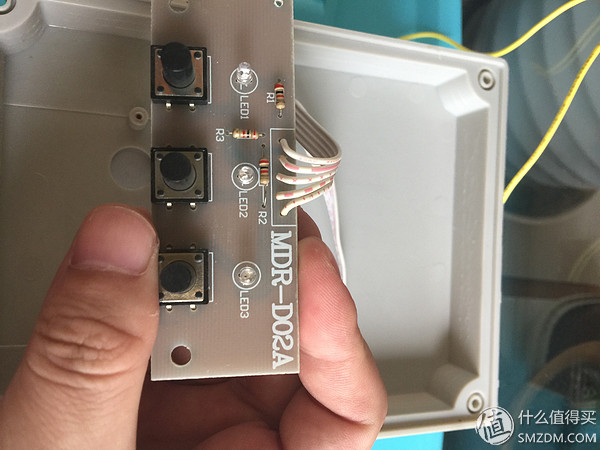
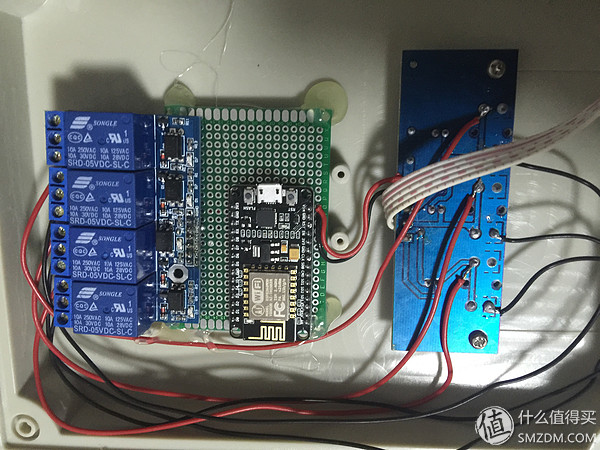
Let's take a look at what kind of inside door control box
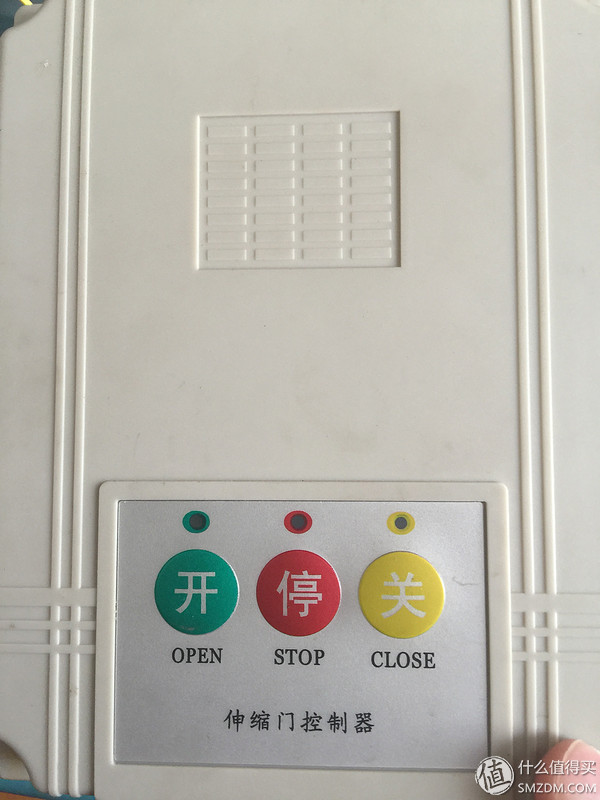
Look for the power supply first: The city electricity goes to the transformer 12v, then goes through 7805 5v, you can take power directly

In the picture above, the white connector is connected to the front panel with 3 buttons, 3 controls, a 5v, a gnd just use it (220 should be grounded, save the garage door charged)
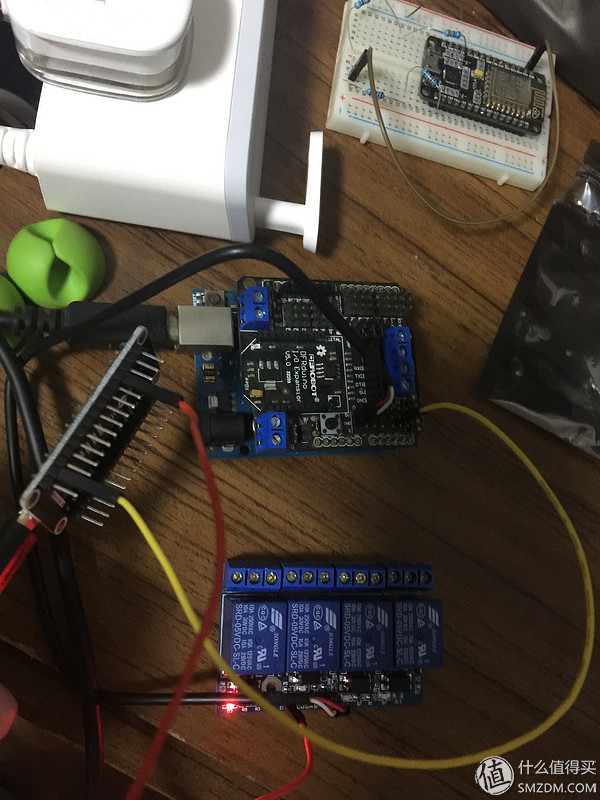
Simulate the button with the relay, the topology is as follows

The other is to put the relay on the switch, the following is the experimental process and finished product debugging
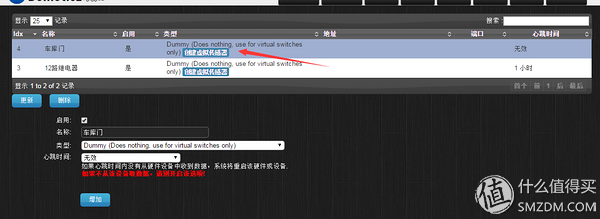
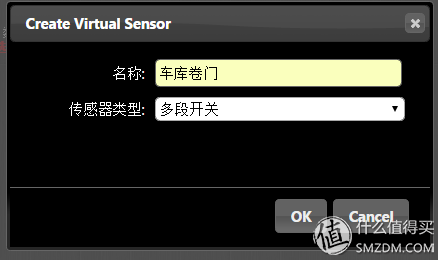
Add switches on domoticz, add hardware first and create virtual devices
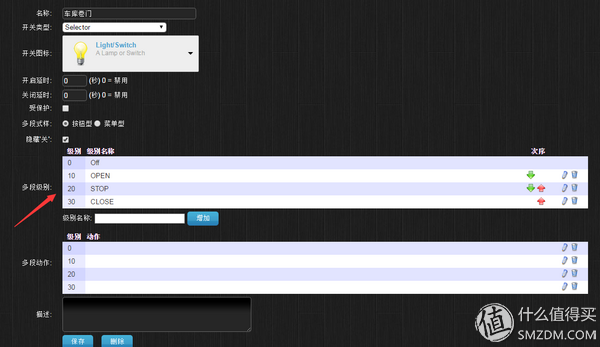
Multi-segment switch name can be set

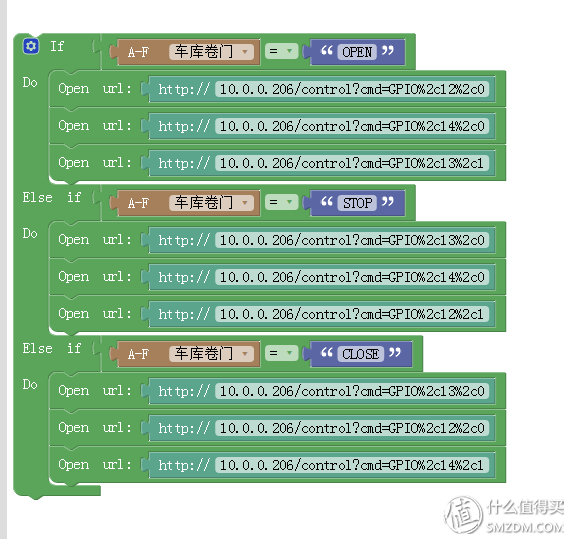
The last step is to blockly edit the operation after each switch is pressed, the interface is as shown below, and the control is the http command.
Some symbols in the webpage blockly do not recognize, need ASCII conversion
The next article will introduce how to automatically control the garage door switch through blockly events in domoticz after adding the rain sensor.
PS. If you do not delay the border , I will later share how to use domoticz through BroadLink to link home infrared and RF devices . Yes, you are not mistaken. .
If you are looking for UL cUL Class 2 AC-DC power supply, ZhenHuan Group can help you. We offer the complete Class 2 power transformer solutions covering a output power ranging from 4.2 Watts to 100 Watts and beyond with output voltages and currents ranging from 4.2VDC to 48VDC, 100ma to 5000ma. Our wall plug type and desktop type class 2 power supply are designed to meet safety and international UL 1310 safety standard, also meet the latest energy efficiency Level VI standard.


Class 2 Power Supplies UL,Class 2 Power Supply Cord,Led Christmas Light Power Supply,Led Power Supplies,Class 2 Power Supply 6v
Shenzhenshi Zhenhuan Electronic Co Ltd , https://www.szzhpower.com