The purpose of this section is to use XPS to add additional IP to the ARM PS? processing system. Add GPIO from the IP Catalog tab and connect to the 8 LEDs on the ZedBoard board. When the system is set up, a bitstream is generated and the peripherals are tested.
Hardware platform: Digilent ZedBoard
Development environment: Windows XP 32 bit
Software: ?XPS 14.2 +SDK 14.2
First, the hardware configuration
1, create a hardware project
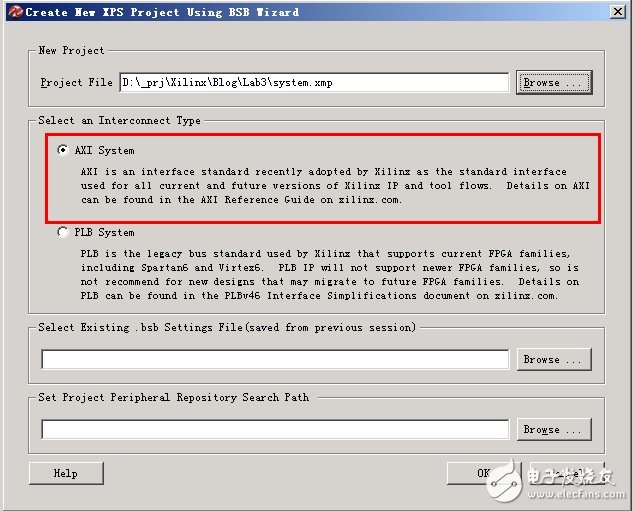
Start XPS and create a Lab3 project. Since the PS system and the FPGA are connected using the AXI interface, the internal interconnect type (Interconnect Type) is selected as AXI.
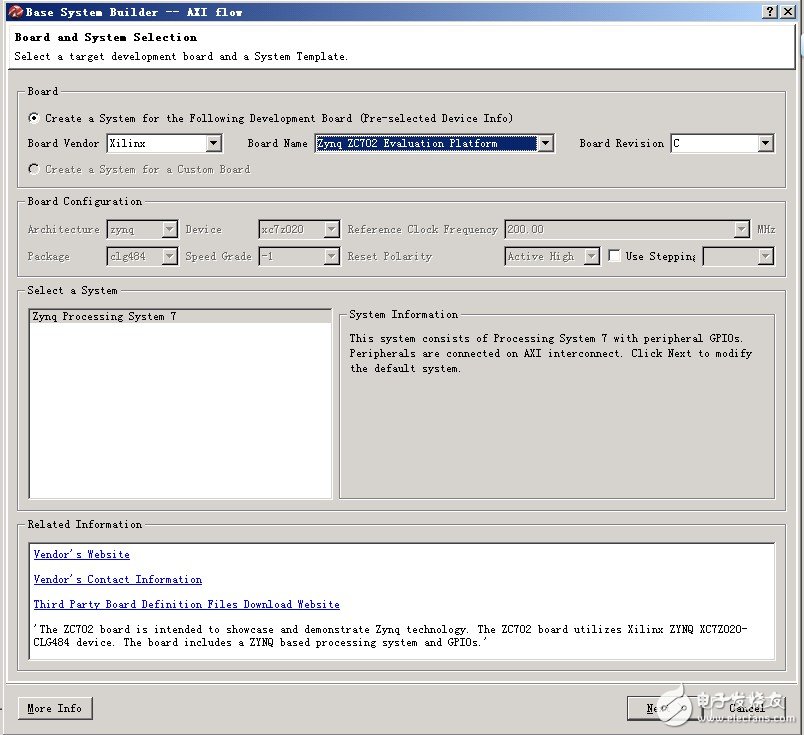
Choose the design platform for Zynq ZC702
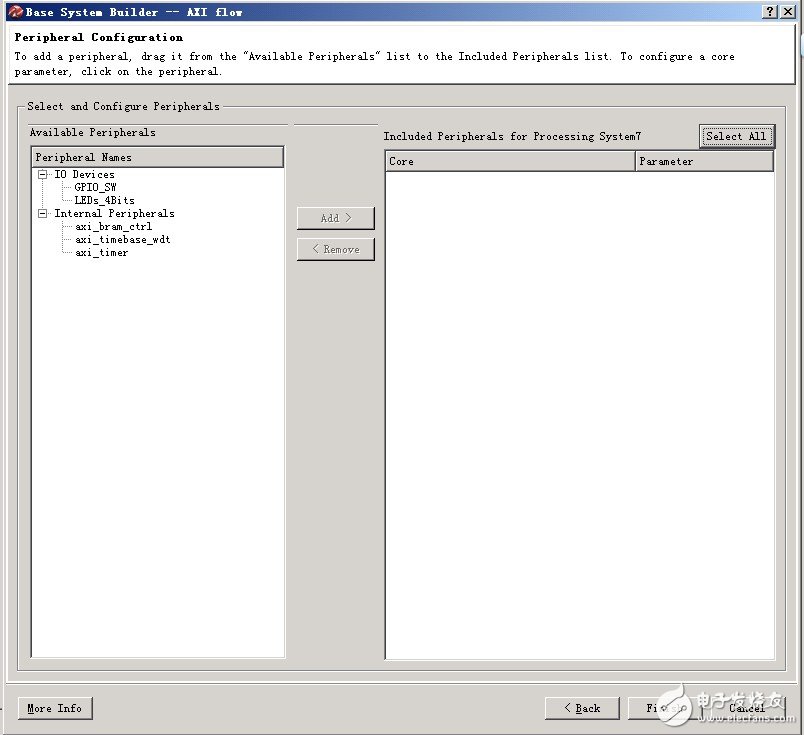
To the peripheral configuration interface, the system will have two peripherals, GPIO_SW and LEDs_4bits by default. We don't need to, remove
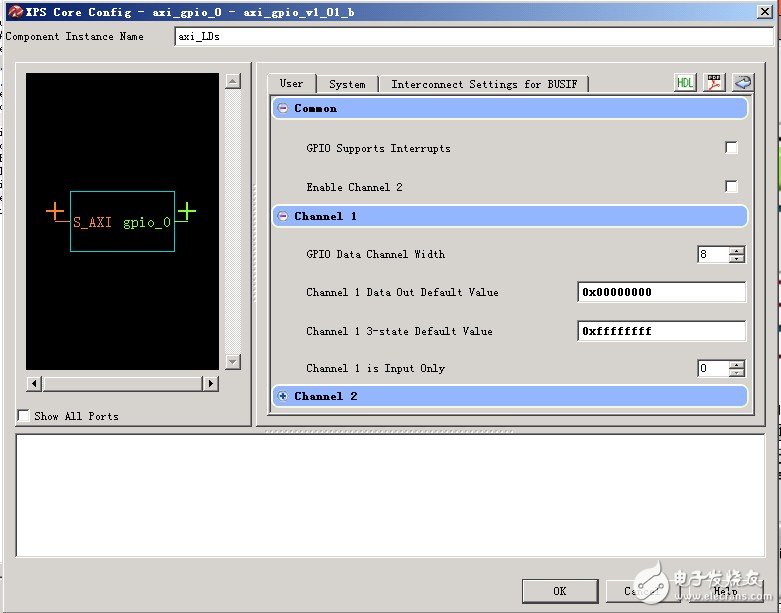
2. Add AXI GPIO peripherals
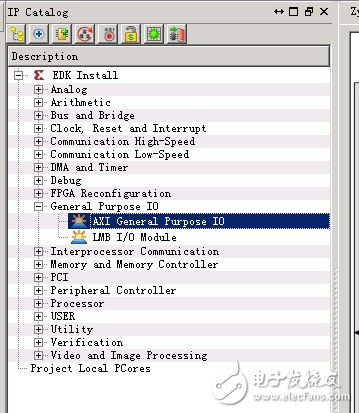
After the project is established, in the IP Catalog, find General Purpose IO, find AXI GPIO, and double-click to add to the system.
Modify the component instantiation name to axi_LDs, which is the component that will be instantiated to connect to the PS. Change the length to 8, the other default.
Click on the Bus Interfaces tab and you can see that the system summary now has PS (here processing_systems7_0), added peripheral axi_LDs and AXI internal interconnect bus axi_interconnet_1. It can be seen that for ?axi_interconnet_1, the PS is the AXI master and the peripheral is the AXI slave.
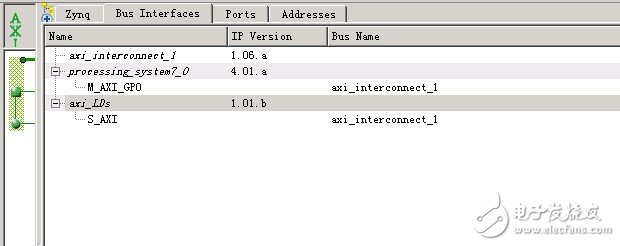
On the Port tab, set GPIO_IO_O(output) in IO_IF to External Ports and change the Port name to LD. LD is the top external pin name

3, set the pin constraints
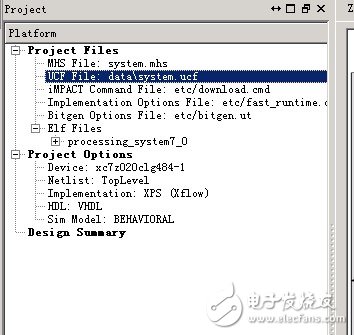
In the project tab, find the system.ucf constraint file.
Change its content to
NET LD[0] LOC = T22 | IOSTANDARD=LVCMOS33; # "LD0"
NET LD[1] LOC = T21 | IOSTANDARD=LVCMOS33; # "LD1"
NET LD[2] LOC = U22 | IOSTANDARD=LVCMOS33; # "LD2"
NET LD[3] LOC = U21 | IOSTANDARD=LVCMOS33; # "LD3"
NET LD[4] LOC = V22 | IOSTANDARD=LVCMOS33; # "LD4"
NET LD[5] LOC = W22 | IOSTANDARD=LVCMOS33; # "LD5"
NET LD[6] LOC = U19 | IOSTANDARD=LVCMOS33; # "LD6"
NET LD[7] LOC = U14 | IOSTANDARD=LVCMOS33; # "LD7"
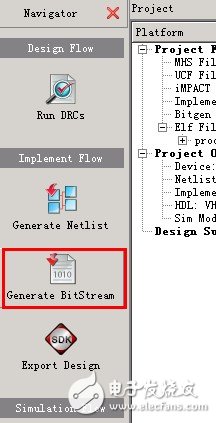
4. Click Generate BitStream to generate a bitstream.
If there is no wrong question, the console will prompt the message as follows, indicating that the configuration bitstream file of the FPGA has been successfully generated.
"*********************************************"
"Running Bitgen.."
"*********************************************"
Cd implementaTIon & bitgen -w -f bitgen.ut system & cd ..
Release 14.2 - Bitgen P.28xd (nt)
Copyright (c) 1995-2012 Xilinx, Inc. All rights reserved.
PMSPEC -- Overriding Xilinx file
With local file
Loading device for applicaTIon Rf_Device from file '7z020.nph' in environment
C:\Xilinx\14.2\ISE_DS\ISE\;C:\Xilinx\14.2\ISE_DS\EDK.
"system" is an NCD, version 3.2, device xc7z020, package clg484, speed -1
Opened constraints file system.pcf.
Mon Oct 08 09:13:57 2012
Running DRC.
DRC detected 0 errors and 0 warnings.
CreaTIng bit map...
Saving bit stream in "system.bit".
Bitstream generaTIon is complete.
Done!
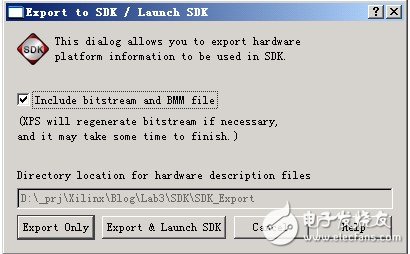
5. Import the hardware configuration to the SDK and start the SDK. Here you need to include the bitstream and BMM files in the SDK at the same time.
Second, create a software program
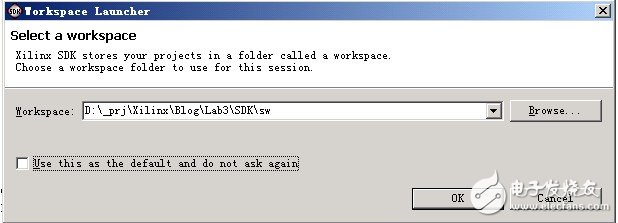
In order to facilitate project management, create a sw folder in the SDK directory as a workspace.
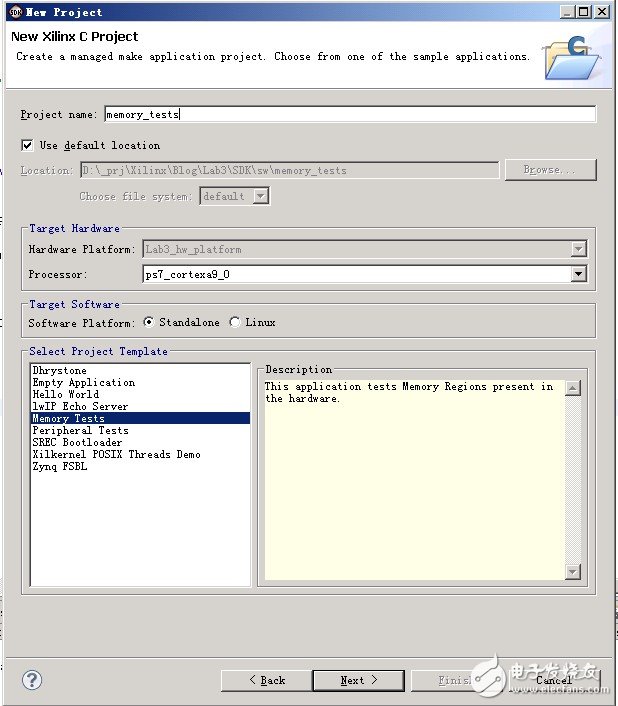
• Use the New Project Wizard. Note that the project template is used here as Memory Tests . Personal experience is that there will be XMD errors when using Hello World. The reason is not understood. It may be that the configuration of the project is different.
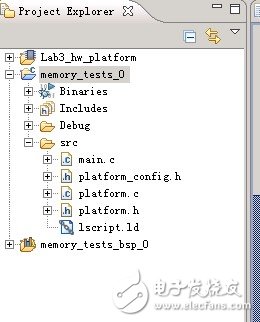
After the new project is created, there will be several files for the storage space test, which we don't need and delete.
Fiber optic splitter is also called optical splitter, is one of the most important passive devices in optical fiber link, is with multiple inputs and multiple output end of the optical fiber connected devices. The fiber optic splitter by the light splitting principle can be divided into the fused biconical taper (FBT type) and planar waveguide type (PLC type).
We provide the whole series of 1xN and 2xN splitter products that are tailored for specific applications. Fiber Optic Splitter Plc, Fiber Optic Cable Splitter, Optical Splitter, Mini Type Plc Splitter, Cassette Type PLC Splitter, Insertion Module Plc are available.


Steel Tube PLC Splitter,Plc Splitter Steel Tube,Tube Type Fiber Optic Splitter,Fiber Optic Plc
Sijee Optical Communication Technology Co.,Ltd , https://www.sijee-optical.com