In a blink of an eye, it is now June, followed by summer heat. Therefore, in the face of the intense summer in Shenzhen, it is better to choose underwater photography or private homes (maybe follow-up will be an underwater shooting tutorial?). Then started some preparations before shooting, but accidentally discovered that the Canon 6D firmware can be upgraded to 1.17 (117 mainly to solve the lens correction problem), and easily check the latest version of the magic lamp firmware, still 1.16.

No brush firmware, the heart is always itch (you know), so there is this little tutorial.
The magic lamp is a third-party firmware for Canon SLR cameras. It can also be interpreted as an external plug-in. When the camera is turned on, it will automatically load “magic lights†from the memory card, and the original Canon firmware will not be modified. It can maximally enhance Canon SLR's native firmware, making it easier for some complex shots.
1. What can I get by installing the magic lamp firmware?RAW video, trap focus, peak focus, and more. Installed for practical functions.
2. Install the magic lampSince I have installed the magic lamp, I do not write it twice.
It should be noted that before the magic lights, please confirm that your model and firmware can write magic lights, so as to avoid unnecessary trouble.
Users other than Canon do not try!

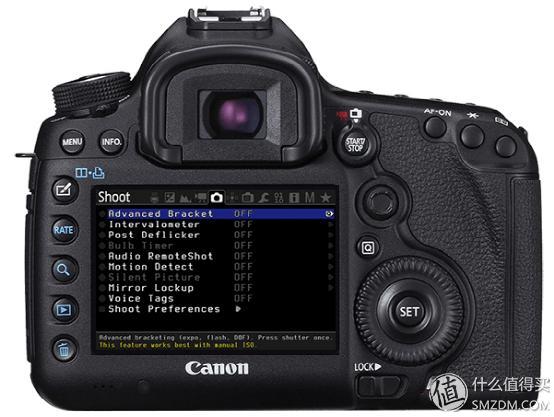
After installing the magic lamp, press the delete key on the SLR to enter the magic light interface, and press and hold the delete key to prohibit loading the magic light firmware.
Some menus are as follows:
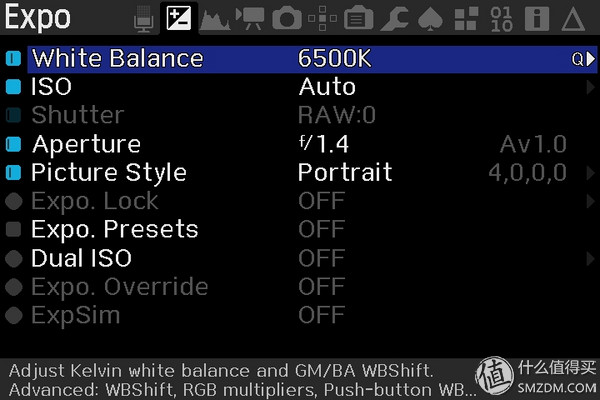
Expo (exposure)
As shown in the figure, the main settings are color temperature, aperture, and ISO settings. You can also set two different exposure parameters and press set to quickly switch between shots.
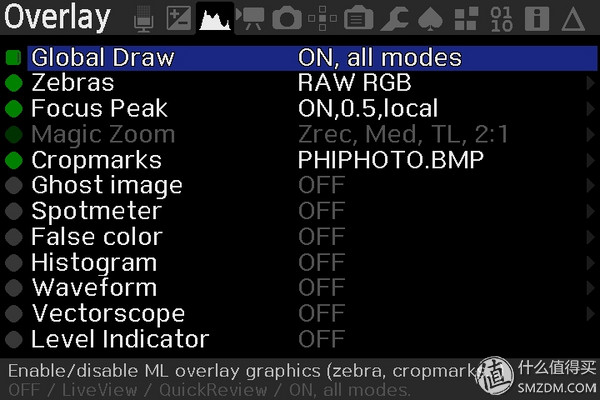
Overlay (overlay display)
As the name implies, modify the Live Viewfinder display to enhance camera functionality. Peak focus, magic zoom, cut mark.
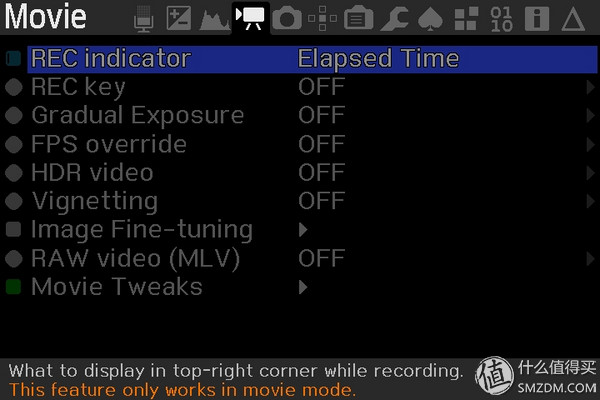
Movie (video)
Hdr video, Raw. My personal demand for video is not large, plus the limitations of 6D memory cards, so Raw video is not within the scope of the explanation.
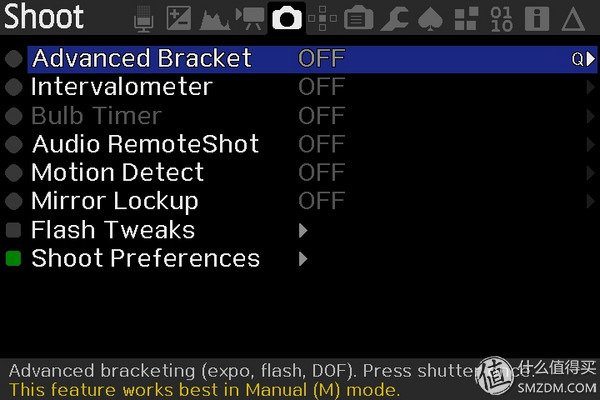
Shoot (shooting)
Delay photography, sound remote shooting, silent shooting. With the magic lights, you can experience higher-order multi-shot composite shooting without the shutter release.
Focus
Trap focus, multi-focus synthesis, tracking focus.

Display
I feel I can't use it..

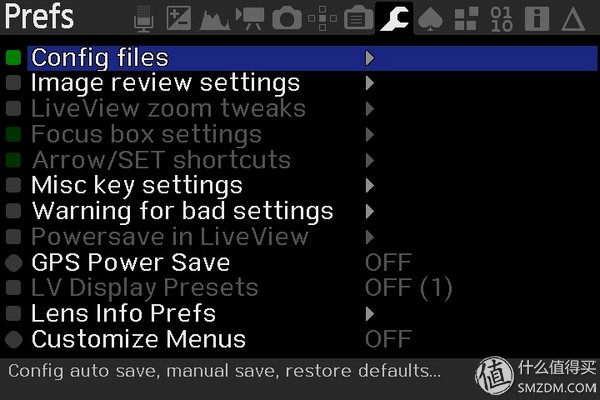
Prefs (settings)
Set the storage, live power settings, and so on, generally by default.
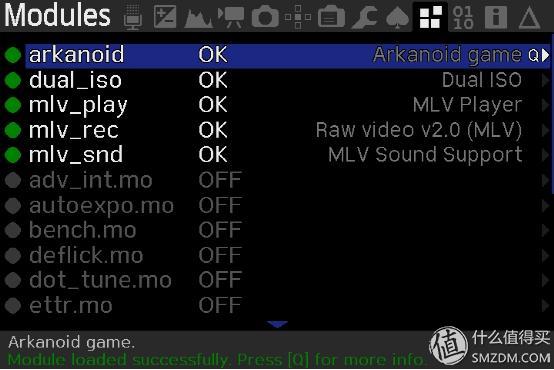
Modules
Magic lights have many features that are not active. Modules can activate some advanced modules.

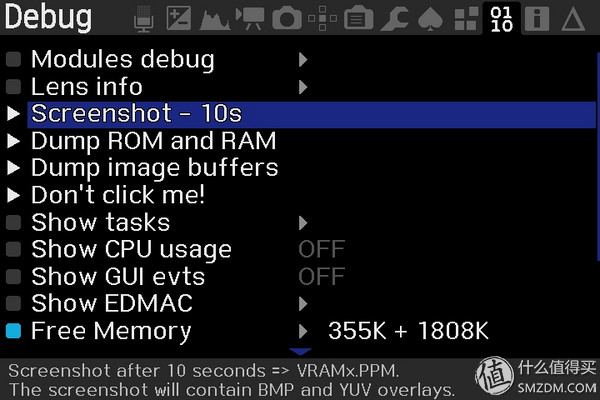
Debug
The camera's shutter count, Coms temperature, screenshots after ten seconds, and Dump.
Get an overview of the functions of each menu
Third, the peak focus (Focus Peak)Peak focus is a focusing method available on the Sony NEX Micro Single Camera. The principle is to highlight the area with the highest contrast on the screen. I believe Sony users will not be unfamiliar with this feature.
Click on the menu Overlay-Focus Peak (pictured)

Set as below
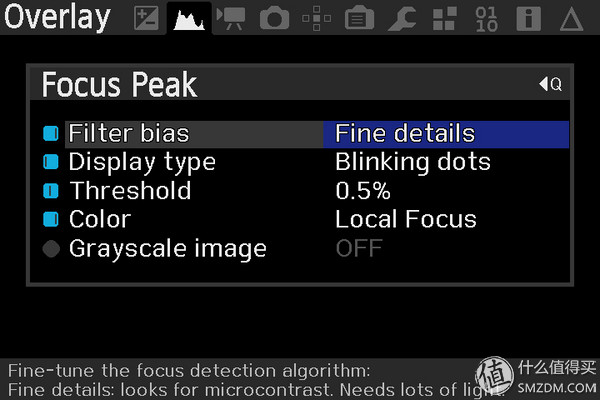
Color I choose Local Focus, of course, you can keep the default.
Threshold (threshold) is set to 0.5%, other options are not modified.
Activate Focus Peak and turn on the camera Live to see the peak focus. Pictured
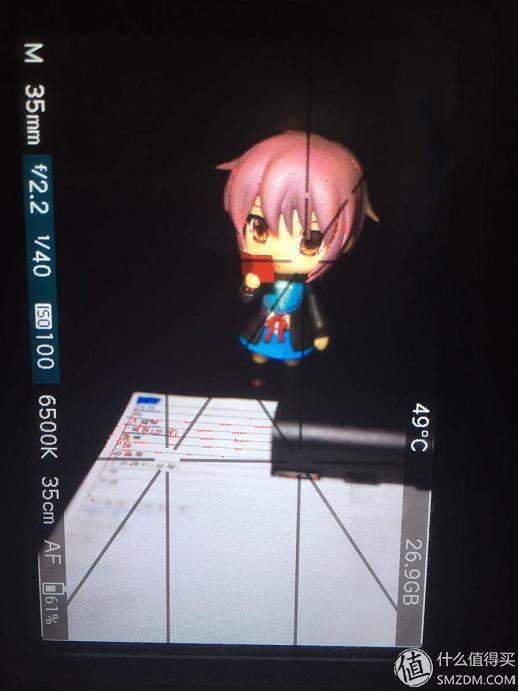
The red point is the strongest point of the current focus, which is real focus.
When previewing the shots, the “Focus Info†will still be displayed on the photo so that you can quickly confirm whether or not you can go to the chest of your sister to save the pictures in time.
When many photographers shoot their sisters, they will zoom in to focus on the girl's "eyes" to ensure that she does not run away. So the peak focus can definitely help you.
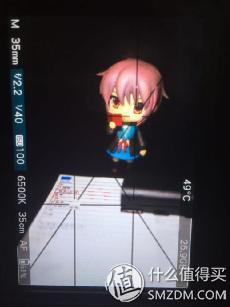
Peak Focus AdvancedWhen the light and subject are different, the “focus information†of the peak focus is also very different.
The filter bias for peak focus has three options, namely, strong edges, Balanced, and Fine Details. The enhanced edge refers to the enhancement of the edge capture of the subject, and the detail is the enhanced capture of the detail of the subject.
The Threshold (value) value refers to the total number of pixels in the subject when it is judged to be true, and can be modified according to actual conditions.
Color (color) is the color of the cue point of the set focus, Local Focus (the local focus) appears all the colors in the color menu at the same time, according to the different colors to determine the intensity of the focus step by step, and a single color can only return Hui " Actual focus" point.
Grayscale image, using grayscale to display the focus, can greatly improve the focus information accuracy.
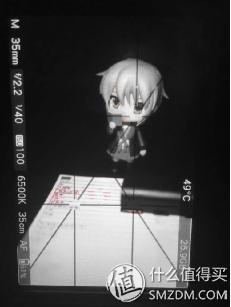
In fact, the grayscale mode is very easy to use, and after eliminating most colors, it becomes easy to identify.
I do not recommend this feature because it may increase crime.
Used 6D children's shoes know that 6D has a mute shooting function, the actual shooting sound can not be considered "silent".
Click on the Shoot-Silent Picture in turn, as shown.
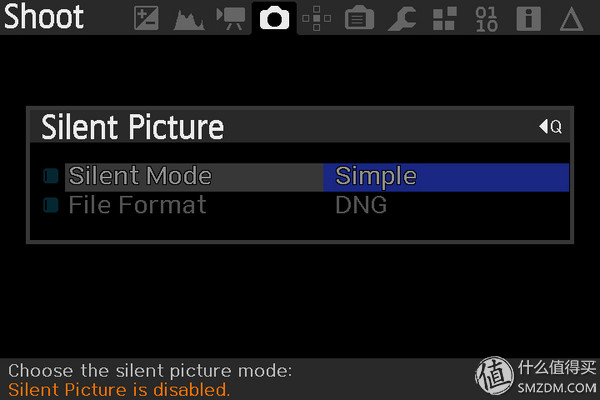
Silent Mode Select Simple
File Format (file format) DNG
With Silent Picture turned on, there will be no sound during the entire shooting process. After shooting, you can't preview directly on the camera. You can't take a picture and you can't believe it.
After it is turned on, open the LV viewfinder and press the shutter button halfway to complete the shooting. As shown in the figure, the success of the magic lamp will display the file saved path, file name, and resolution.

Have you tried setting up your own selfie? Then set the focus back and forth, and then set the delay after X seconds shooting? Repeatedly toss. Sound remote shooting can solve this troublesome problem.
Turn on the sound After the remote shooting, you only need to make a sound. When the sound reaches the setting of the magic lamp, the camera will shoot automatically, without waiting for a few seconds.
We continue to the Shoot menu and set up Audio Remoteshot.
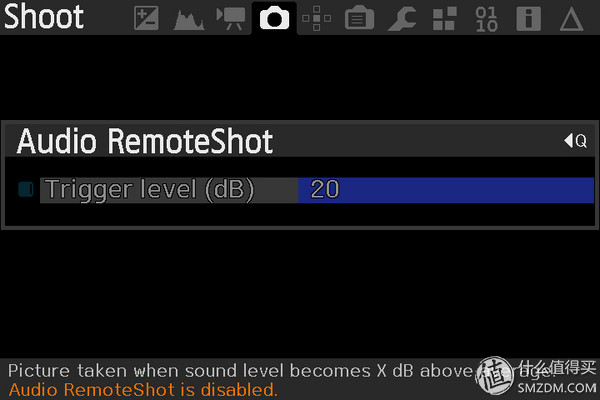
Trigger Lever (trigger level: dB) defaults to 20db. Specific decibels can be modified according to actual needs.
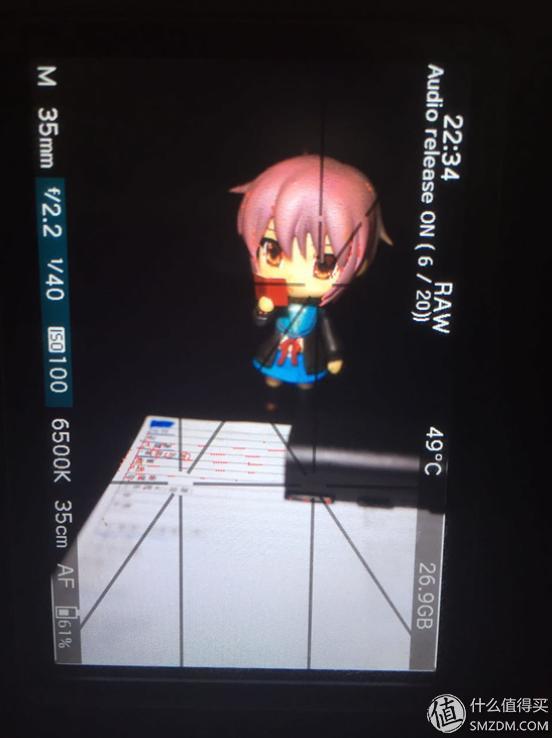
Activate the setting. The measured volume decibel intensity will be displayed in the upper left corner of the screen, and 20db will be activated.
With the peak focus, such as the 600D SLR with its own rotating screen can be through the Live view for the first time to confirm the "self-timer" focus where the focus, if the focus is not right, just move back and forth to adjust the position.
6. Dual ISO shooting (Dual Iso)Dual Iso, as its name implies, stores pixel information of two ISO values ​​in one photograph, one row of pixels is sampled and saved with the basic ISO value, and the other row of pixels is sampled and saved with the auxiliary ISO value, thereby increasing the dynamic range.
The Dual Iso itself has many problems, such as reduced resolution, color cast (later), but to a certain extent solved the issue of Canon shooting large light than the environment.
I think that Dual Iso is not always a suitable way of learning. He will make photography depend on it and become lazy. If conditions permit, it is recommended to use a little tricky way to deal with light ratio, remember not to be lazy in shooting!
First activate Dual Iso in the Modules, return to the Expo menu to set the first option of DUAL-ISO, usually set ISO100, +2~4EV.
Please keep in mind that Dual Iso is used under the condition of "great light ratio". This is not for you to use for exposure.
File conversion after shooting I didn't say much about shooting. I mainly talk about file conversion. It should be noted that the following two methods are used to achieve the purpose of conversion by calling cr2hdr. It is better to keep cr2hdr in the latest state.
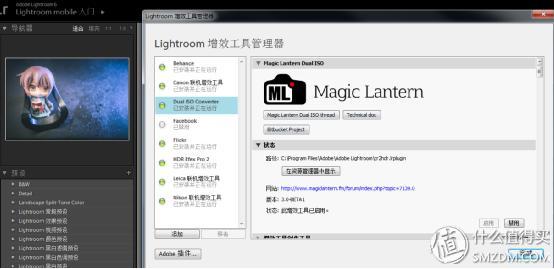
Extract the cr2hdr LR plug-in to the LR root directory, open the LR plug-in manager (Ctrl+Shift+Alt+,) to activate the plug-in, and finally select the picture you want to convert and right-click Export-Dual iso converter.
Install BarracudaGUI and the first time it will prompt you to choose the cr2hdr path. After the setting is completed, the conversion will be completed by adding the picture to be transferred.

The above software can be found in Baidu.
Seven. Actual shooting
Magic Remoteshot, Focus Peak, Magic Zoom, and domestic hands are used in the shooting.
There is nothing special about shooting. Fill it with flash.
Ambient Light is only a few watts of small desk lamp, used to assist the focus. Complete the focus of the entire shot with Focus Peak, Magic Zoom.
Due to the need to sprinkle water during shooting, to avoid confusion, you can solve it with Audio Remoteshot.
After drawing a picture, import the LR profile and import the PS details.
Finished product
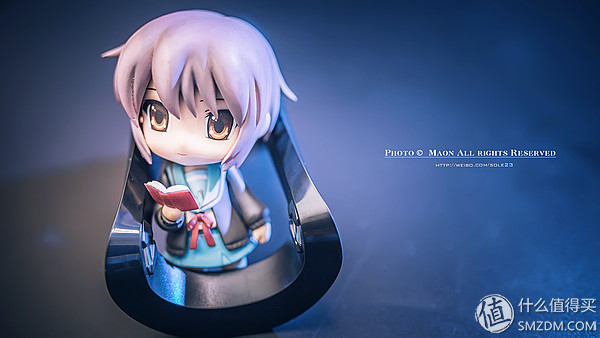
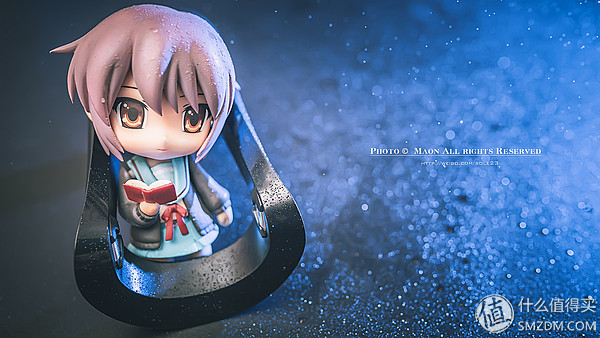
The two pictures are not taken on the same day, and there is no uniform color in the later period, so the color tone will be obviously different. You can also import LR uniform colors later.
Although this article does not introduce what practical black technology, at least it is to let everyone have a preliminary understanding of magic lights. I hope to help you.
SHENZHEN CHONDEKUAI TECHNOLOGY CO.LTD , https://www.szsiheyi.com