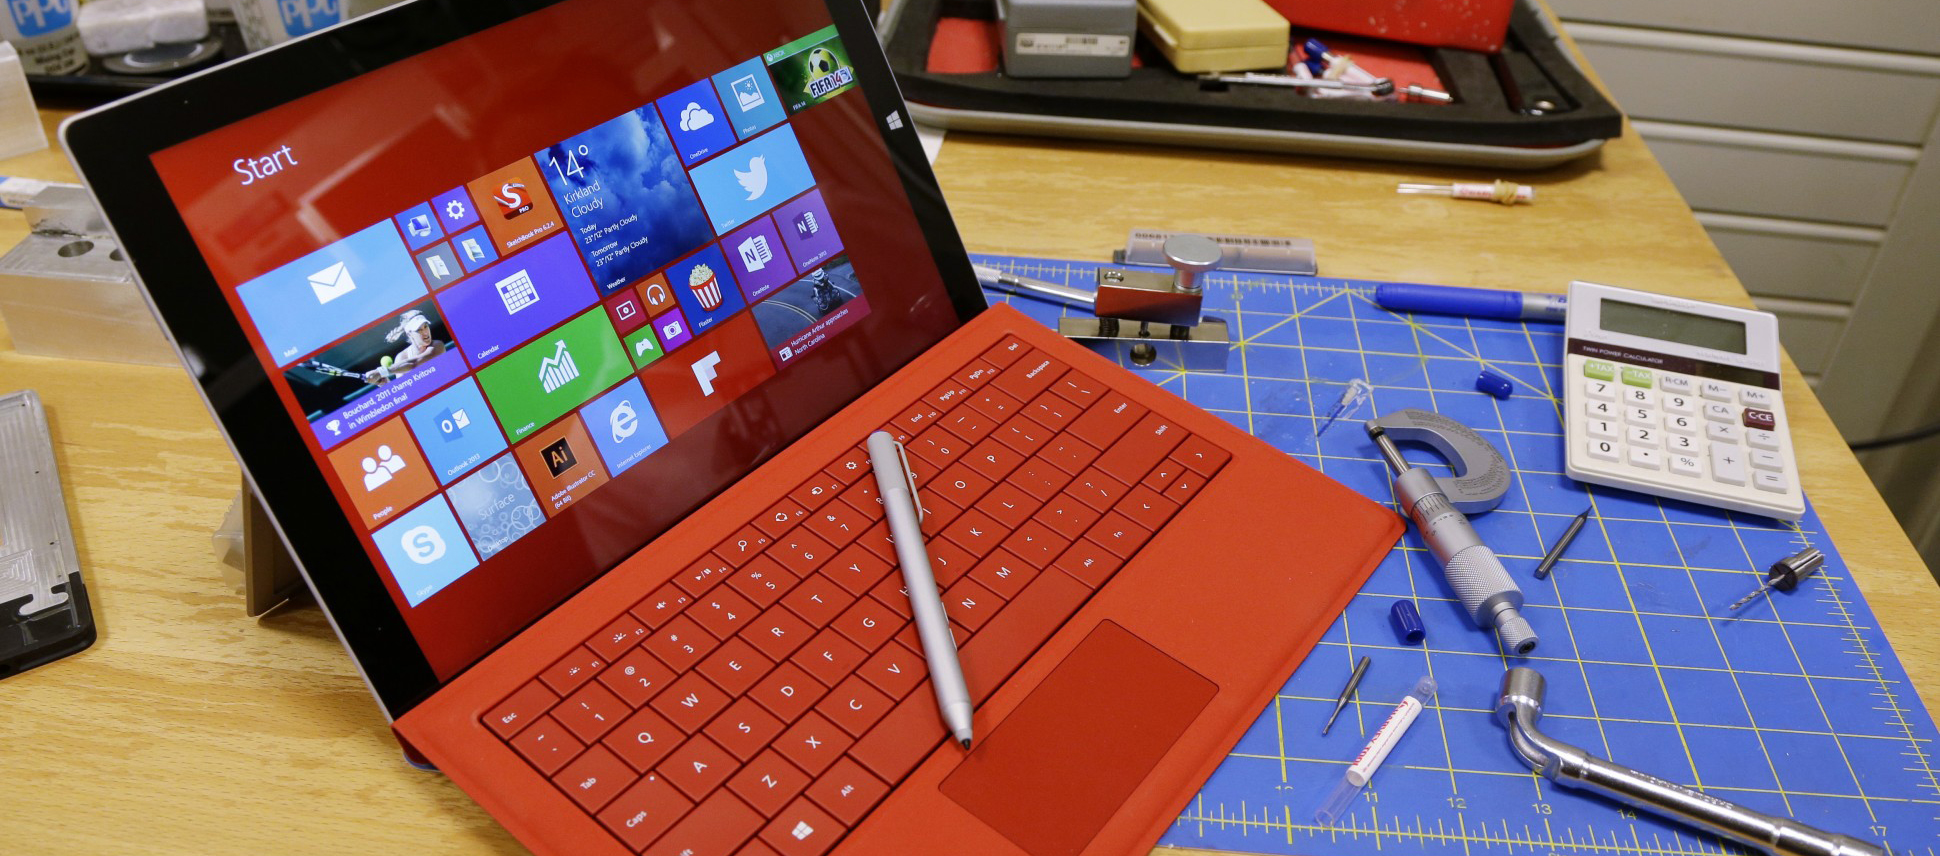
One year later, Microsoft finally launched Surface Pro4, the fourth-generation Surface product that is highly anticipated. The new configuration is equipped with Intel’s sixth-generation Core Skylake processor, which has more powerful performance and a more lightweight appearance. Sought after. Microsoft launched the Surface series in 2012 as a "tablet computer." However, its first and second generations are well known. Although they have more powerful hardware, their heavy and heavy bodies make it difficult for everyone. Think of it as a tablet computer. Although an external Type Cover keyboard can be expanded to a laptop, it is difficult to provide users with a good operating experience because of its 10.6-inch screen.
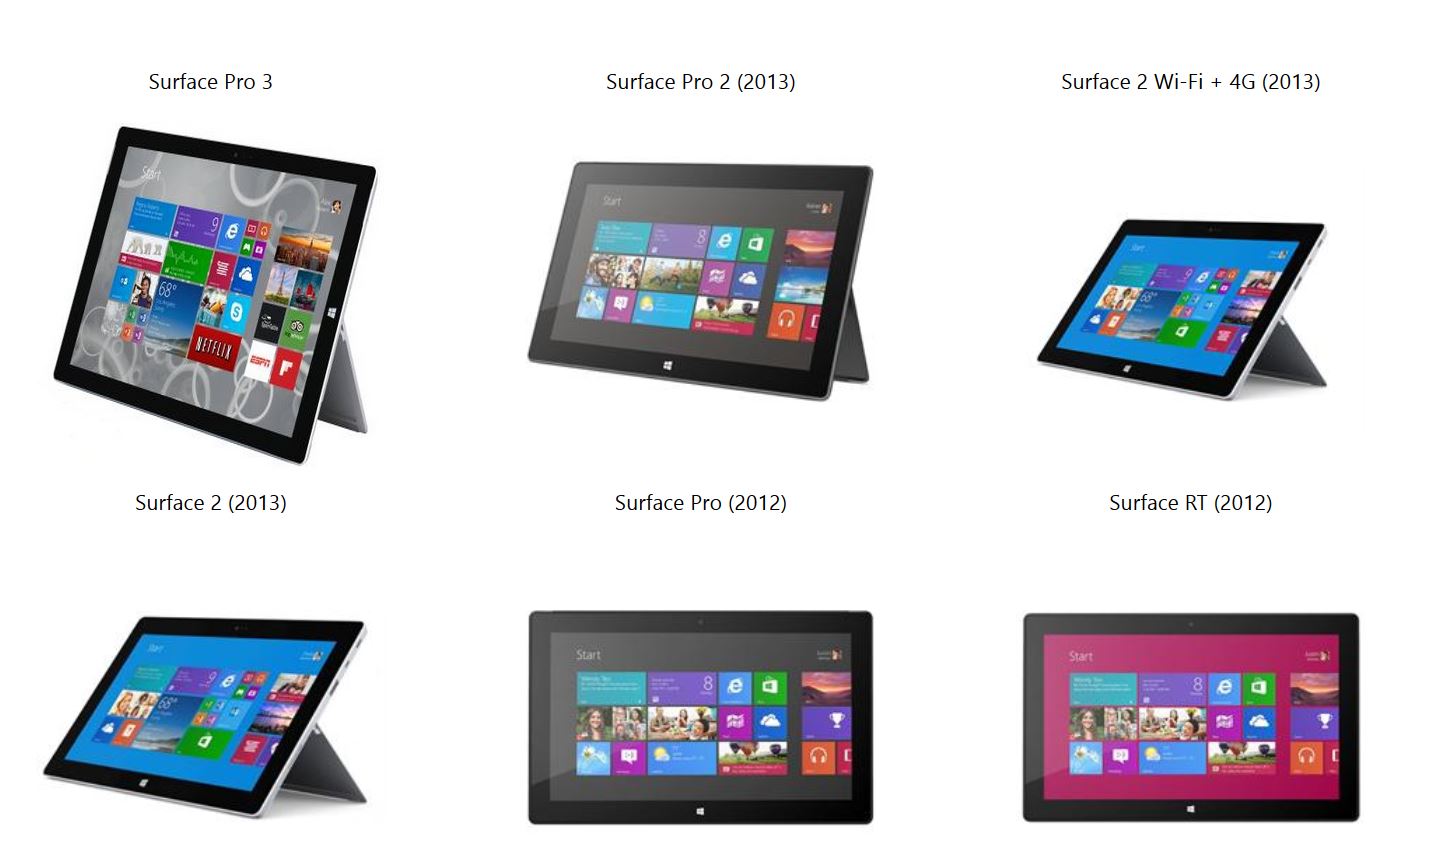
The appearance of Surface Pro 3 has changed this situation, it is lighter and thinner but has 12 inches of screens It can be completely used as a "transformation book". In addition to the screen becoming larger, its configuration and ultrabook are almost at the same level, and can fully meet the daily use requirements. The positioning of Surface has gradually evolved from a "tablet computer" to a "next generation PC". Surface is more than just a tablet, a notebook, and a computer. It is Microsoft's vision for the future.
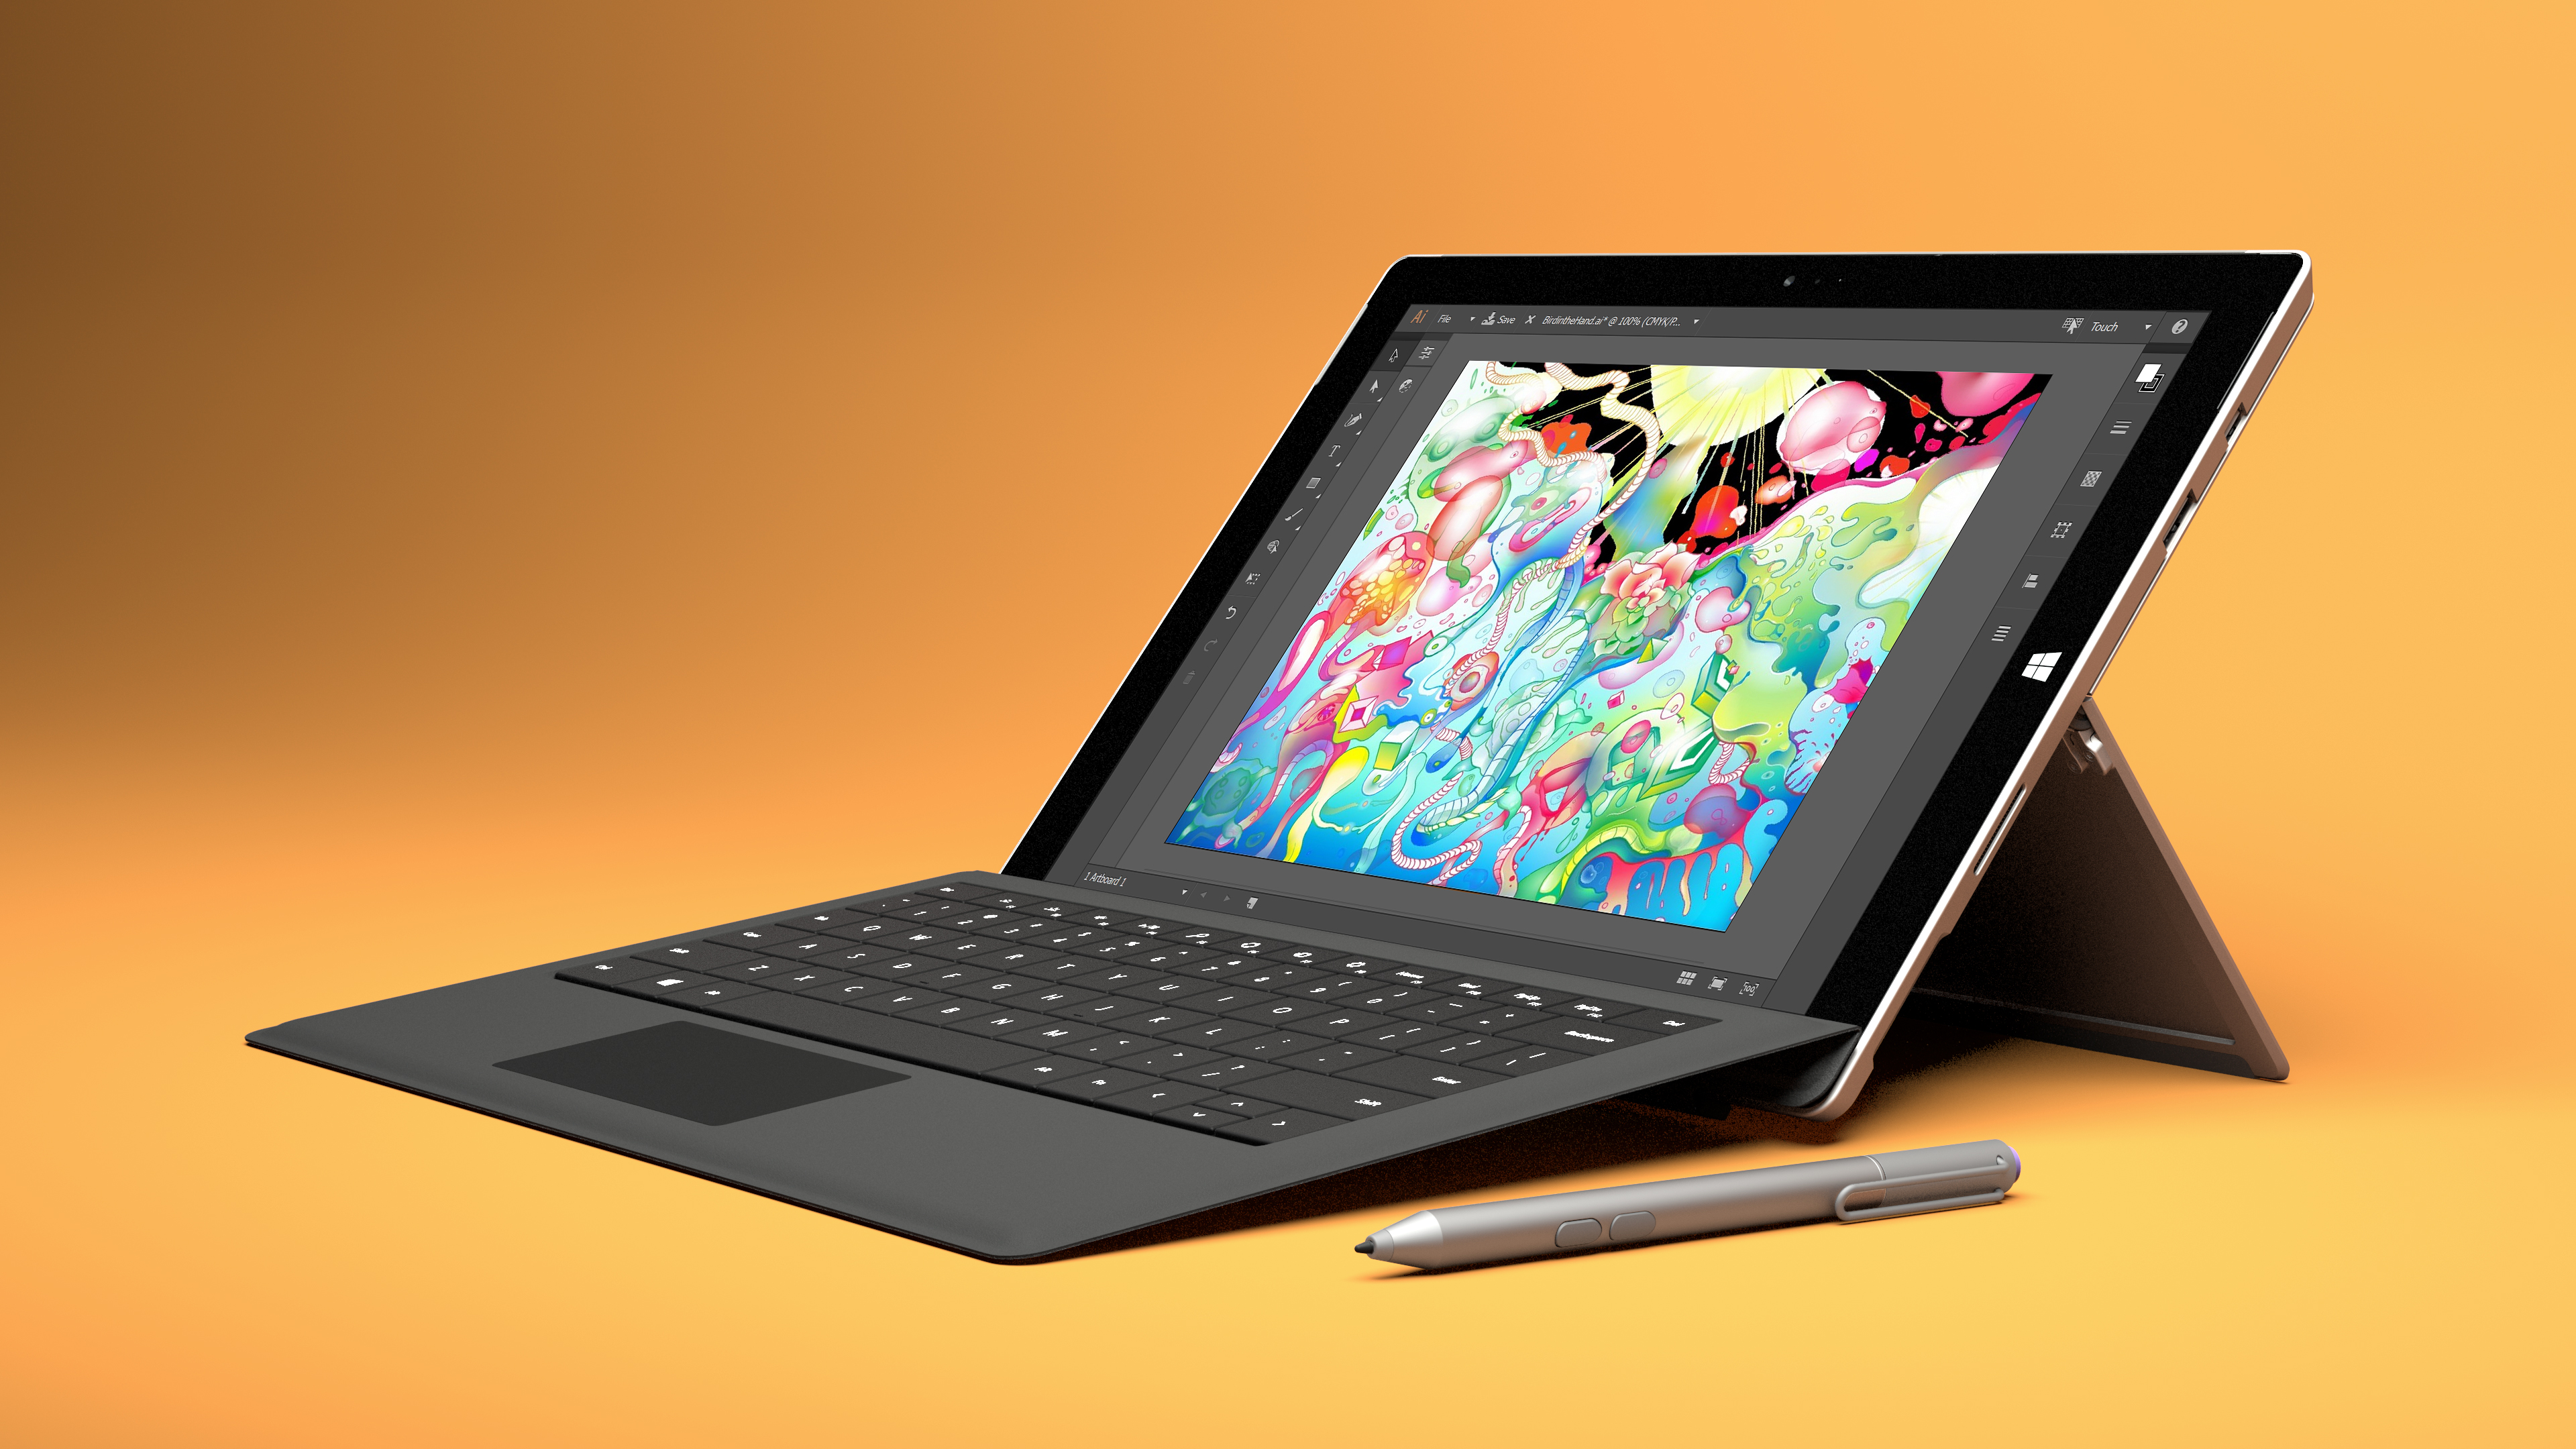
Let's take a look at what kind of configuration Surface Pro 4 has:
12.3-inch PixelSense 2736×1824 (267 PPI) IPS LCD Monitor
Intel Skylake Core M3 processor (4M cache, 2.20 GHz), up to Intel Core i7 processor (8M cache, 3.80 GHz)
4 GB / 8 GB / 16 GB of DDR3L 1600 MHz memory
PCIe interface SSD 128 GB / 256 GB / 512 GB / 1 TB
8 megapixel rear camera, supports 1080p recording, 5 megapixel front camera
USB 3.0 port, Micro-SD slot, Mini DisplayPort, SurfaceConnect charging port
Dual-band Wi-Fi support for 802.11a/b/g/n/ac, Bluetooth 4.0
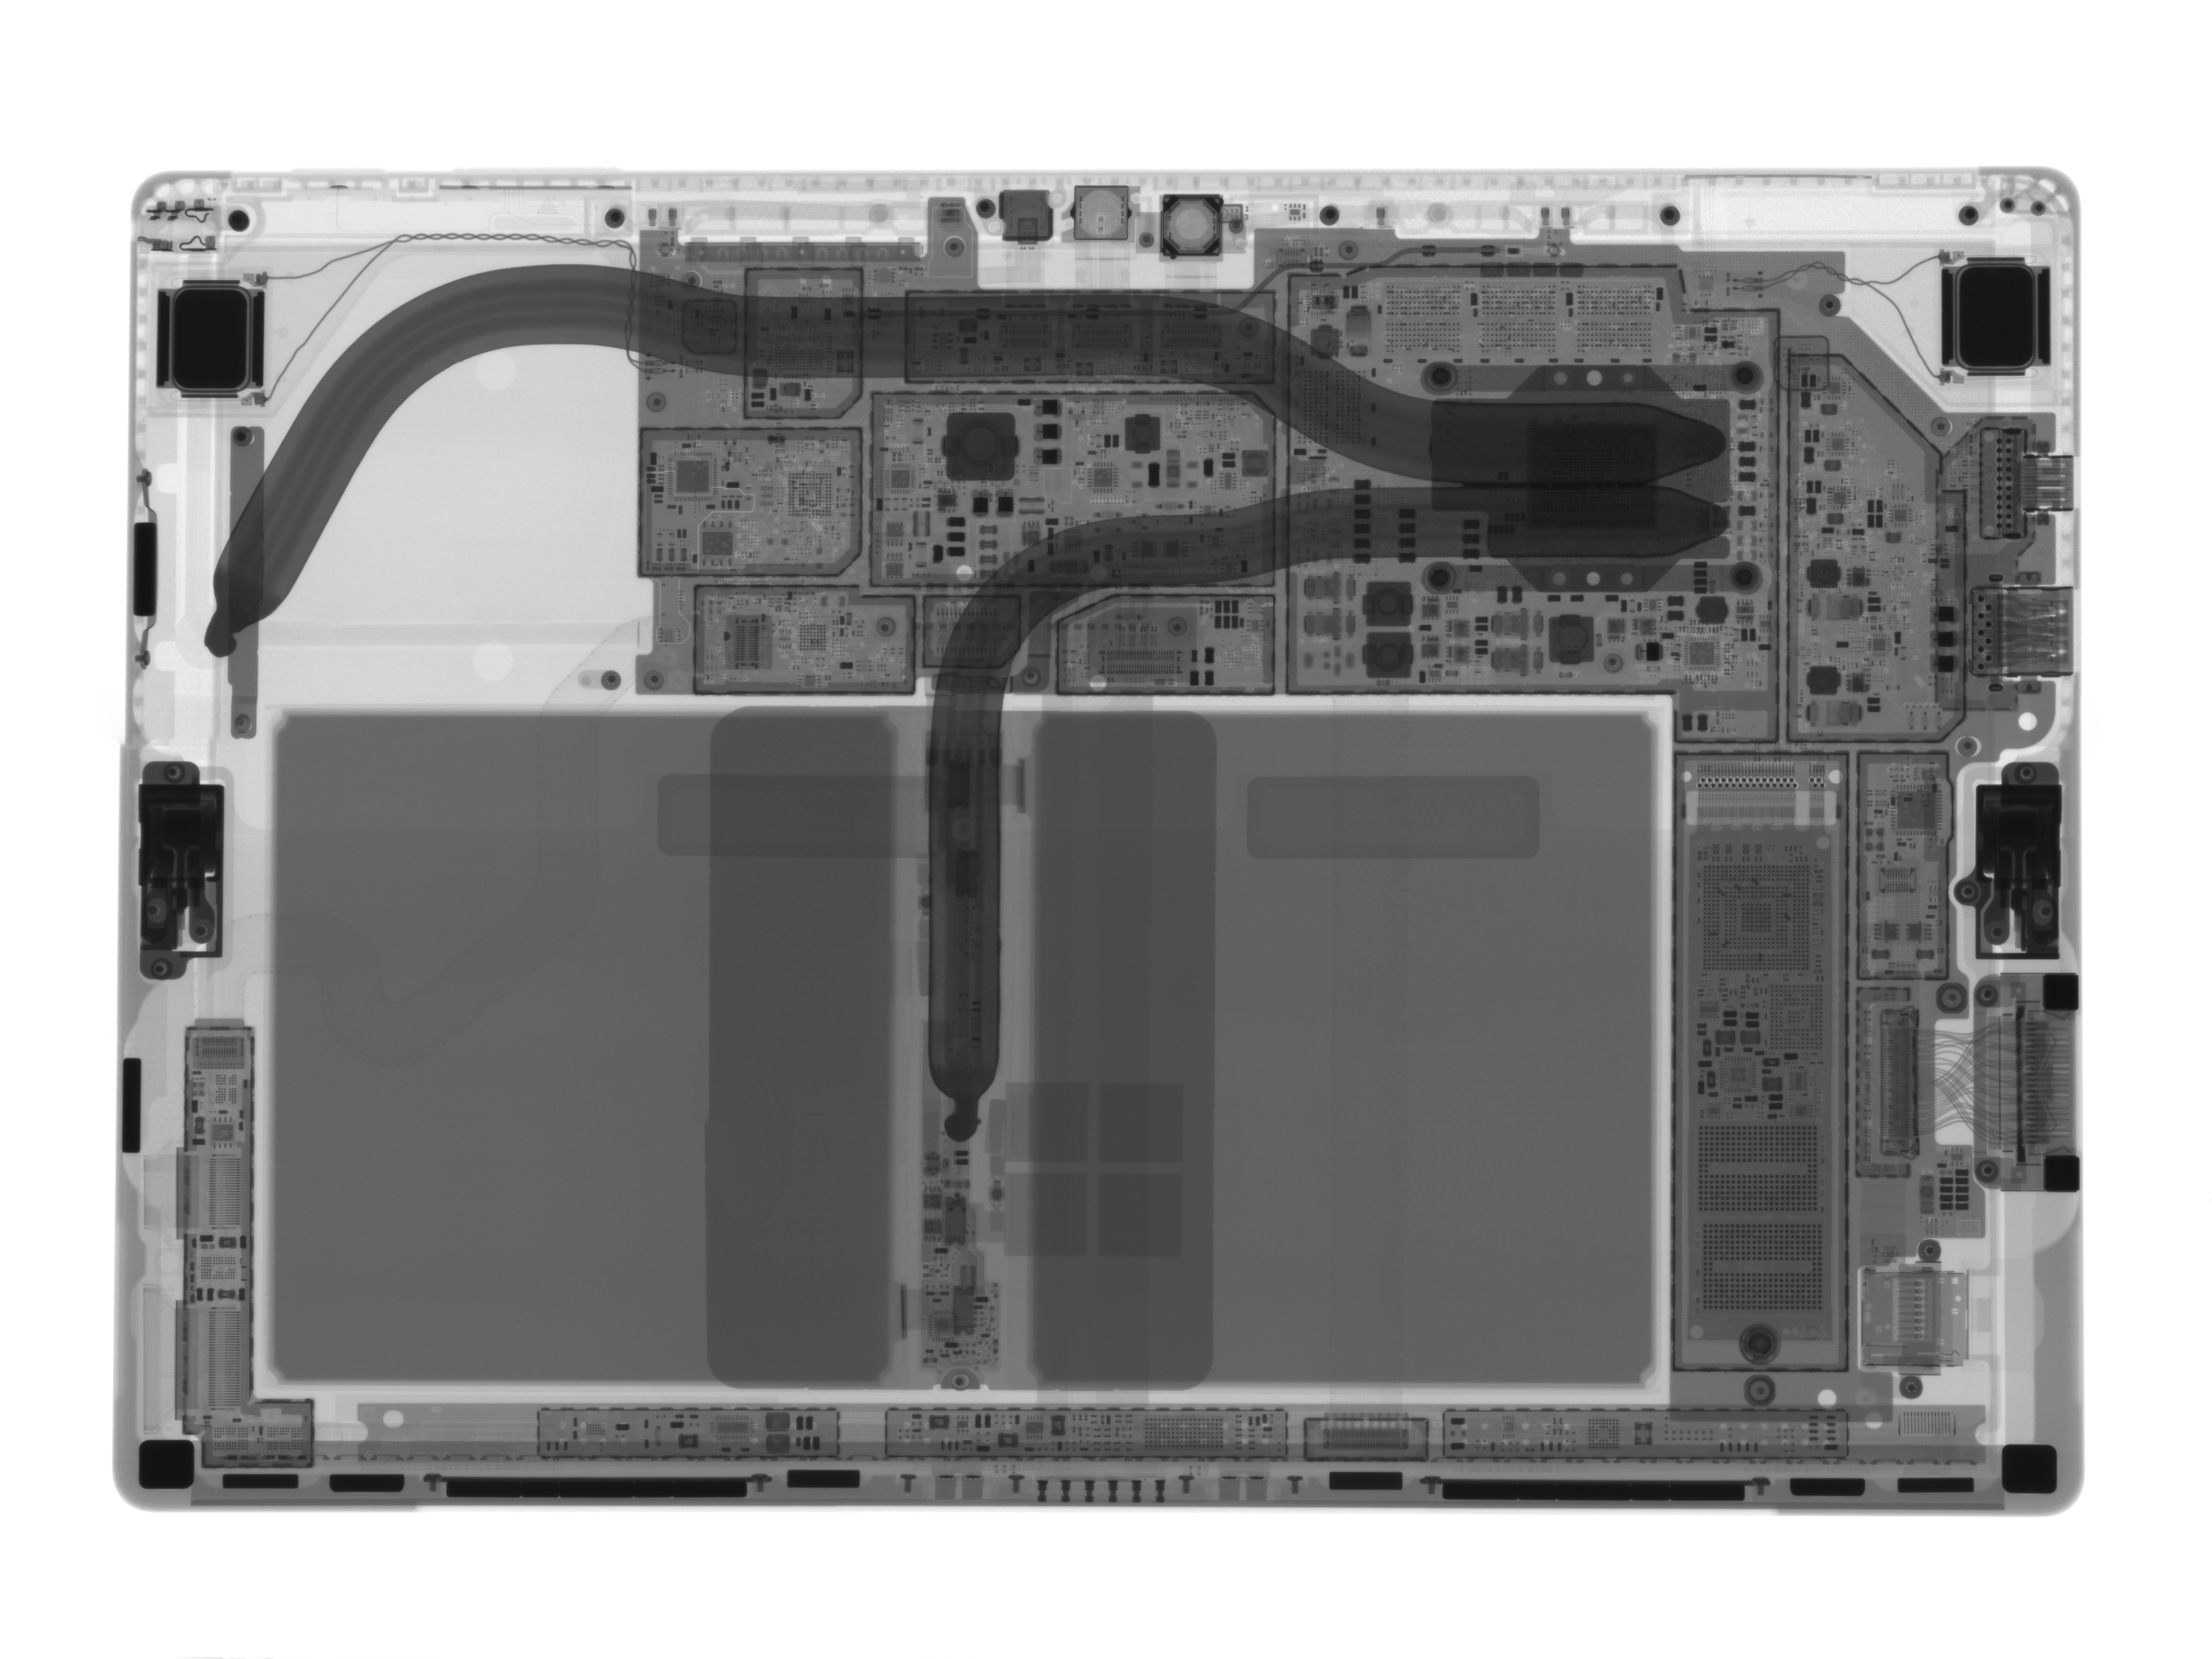
Let's look at the structure of the Surface Pro4 by X-ray first. With the continuous advancement of technology, our dismantling can also be more convenient. Through X-ray analysis, we can learn about the internal structure of the fuselage and facilitate our dismantling.
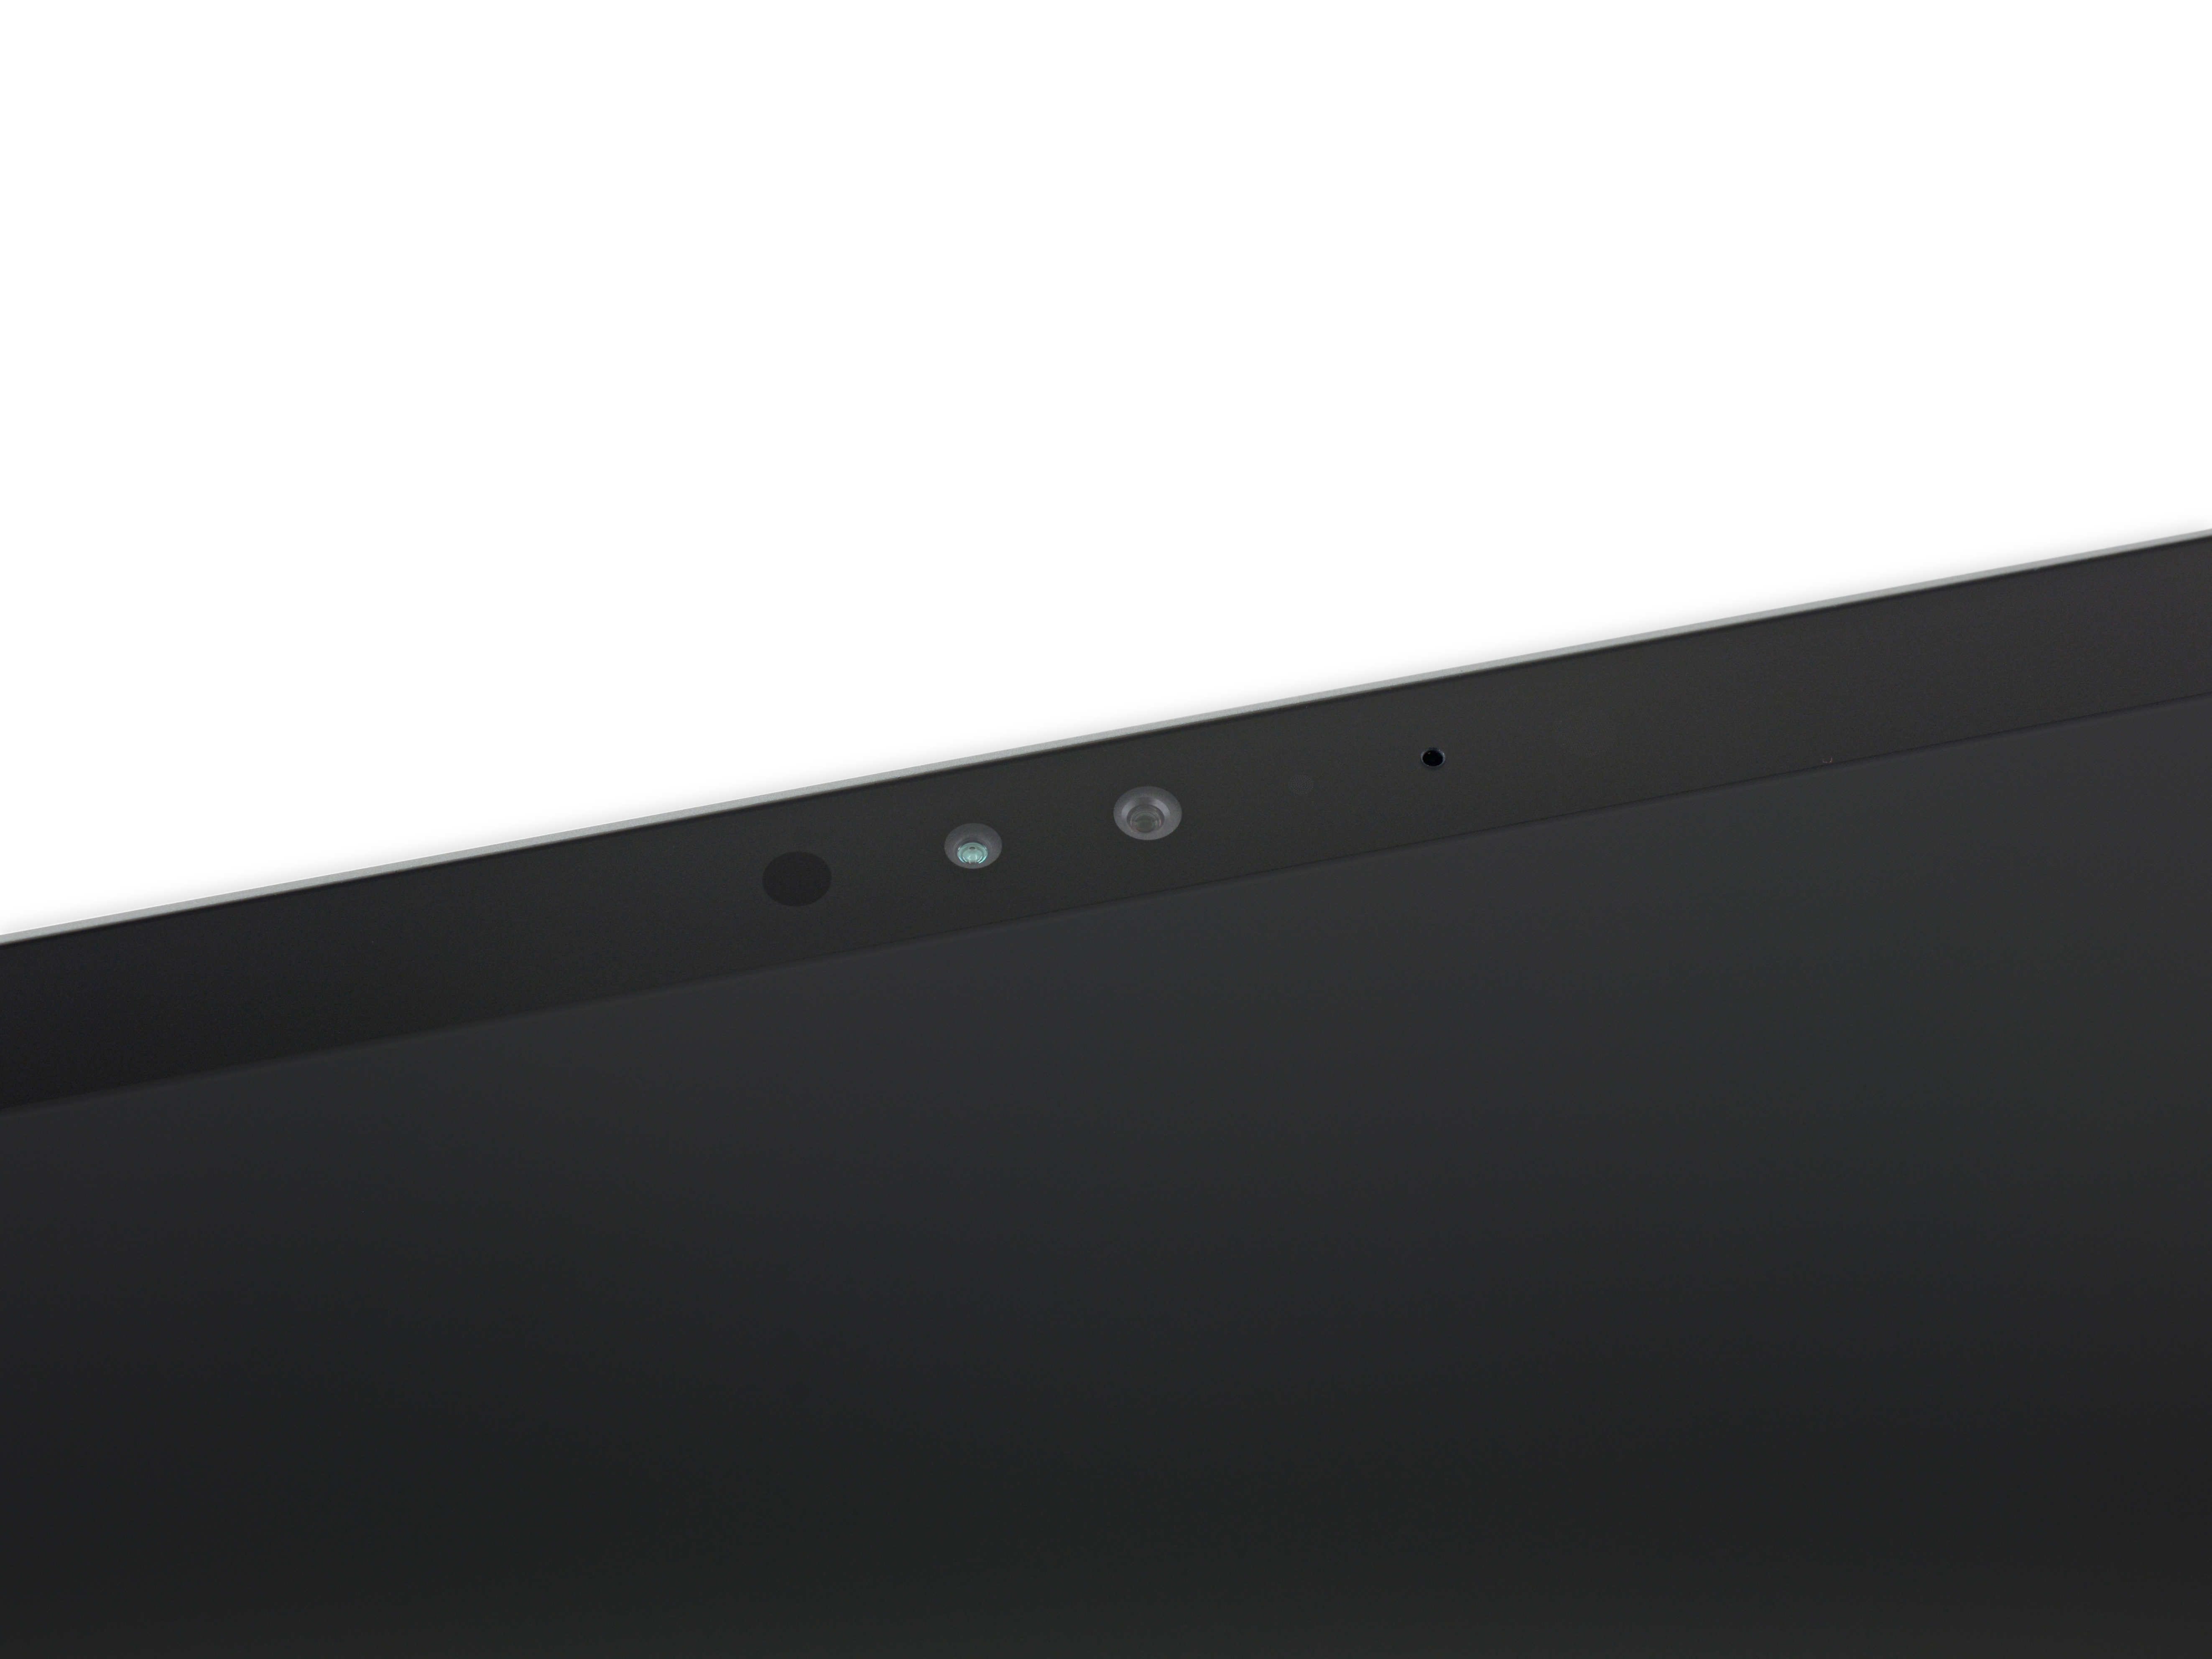
Let's take a look at the camera. Unlike previous generations, this generation of models seems to have a camera module with a total of three openings. Next to the microphone.
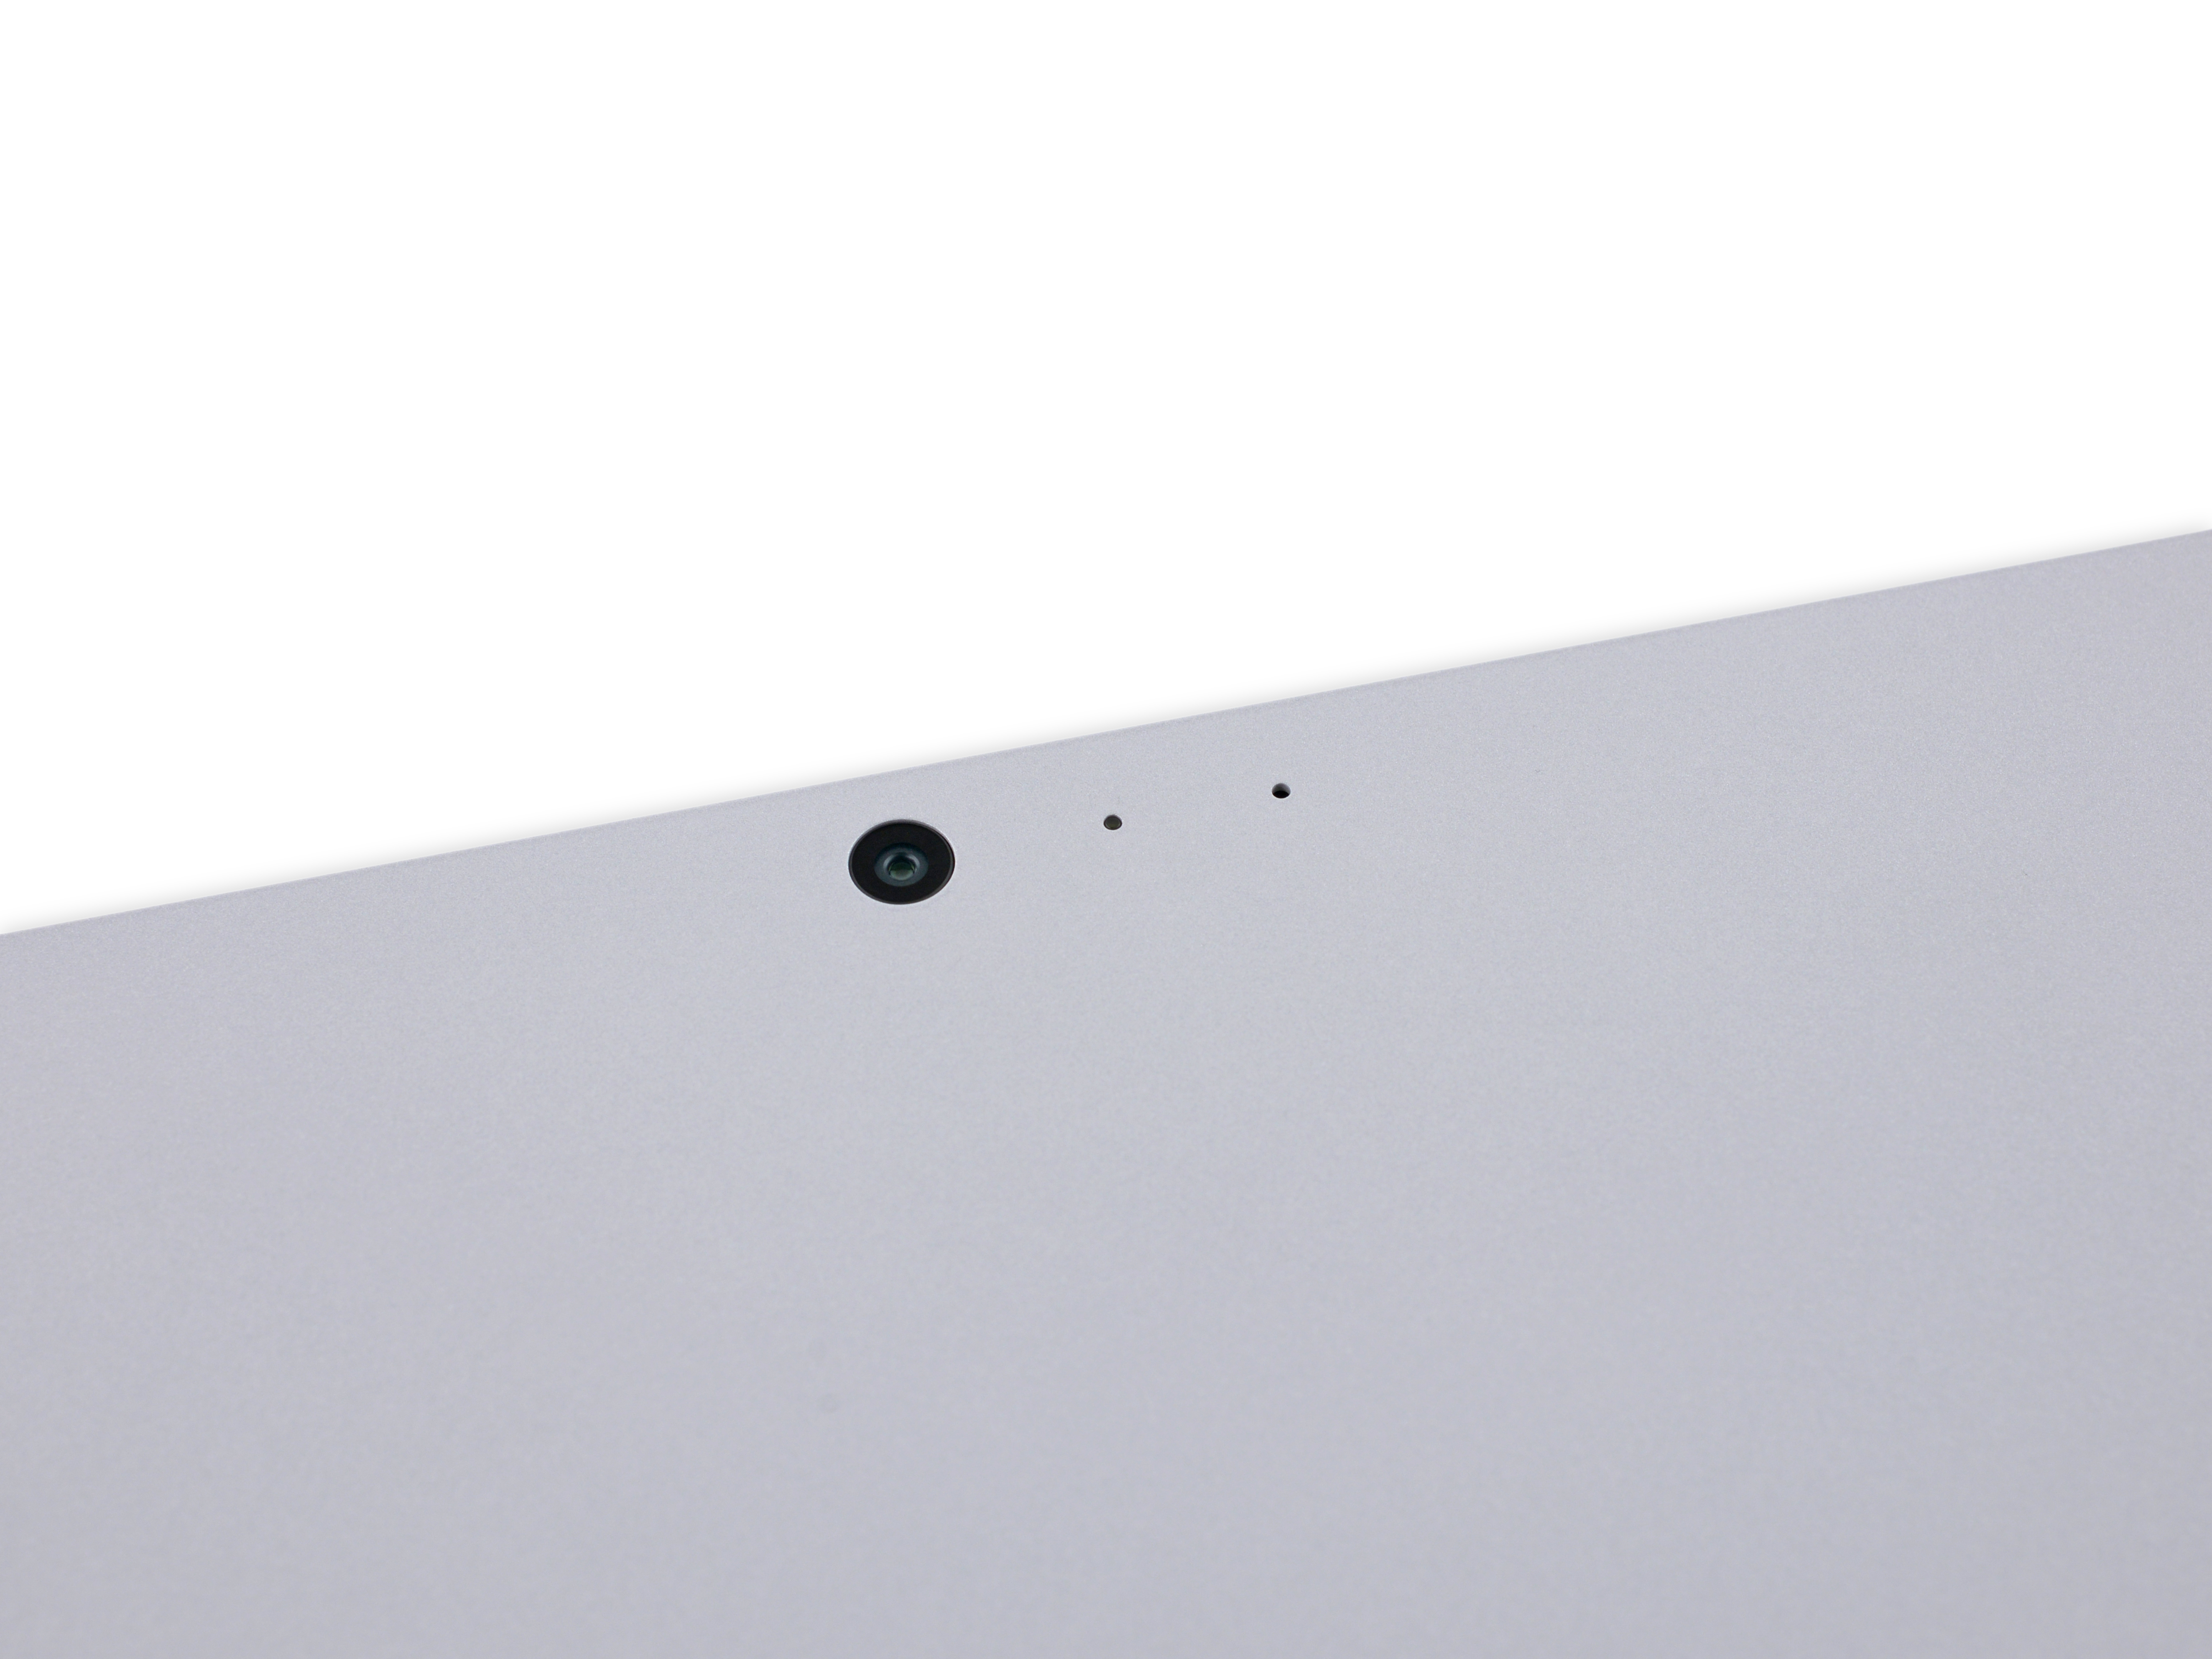
The design on the shell is relatively clear, the combination of camera, microphone, and indicator light.
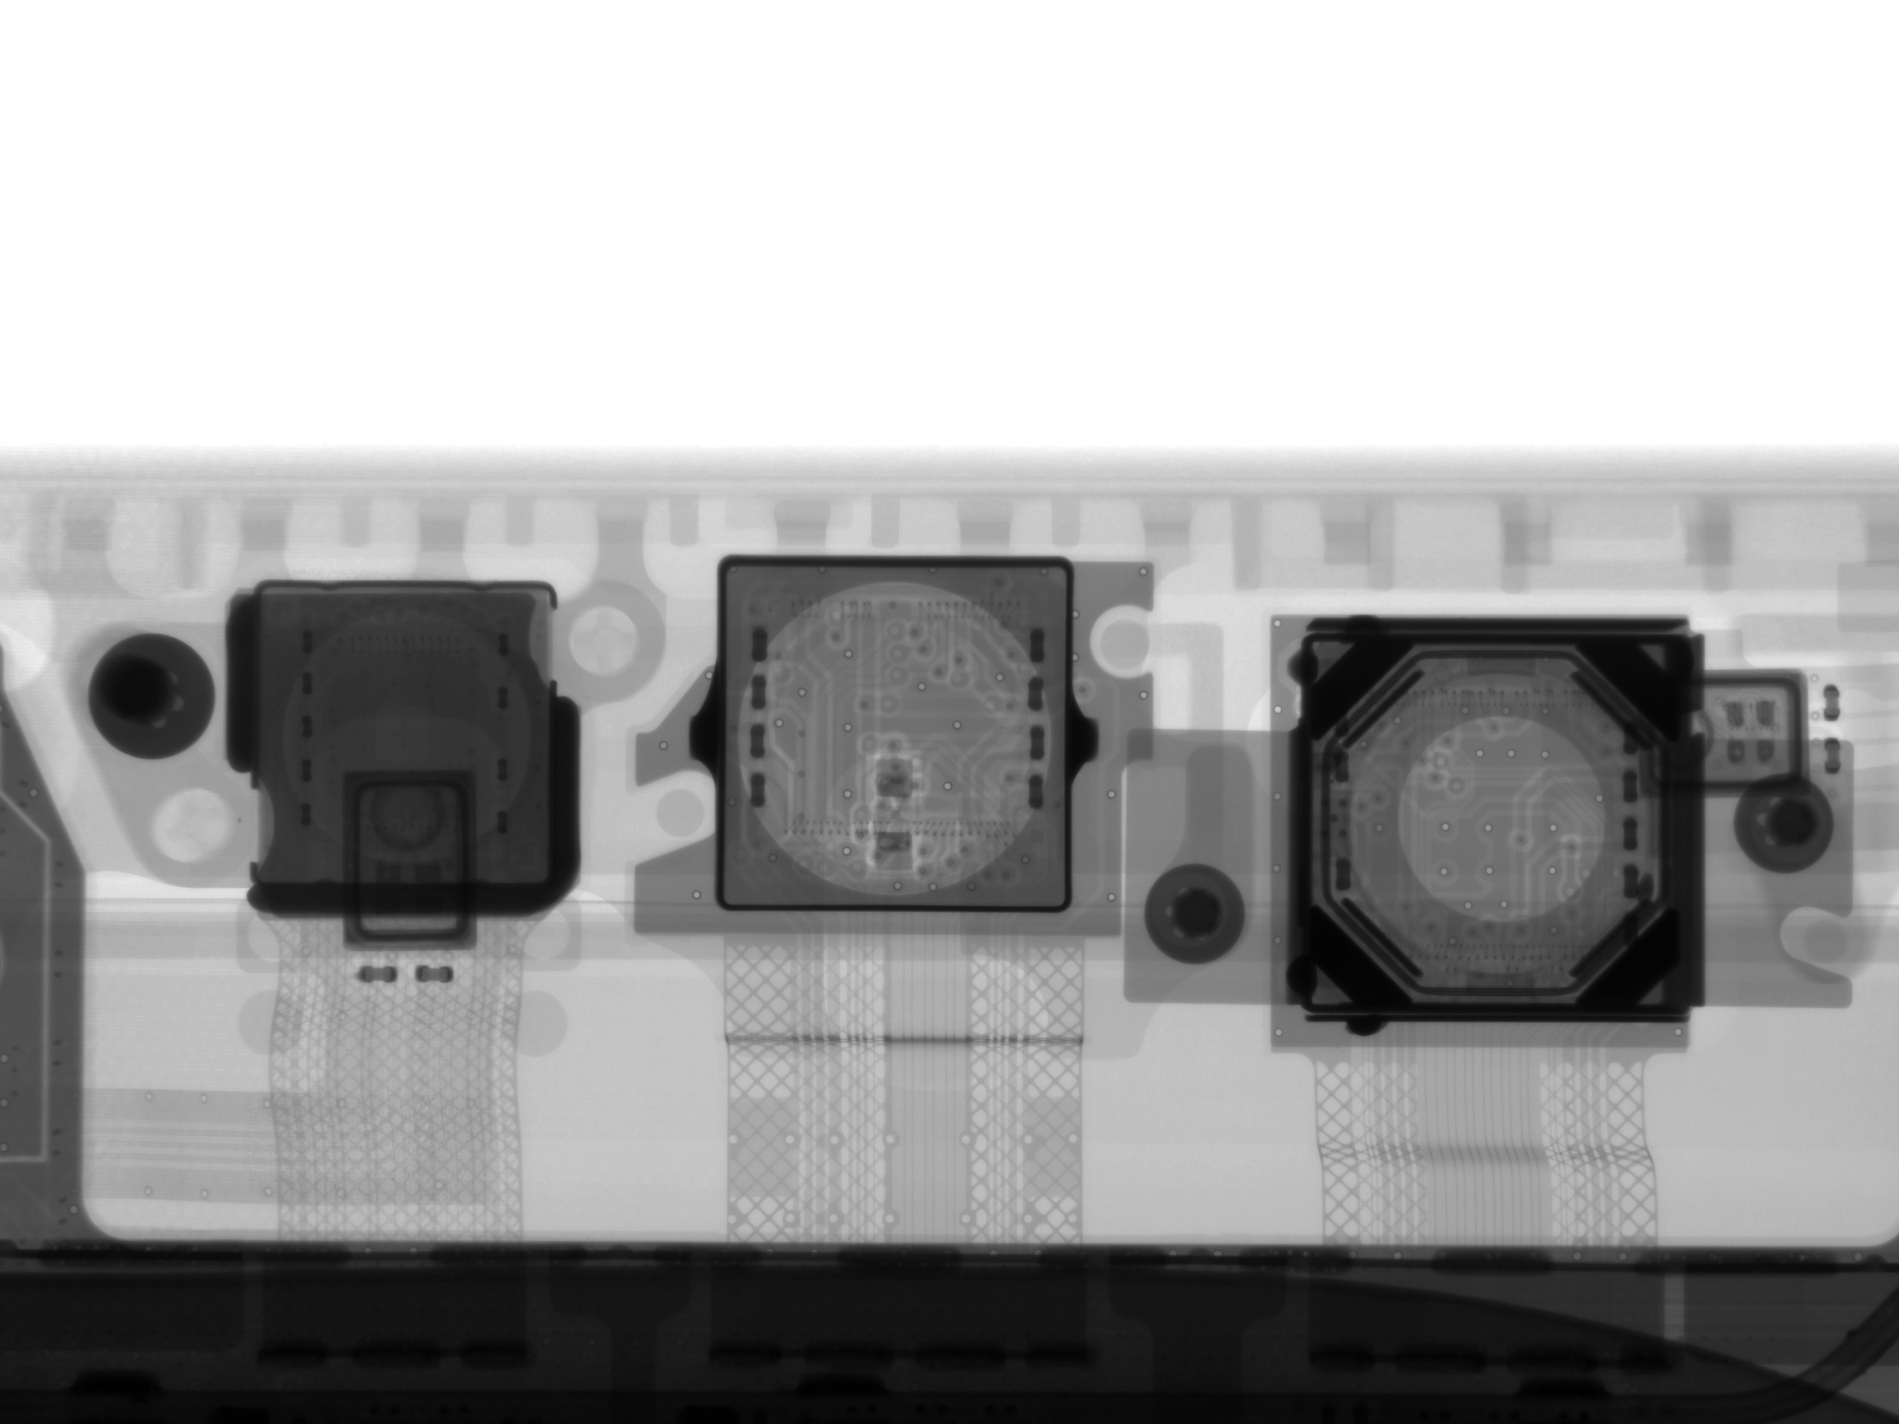
We first look at the structure of this camera module with X-rays. It seems that there are two cameras, and the use of the next component is not clear.
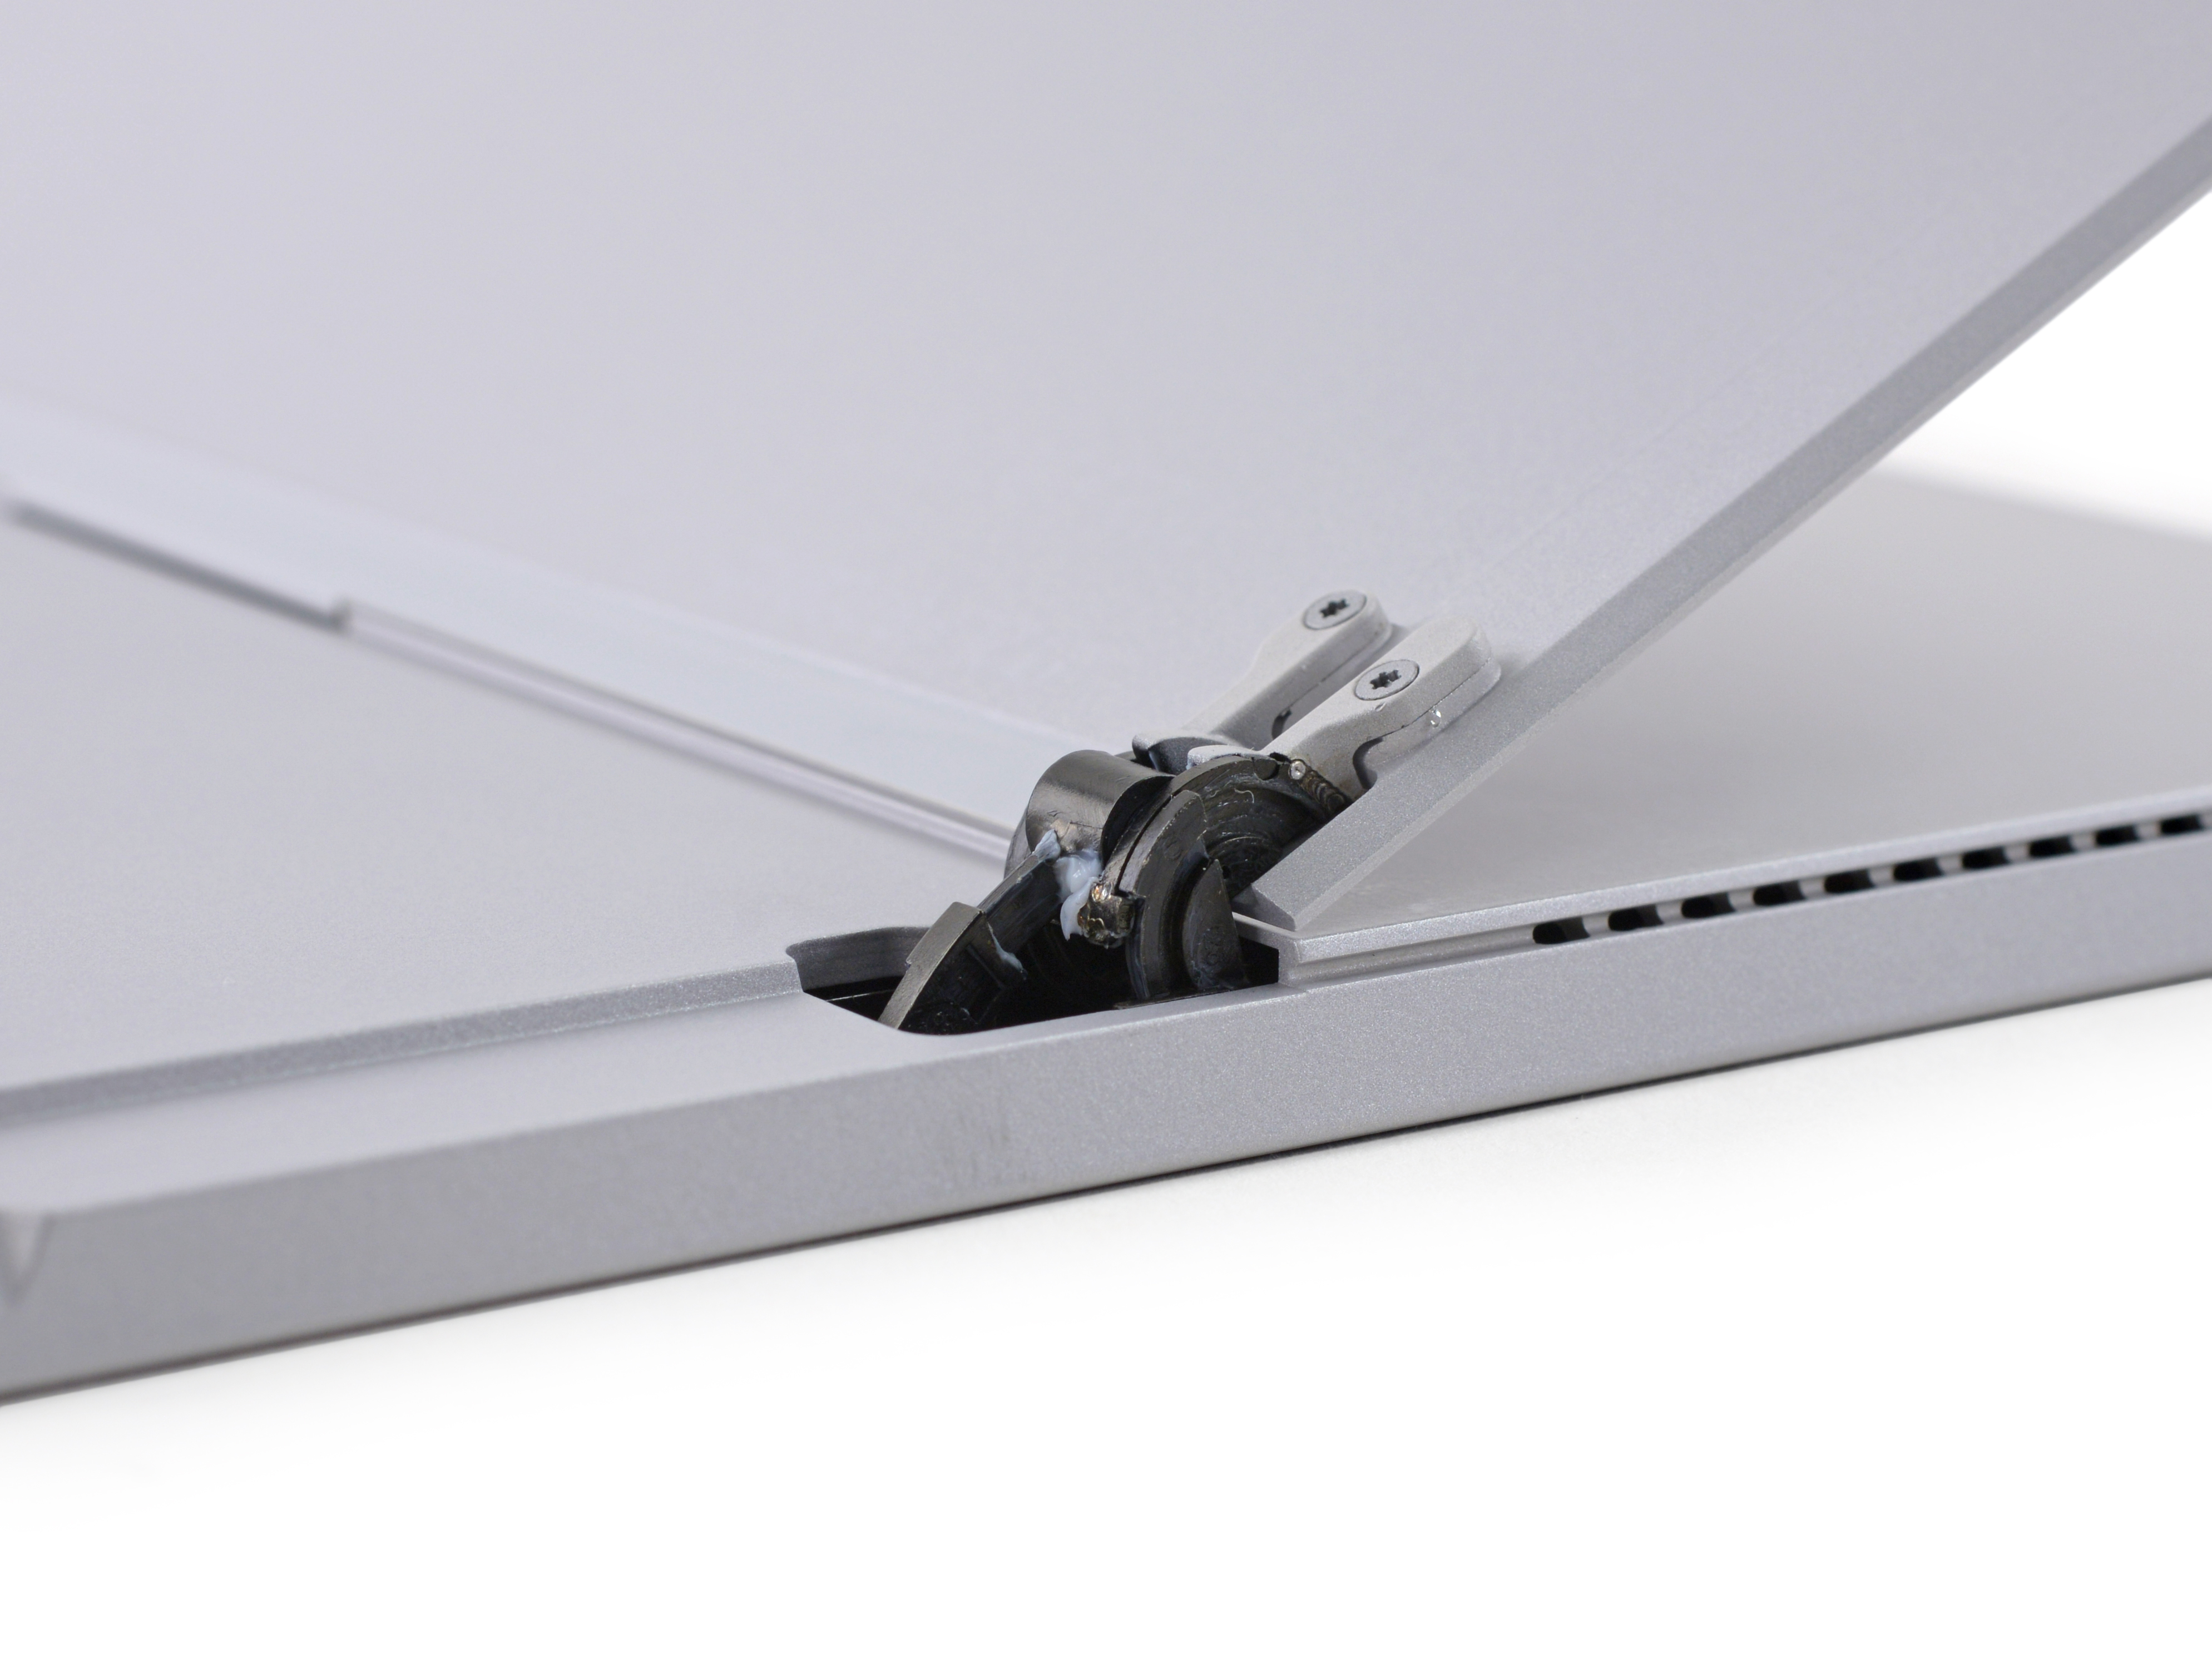
The hinge hinge on the back is an exposed design, and Microsoft has applied a lubricant to the hinge. Although it satisfies the need for lubrication, it also determines that it is easy to stick dust, hair, or threads, and the user needs to take care when using it.

Microsoft is very particular about the design of this hinge. It is more complicated to detect the internal structure through our x-ray.
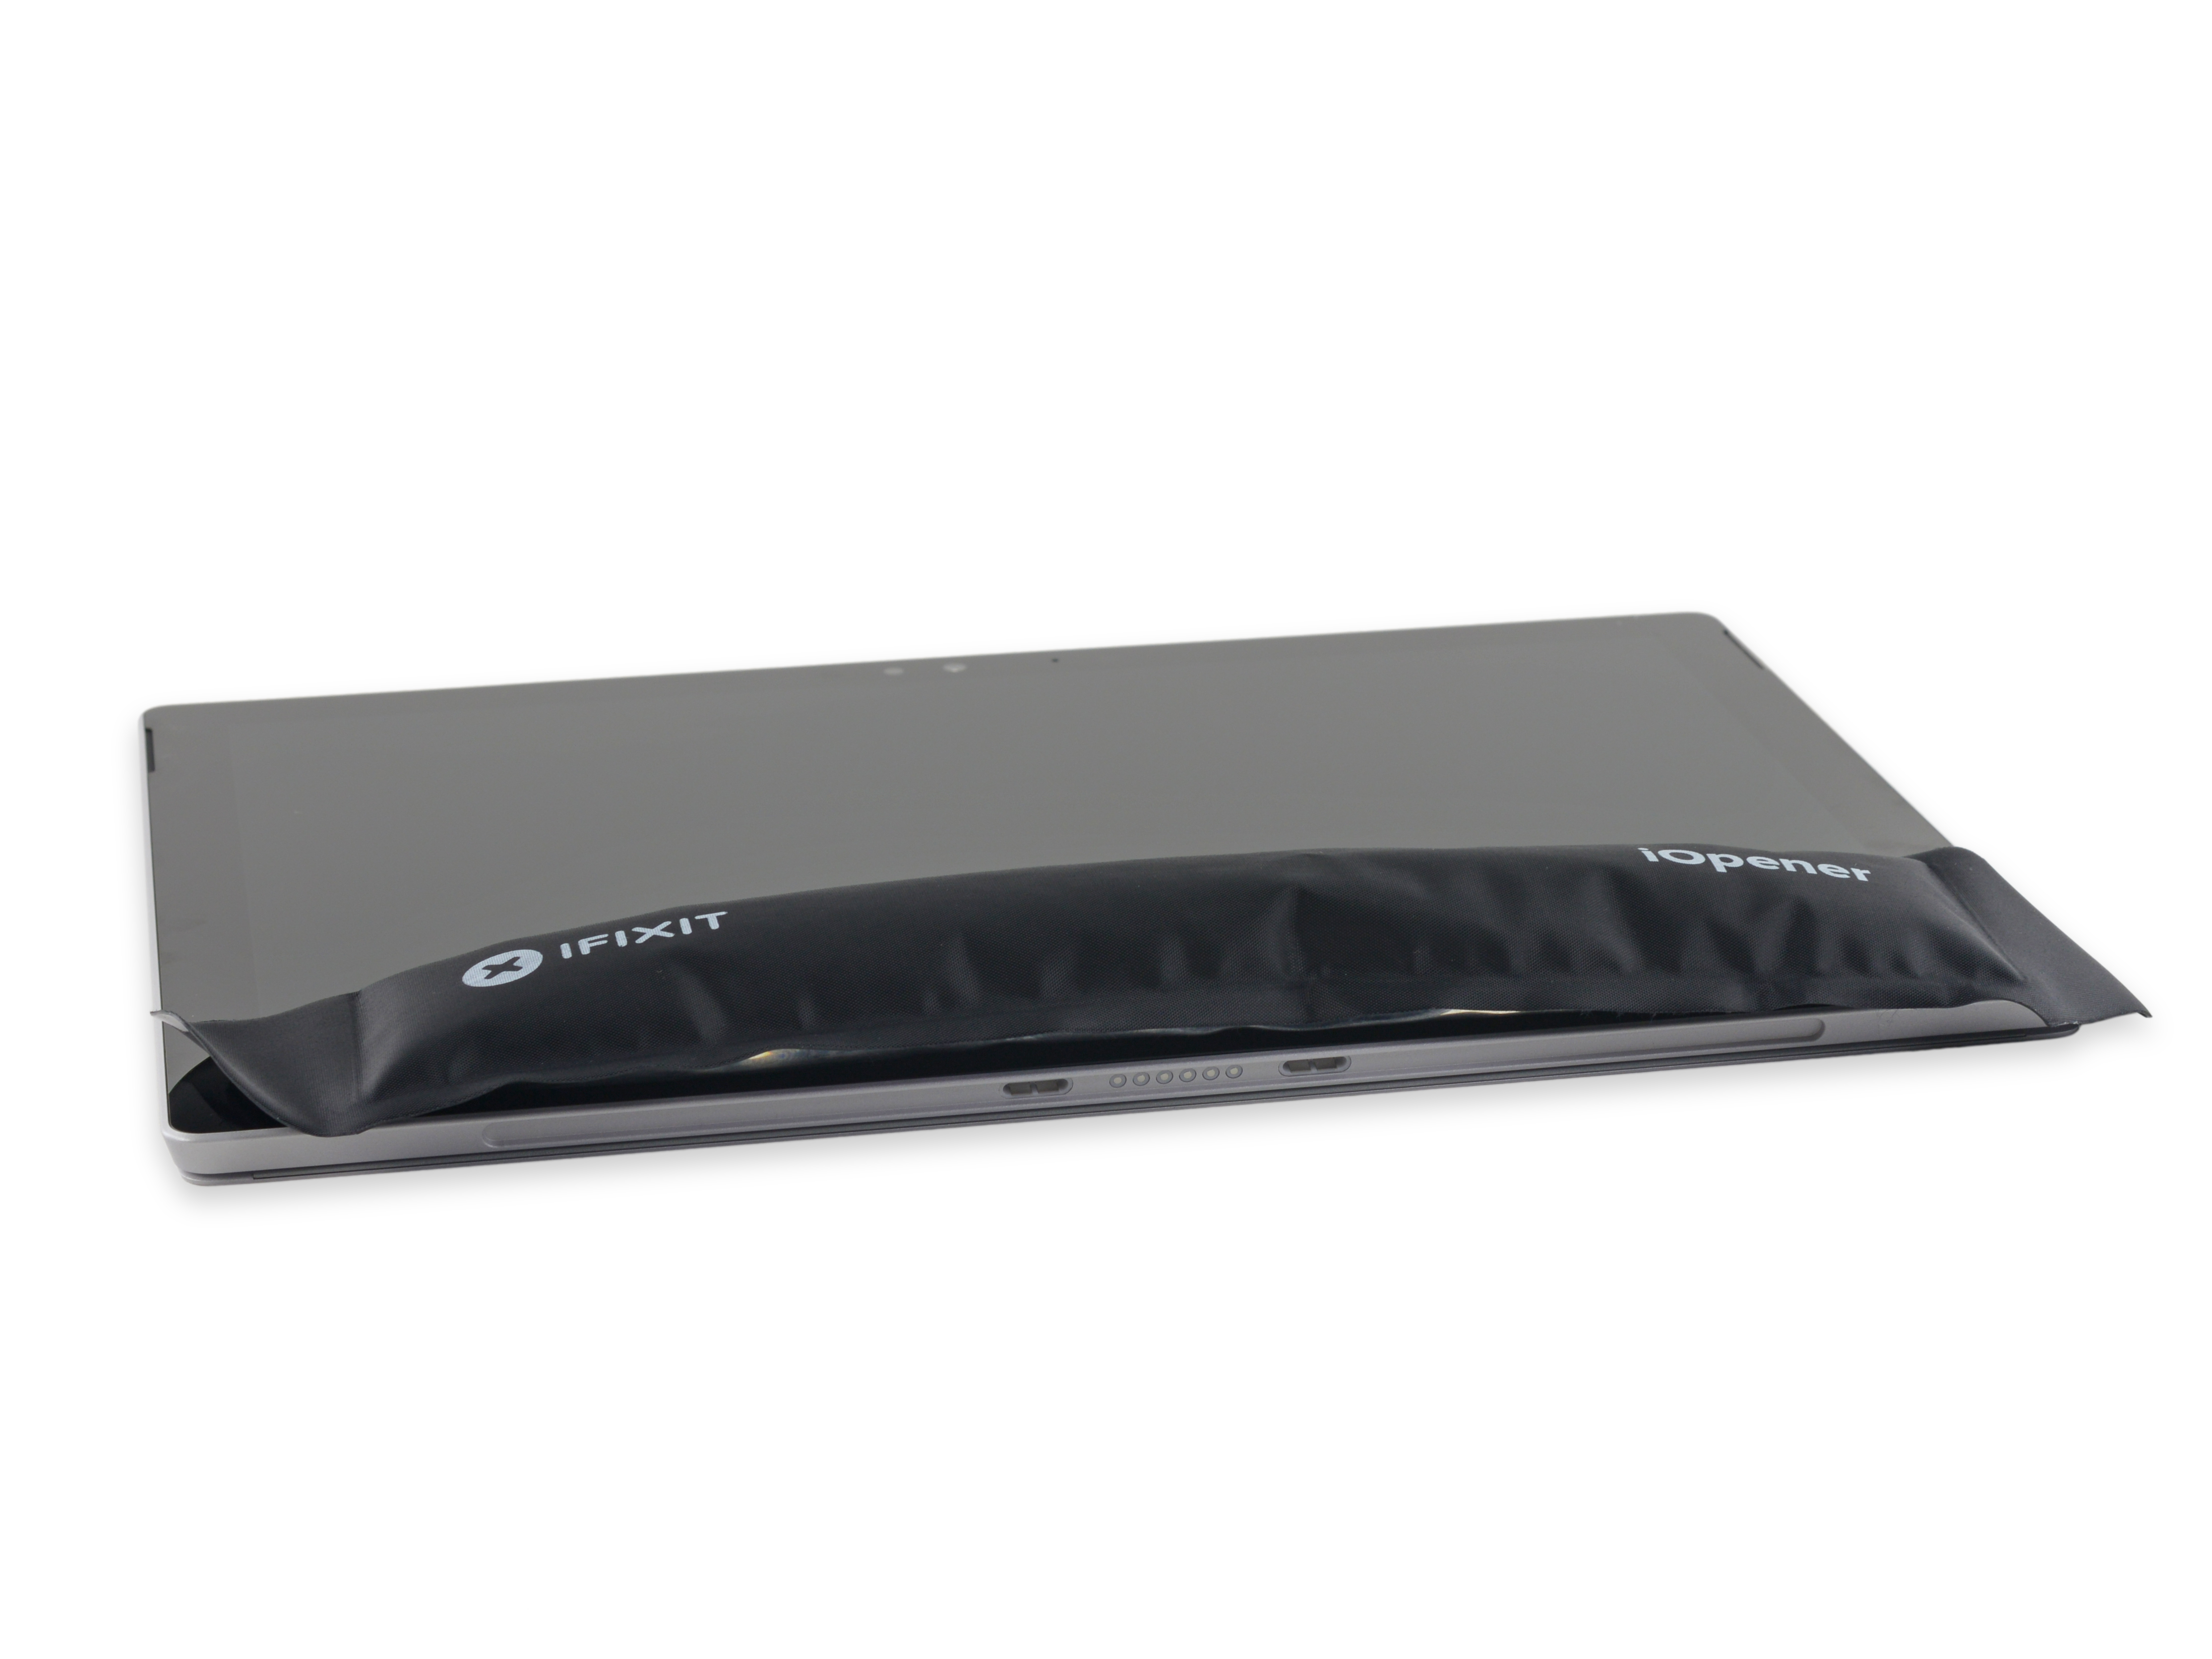
Like the previous Sophie, we began dismantling from the screen and heated it to soften the glue under the screen.
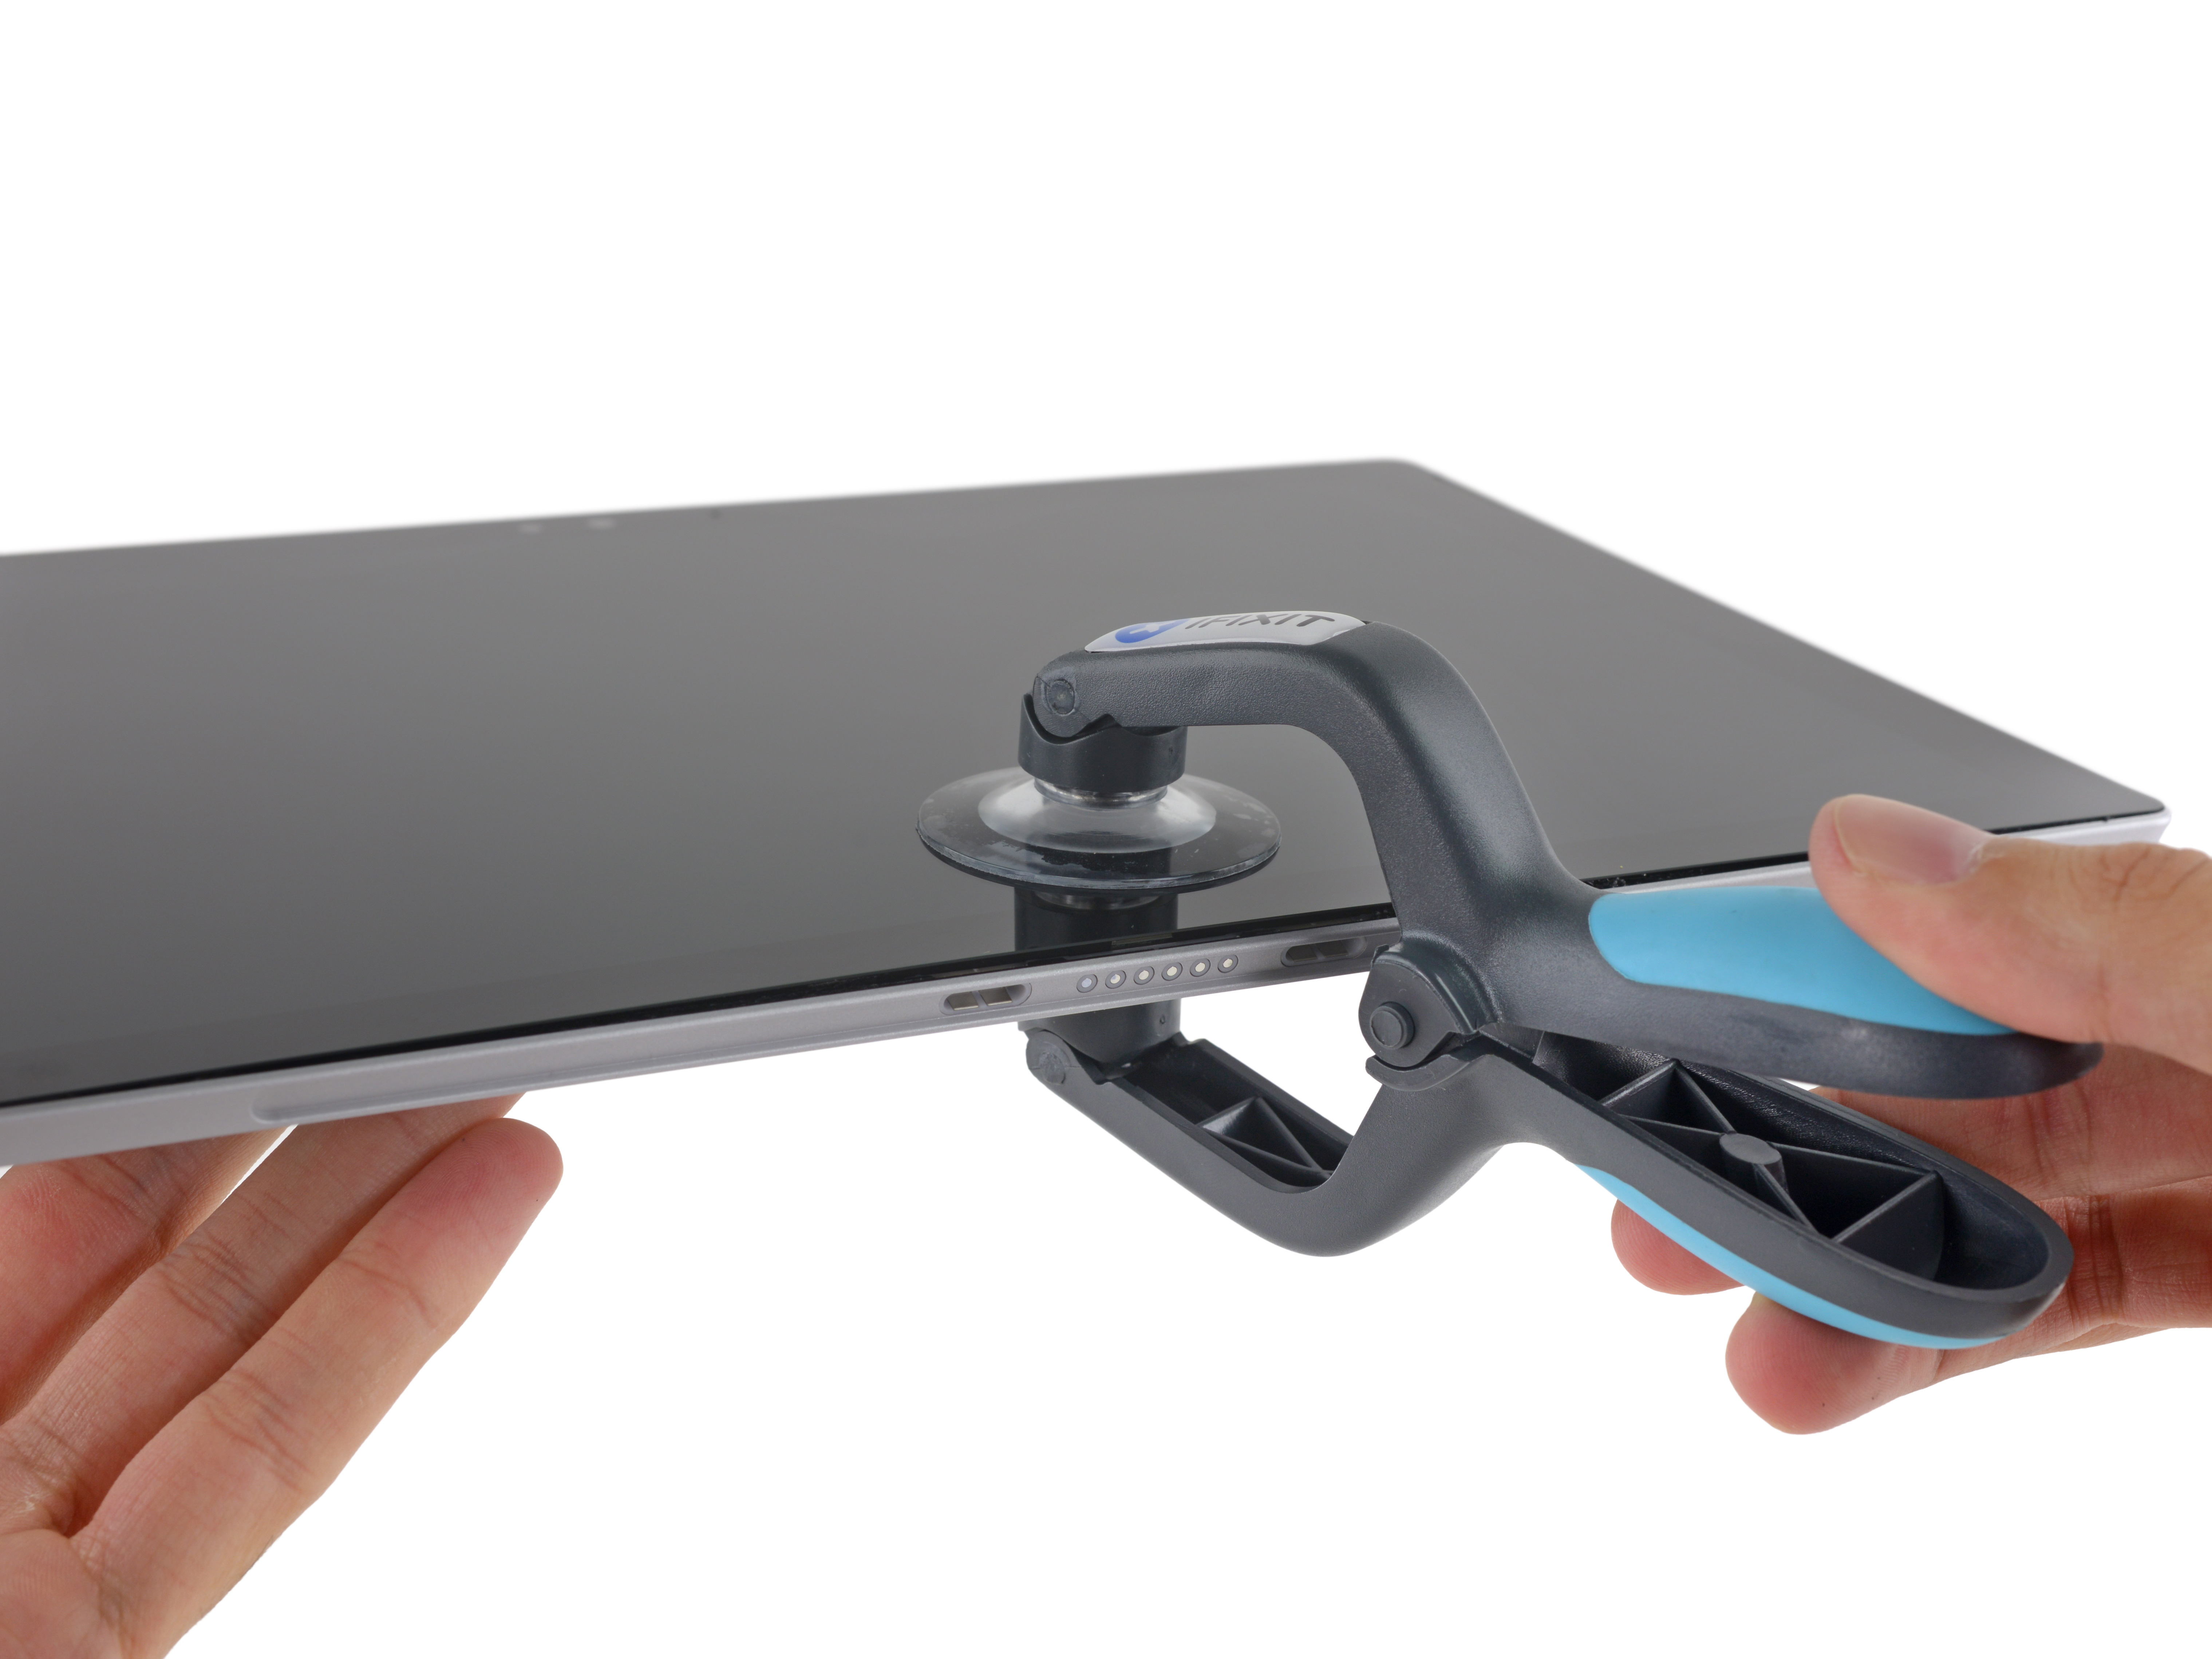
Use the suction cup to slowly pull up the monitor.

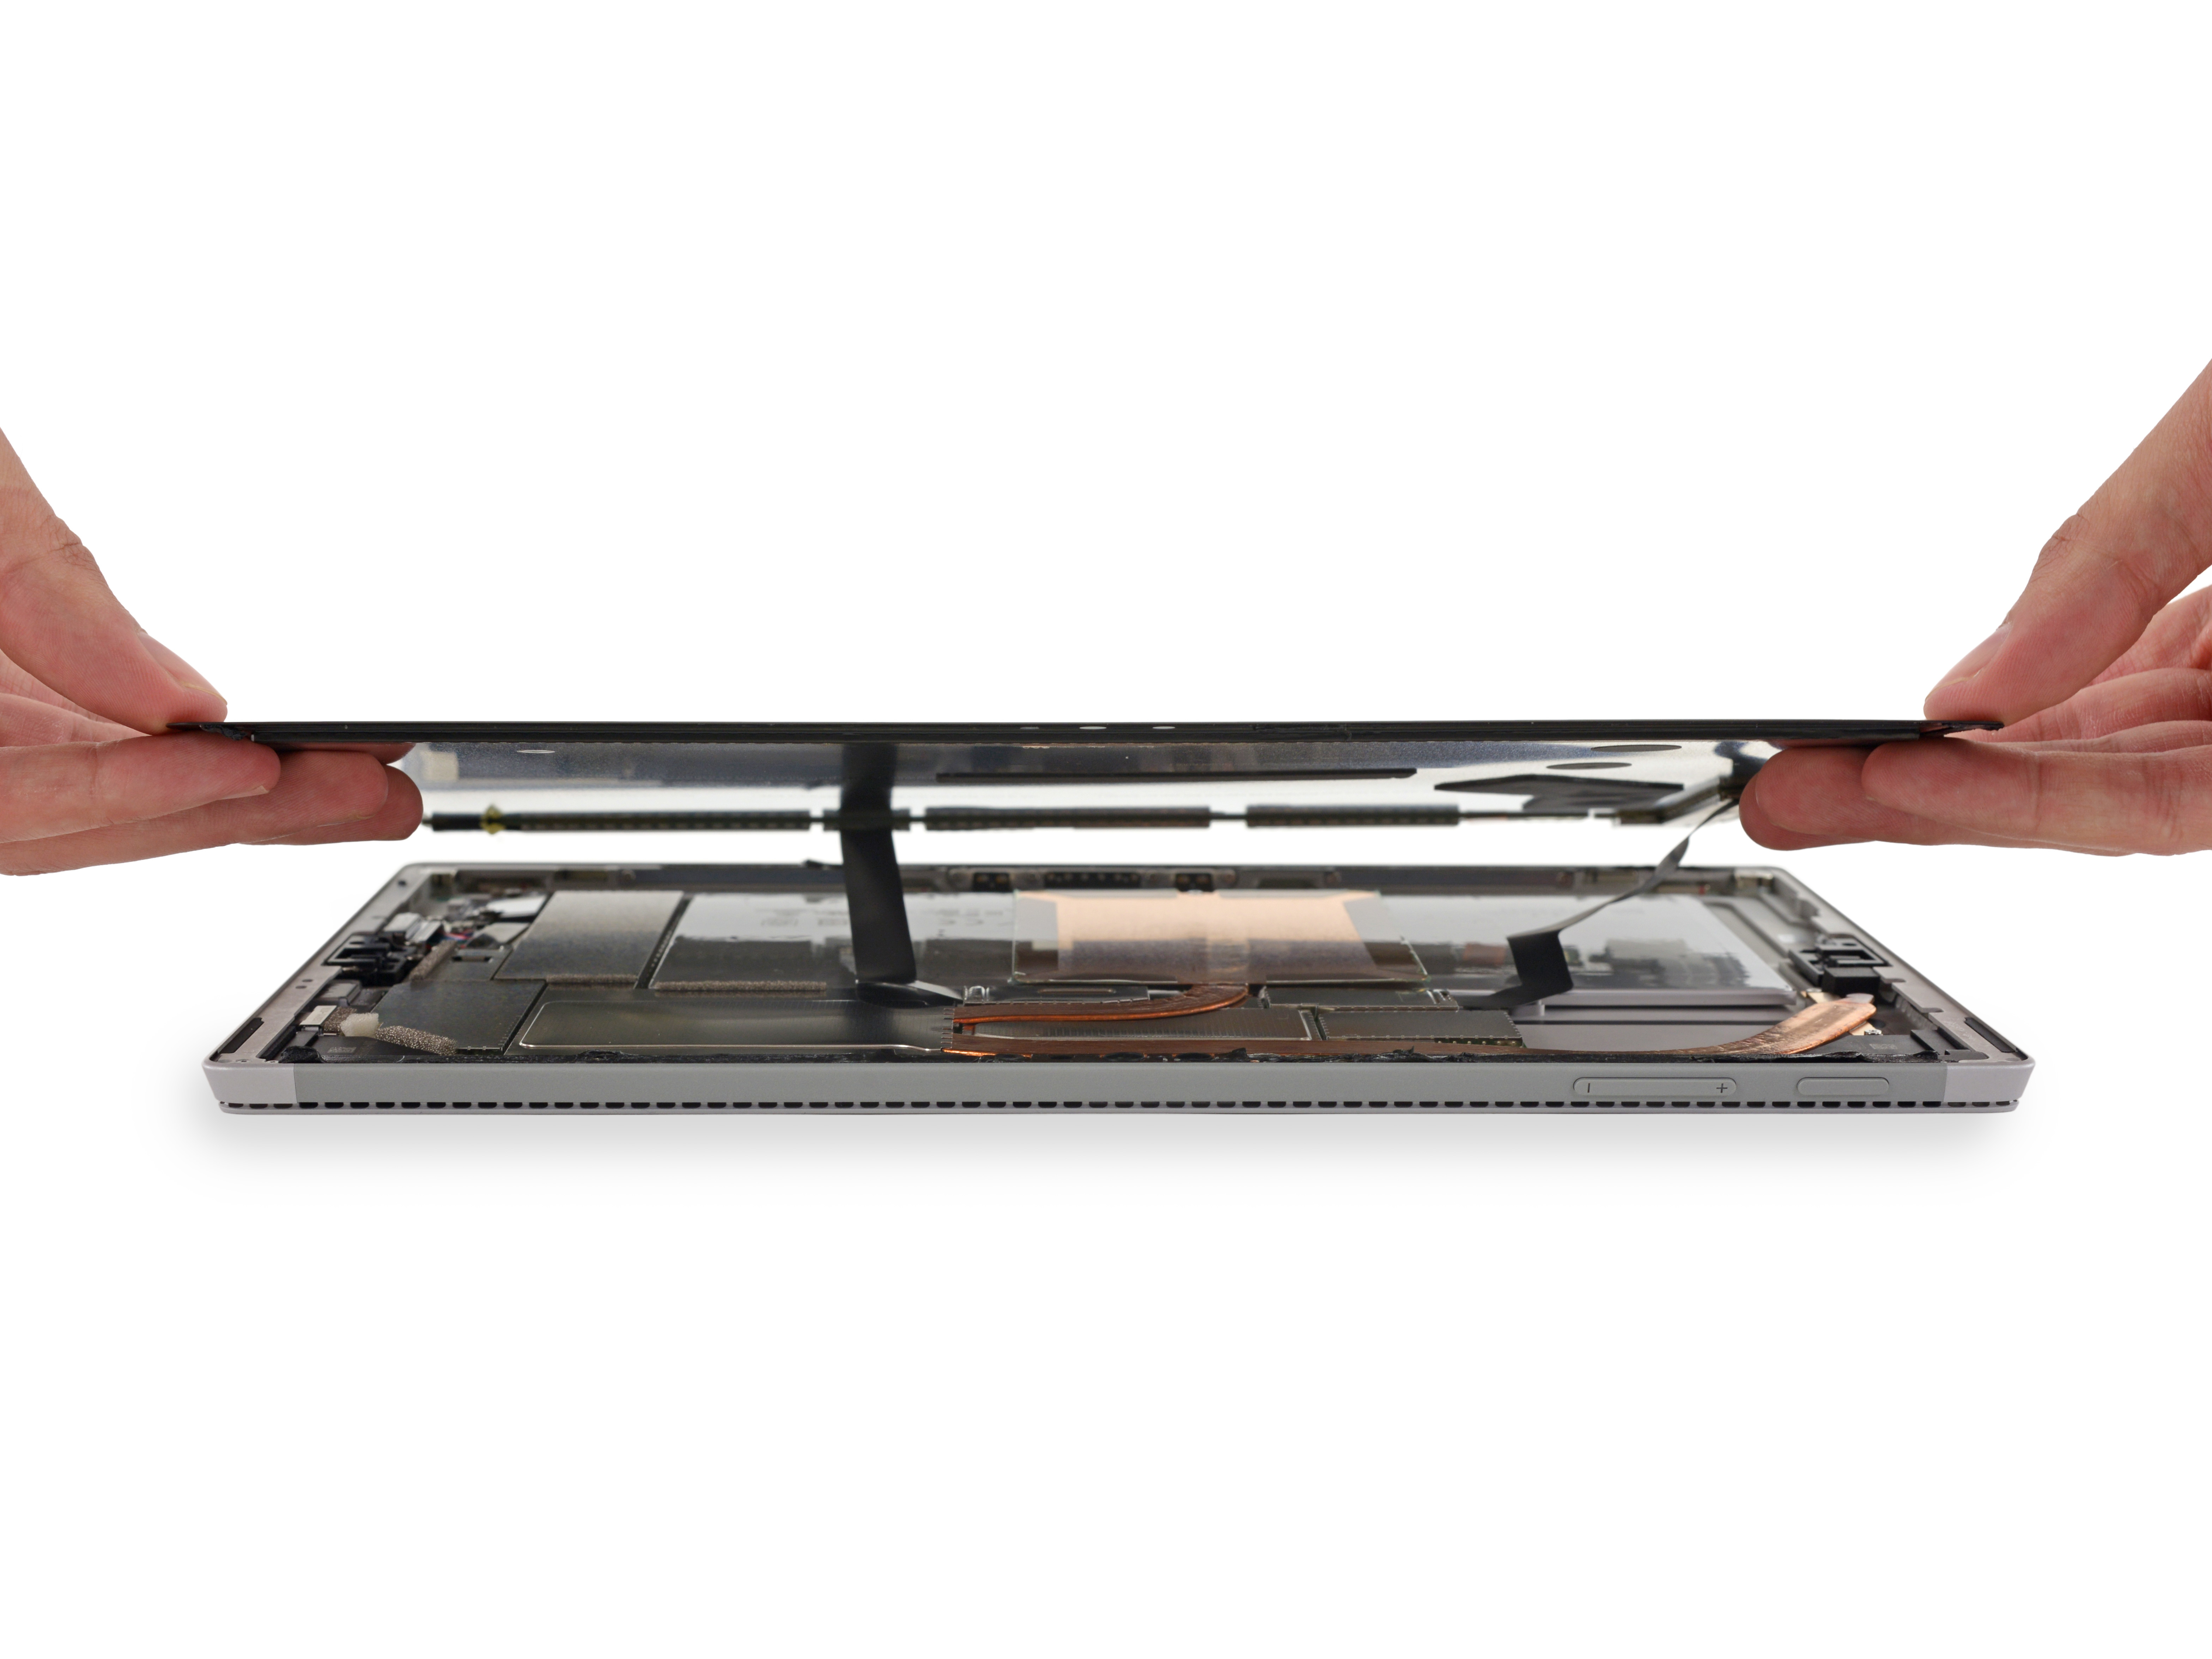
Use the paddle to slowly pick up along the edge of the screen and the body.
There are two cables below the screen. We should pay attention.
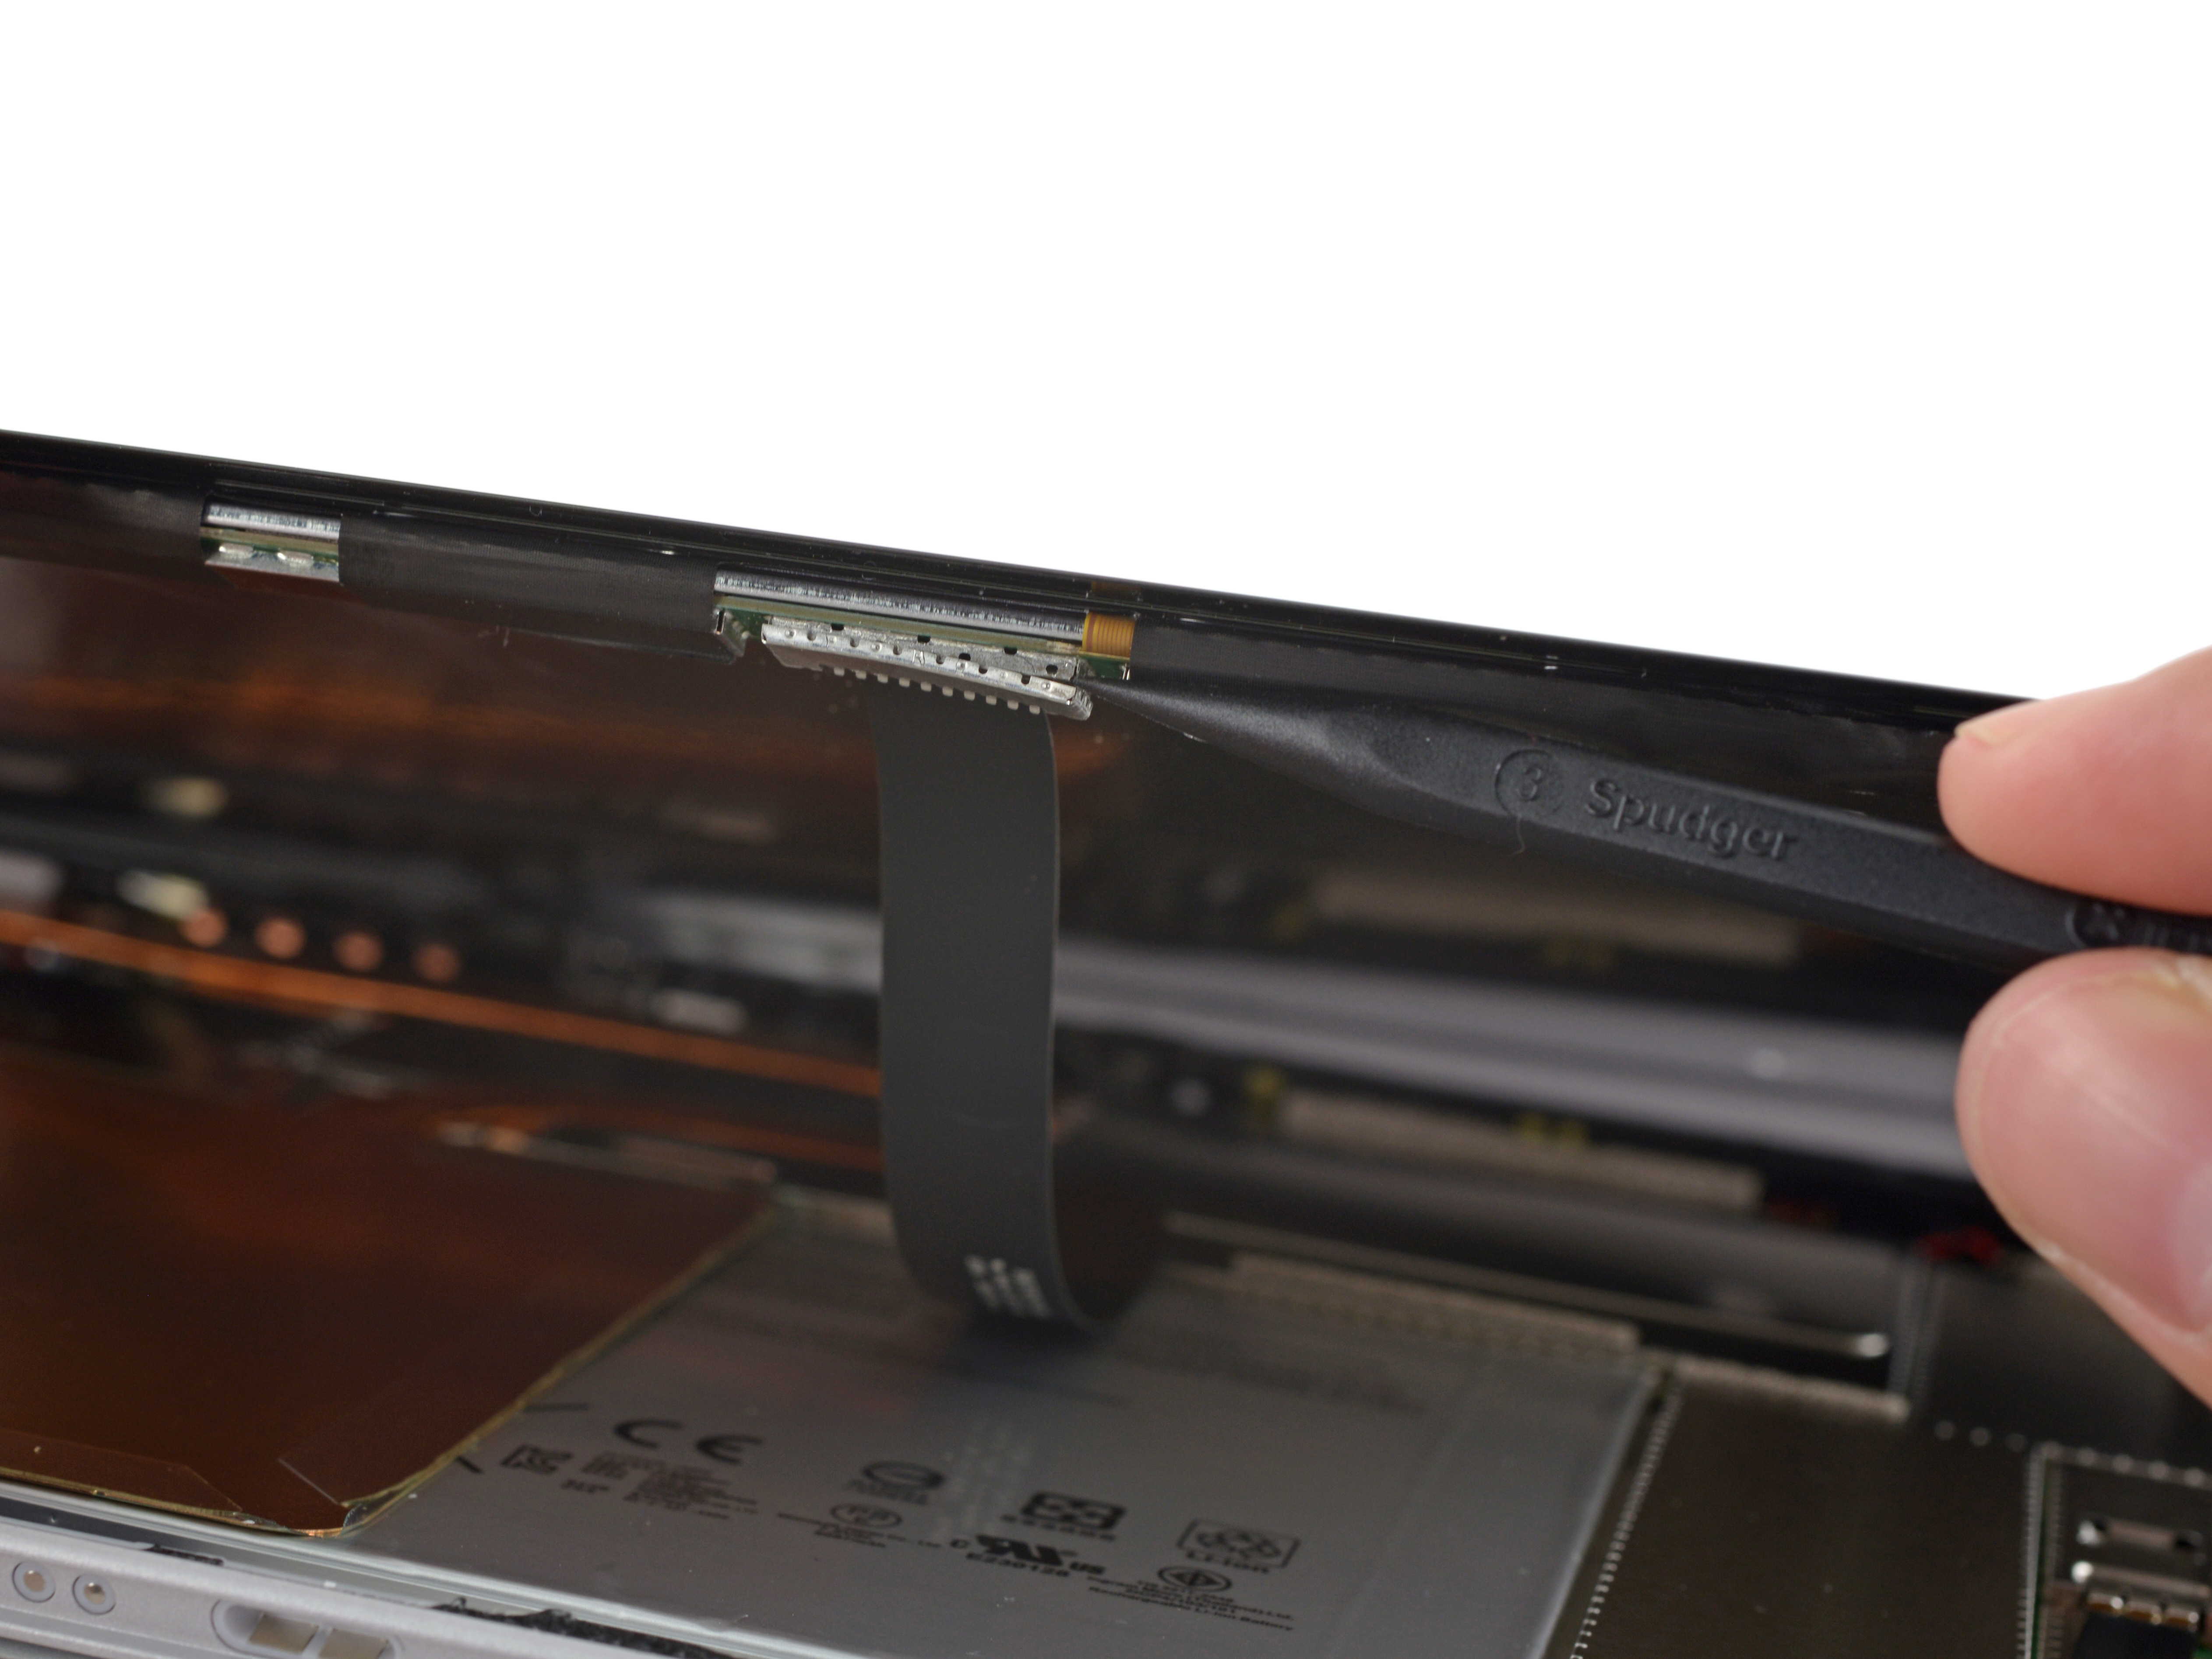
Use a crowbar to unplug the cable.
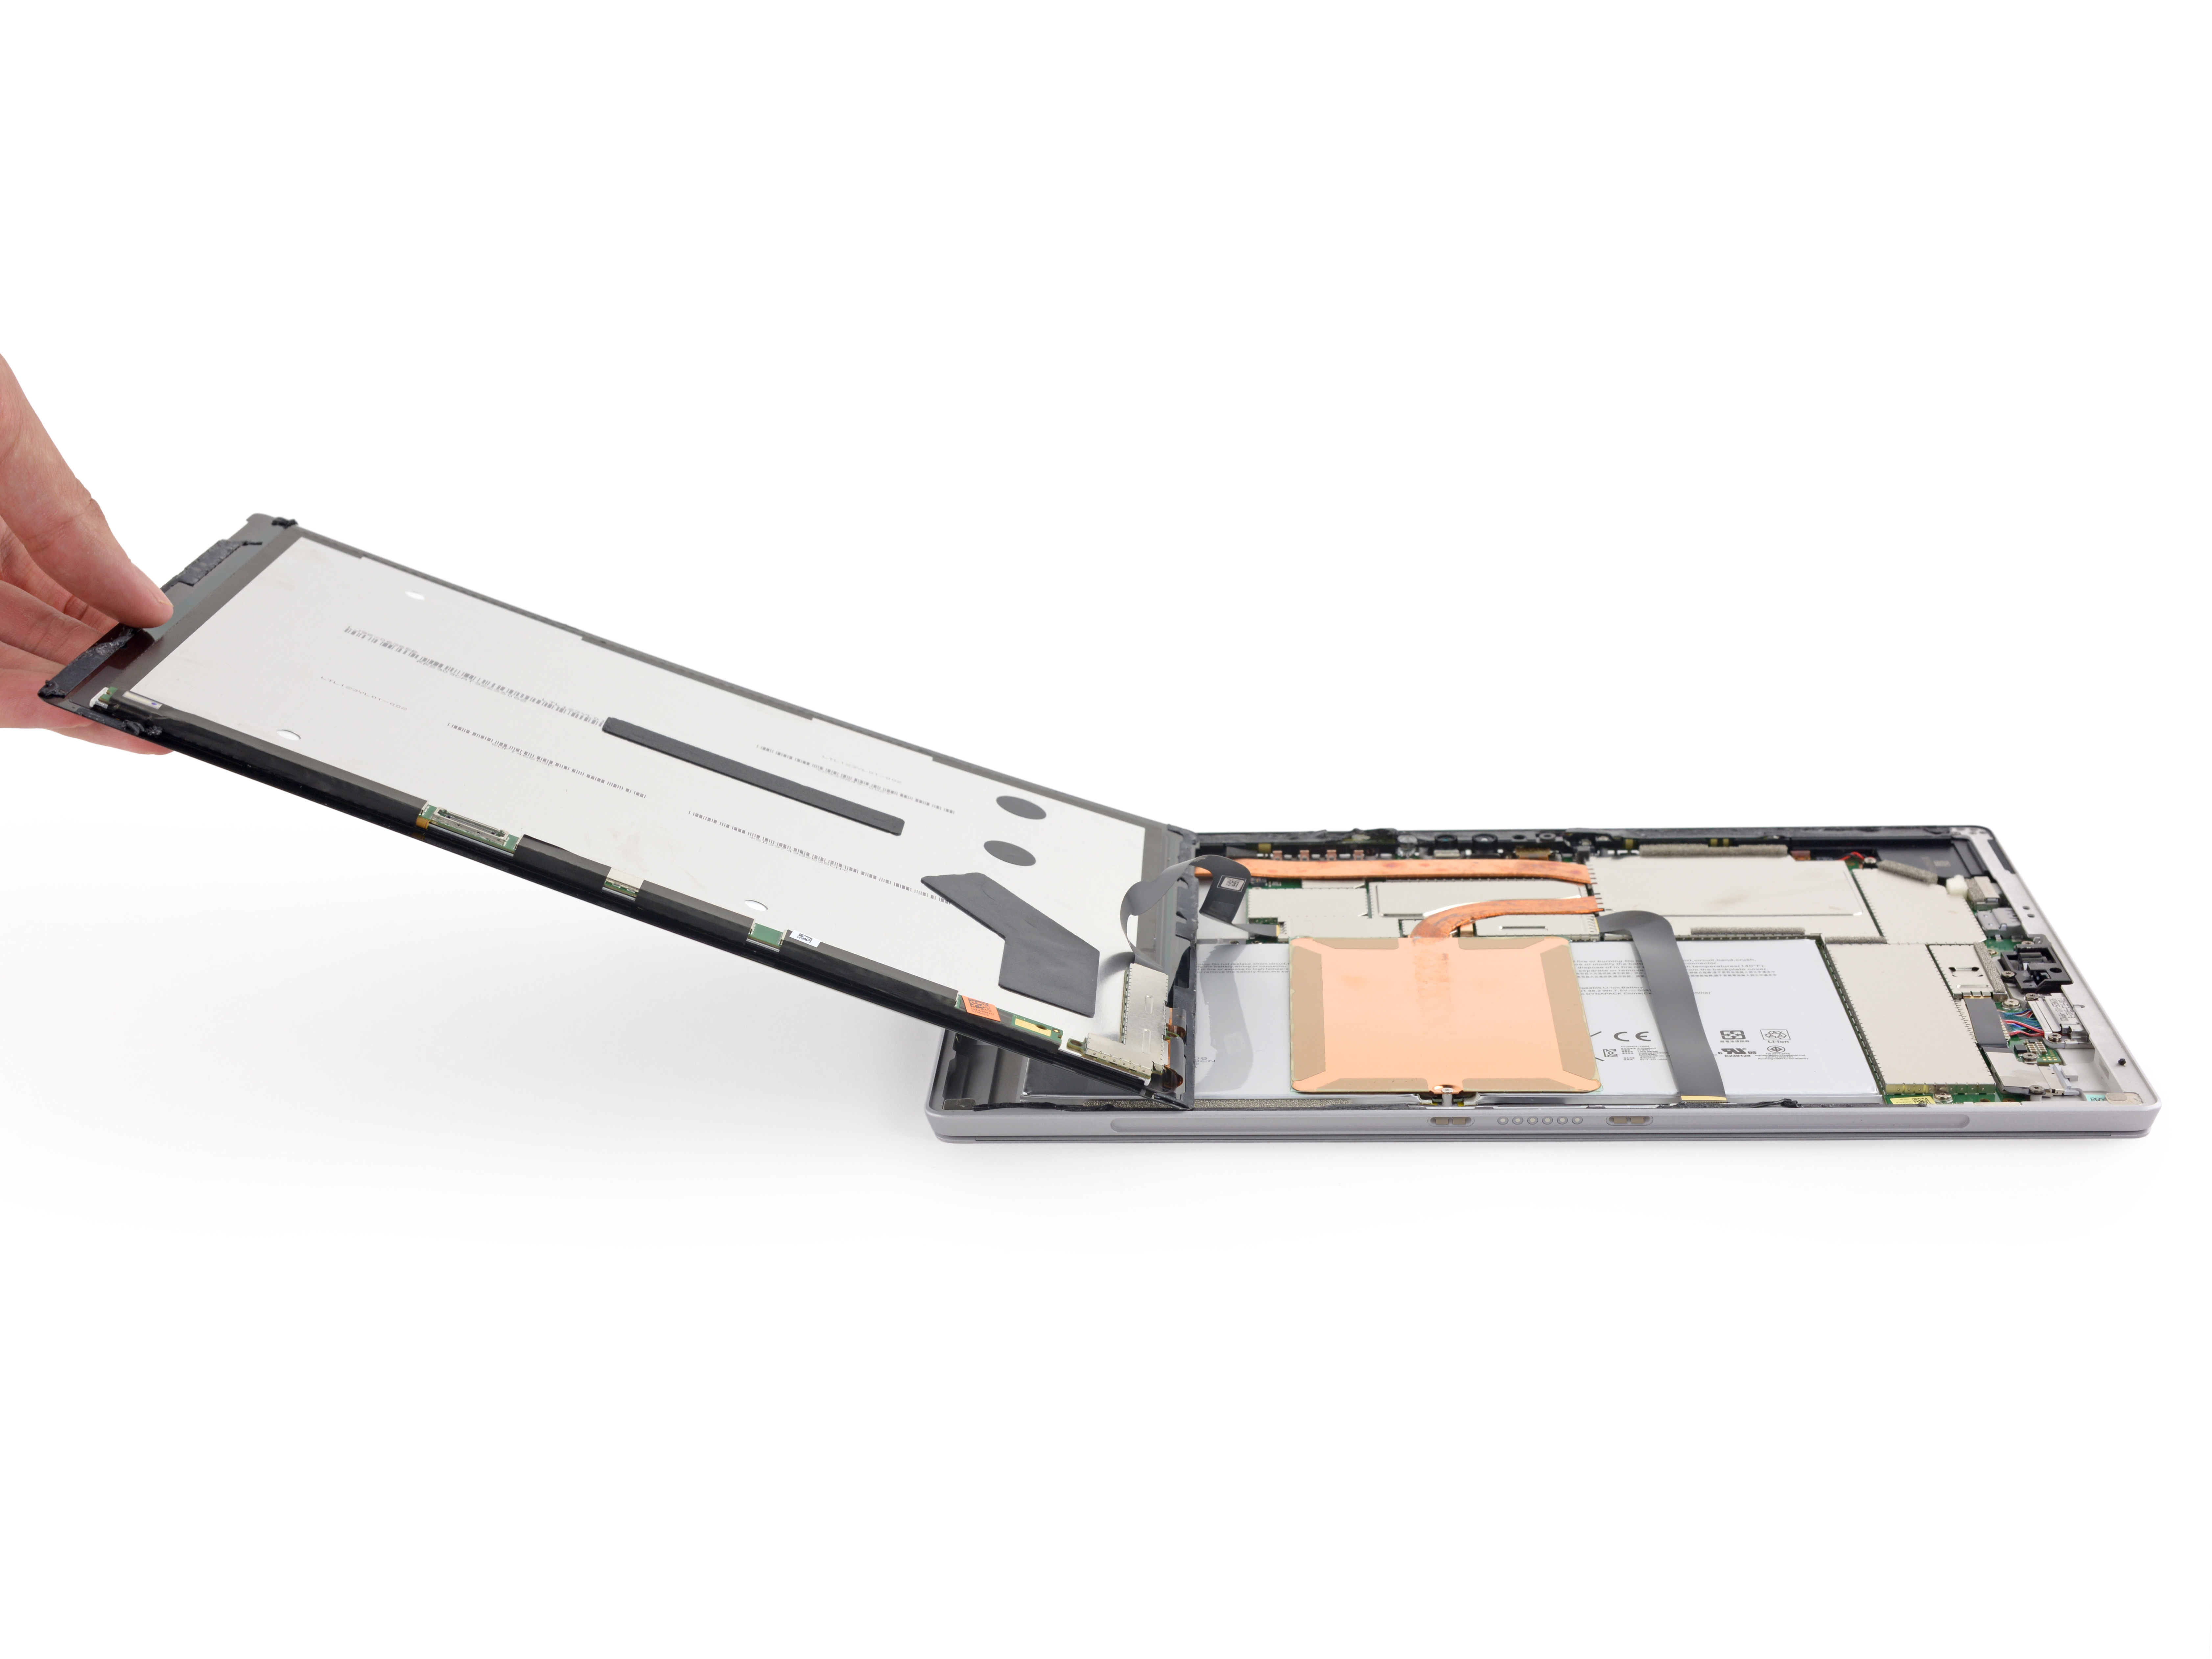
Separate the screen.
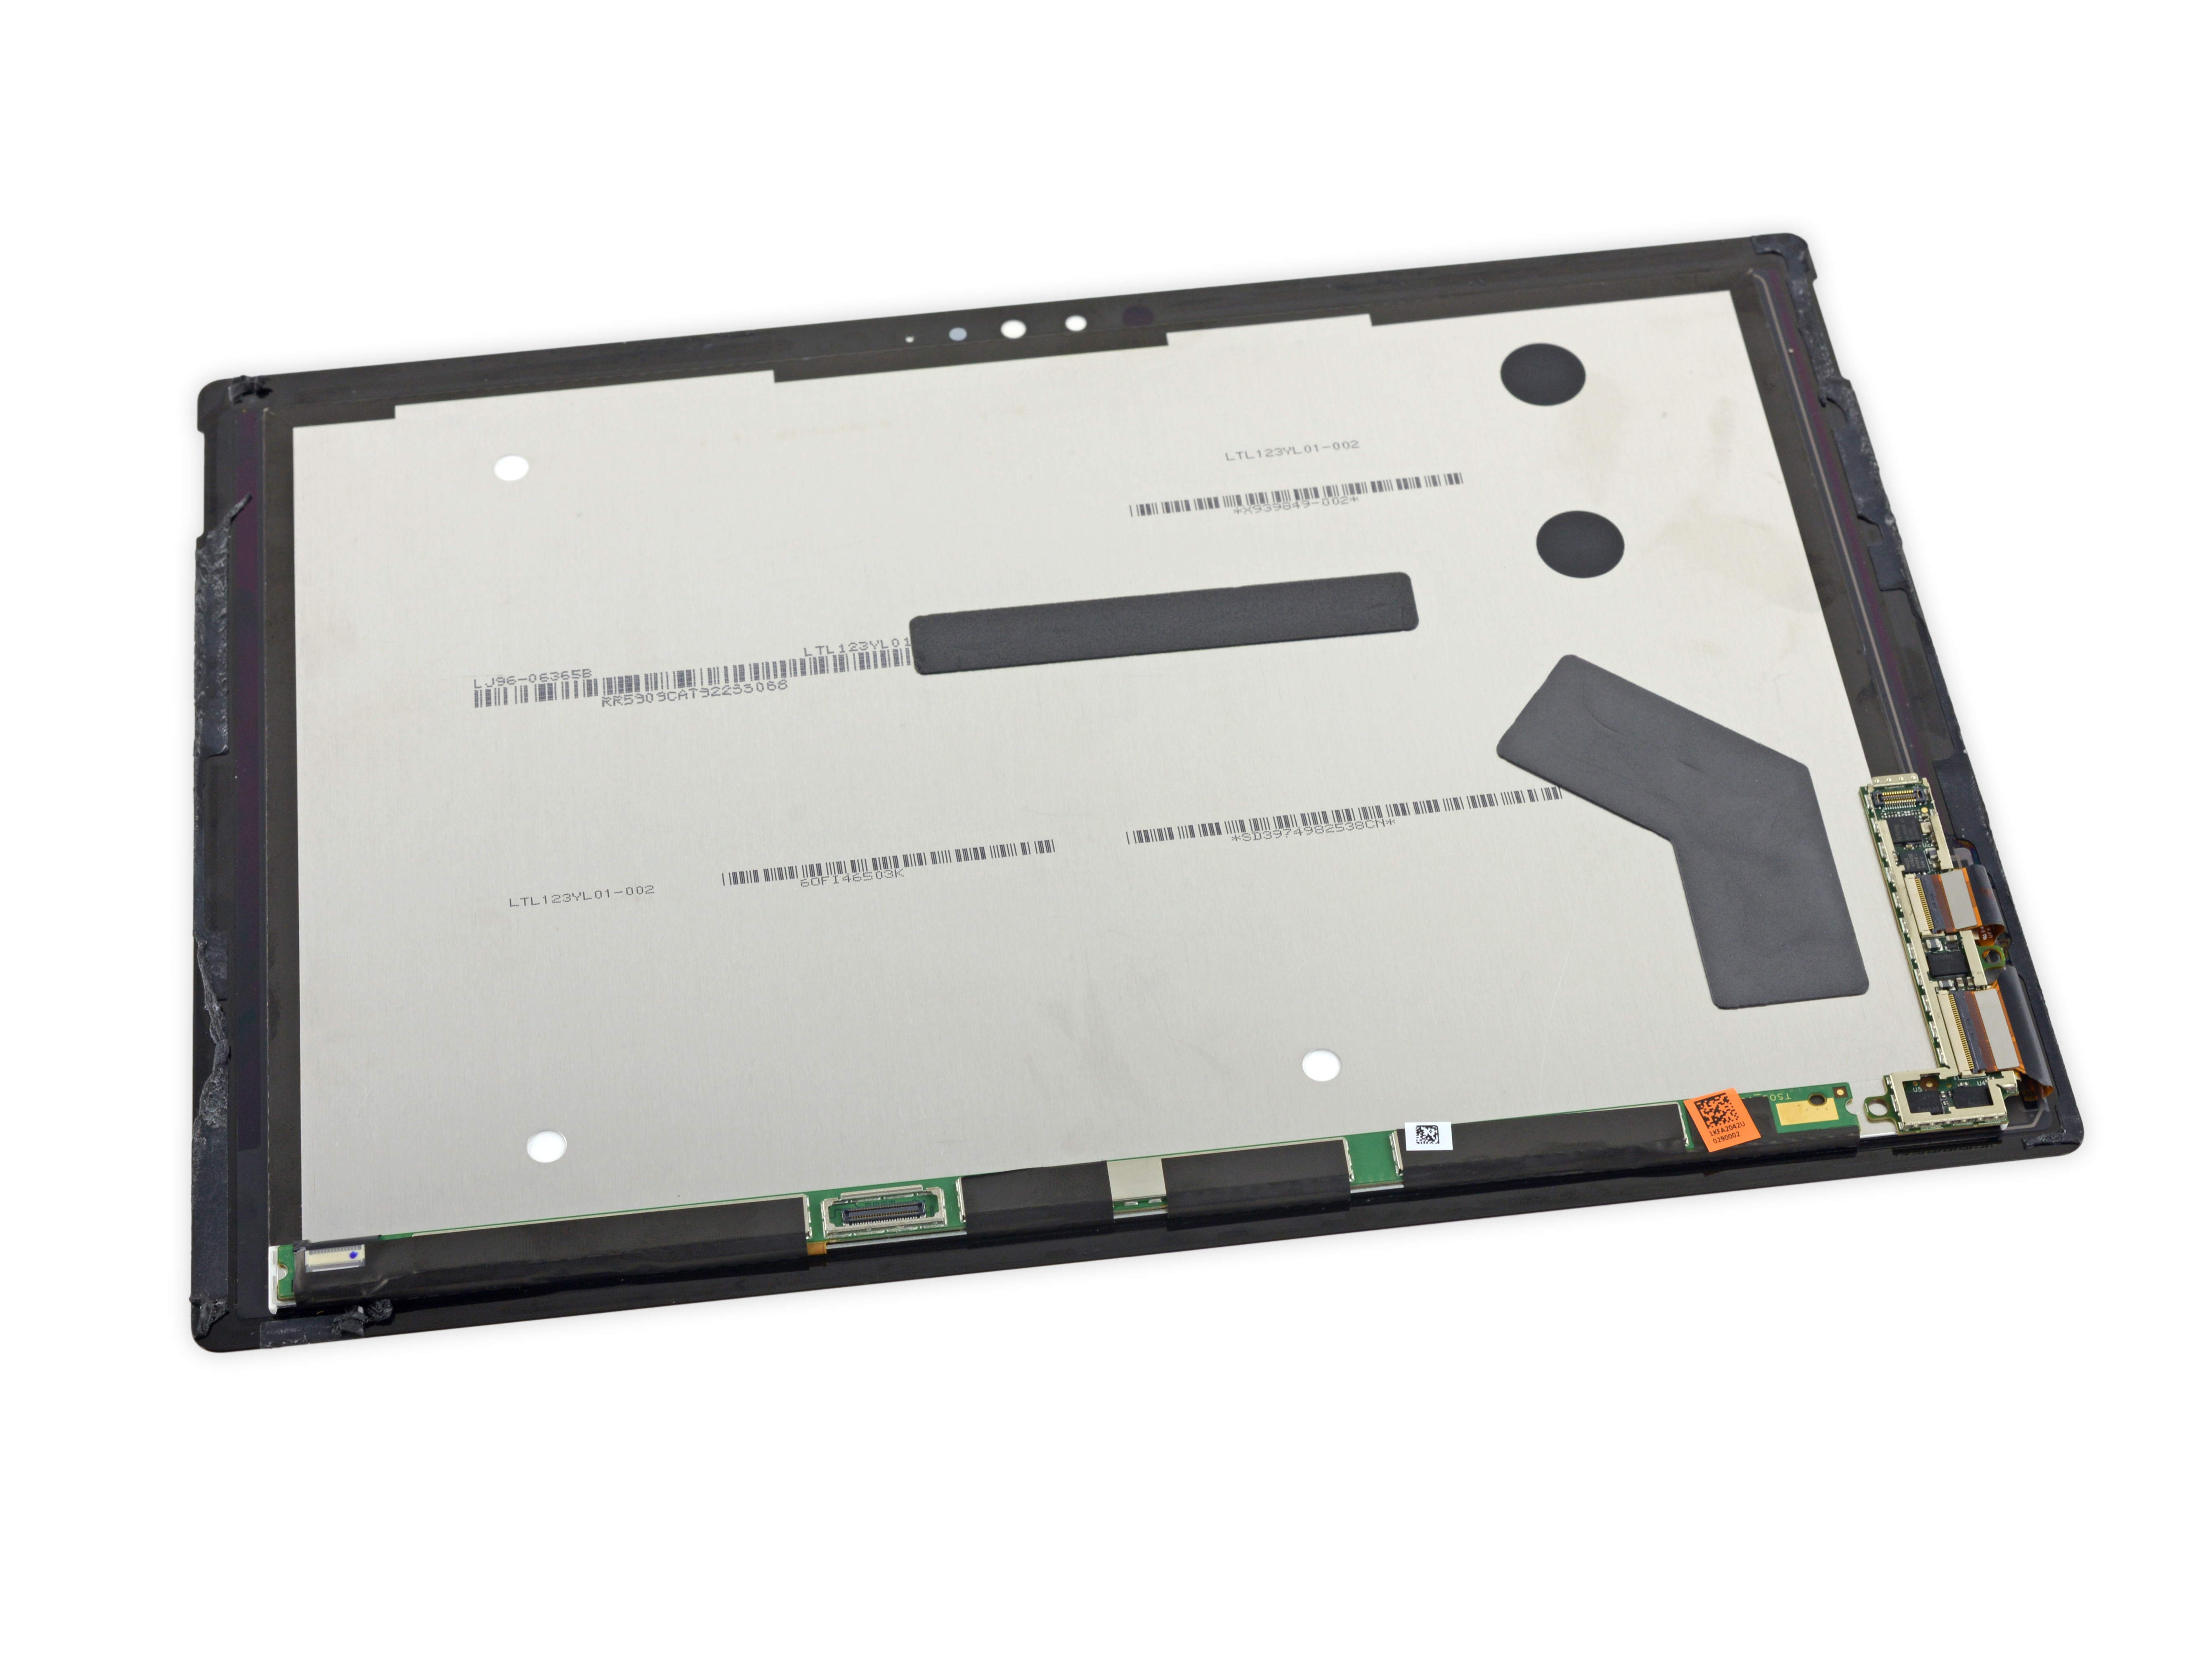
There is a small circuit board at the bottom of the back of the screen.
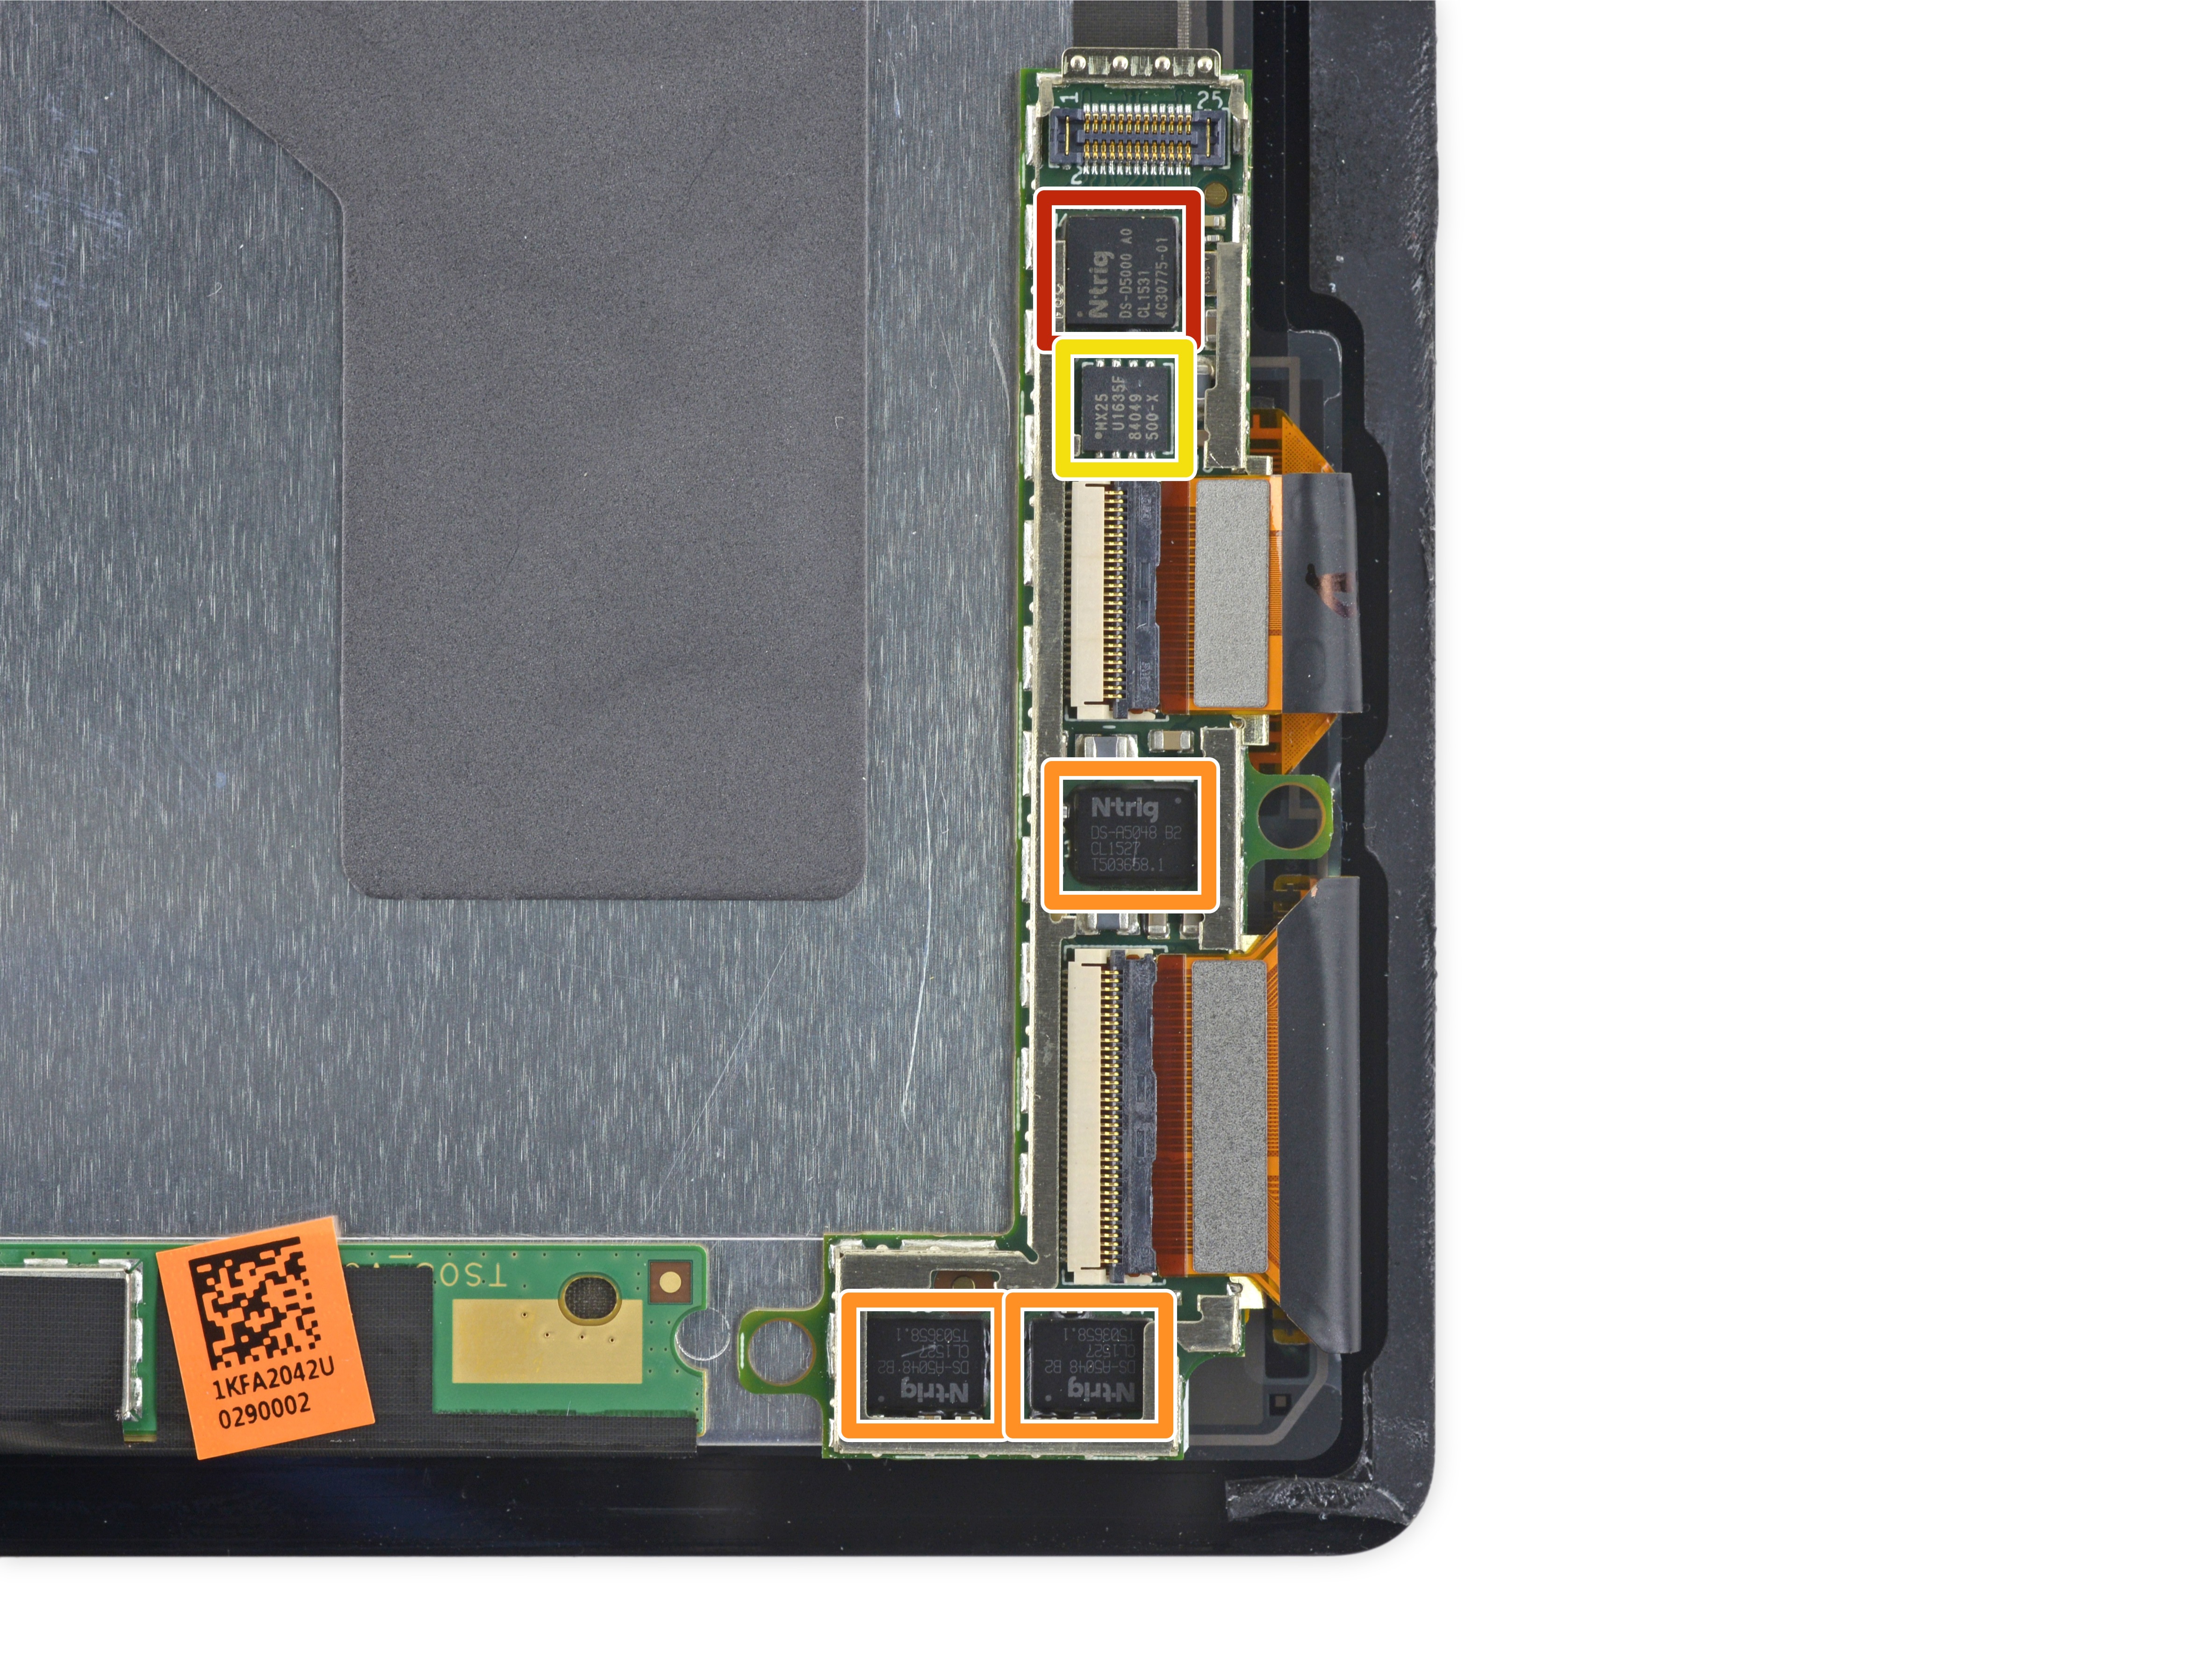
Let's look at what chips are on the circuit.
Red: N-trig DS-D5000 A1
Orange: N-trig DS-D5048 B2
Yellow: Macronix MX25U1635F 1.8V 16 MB MXSMIO Serial Flash
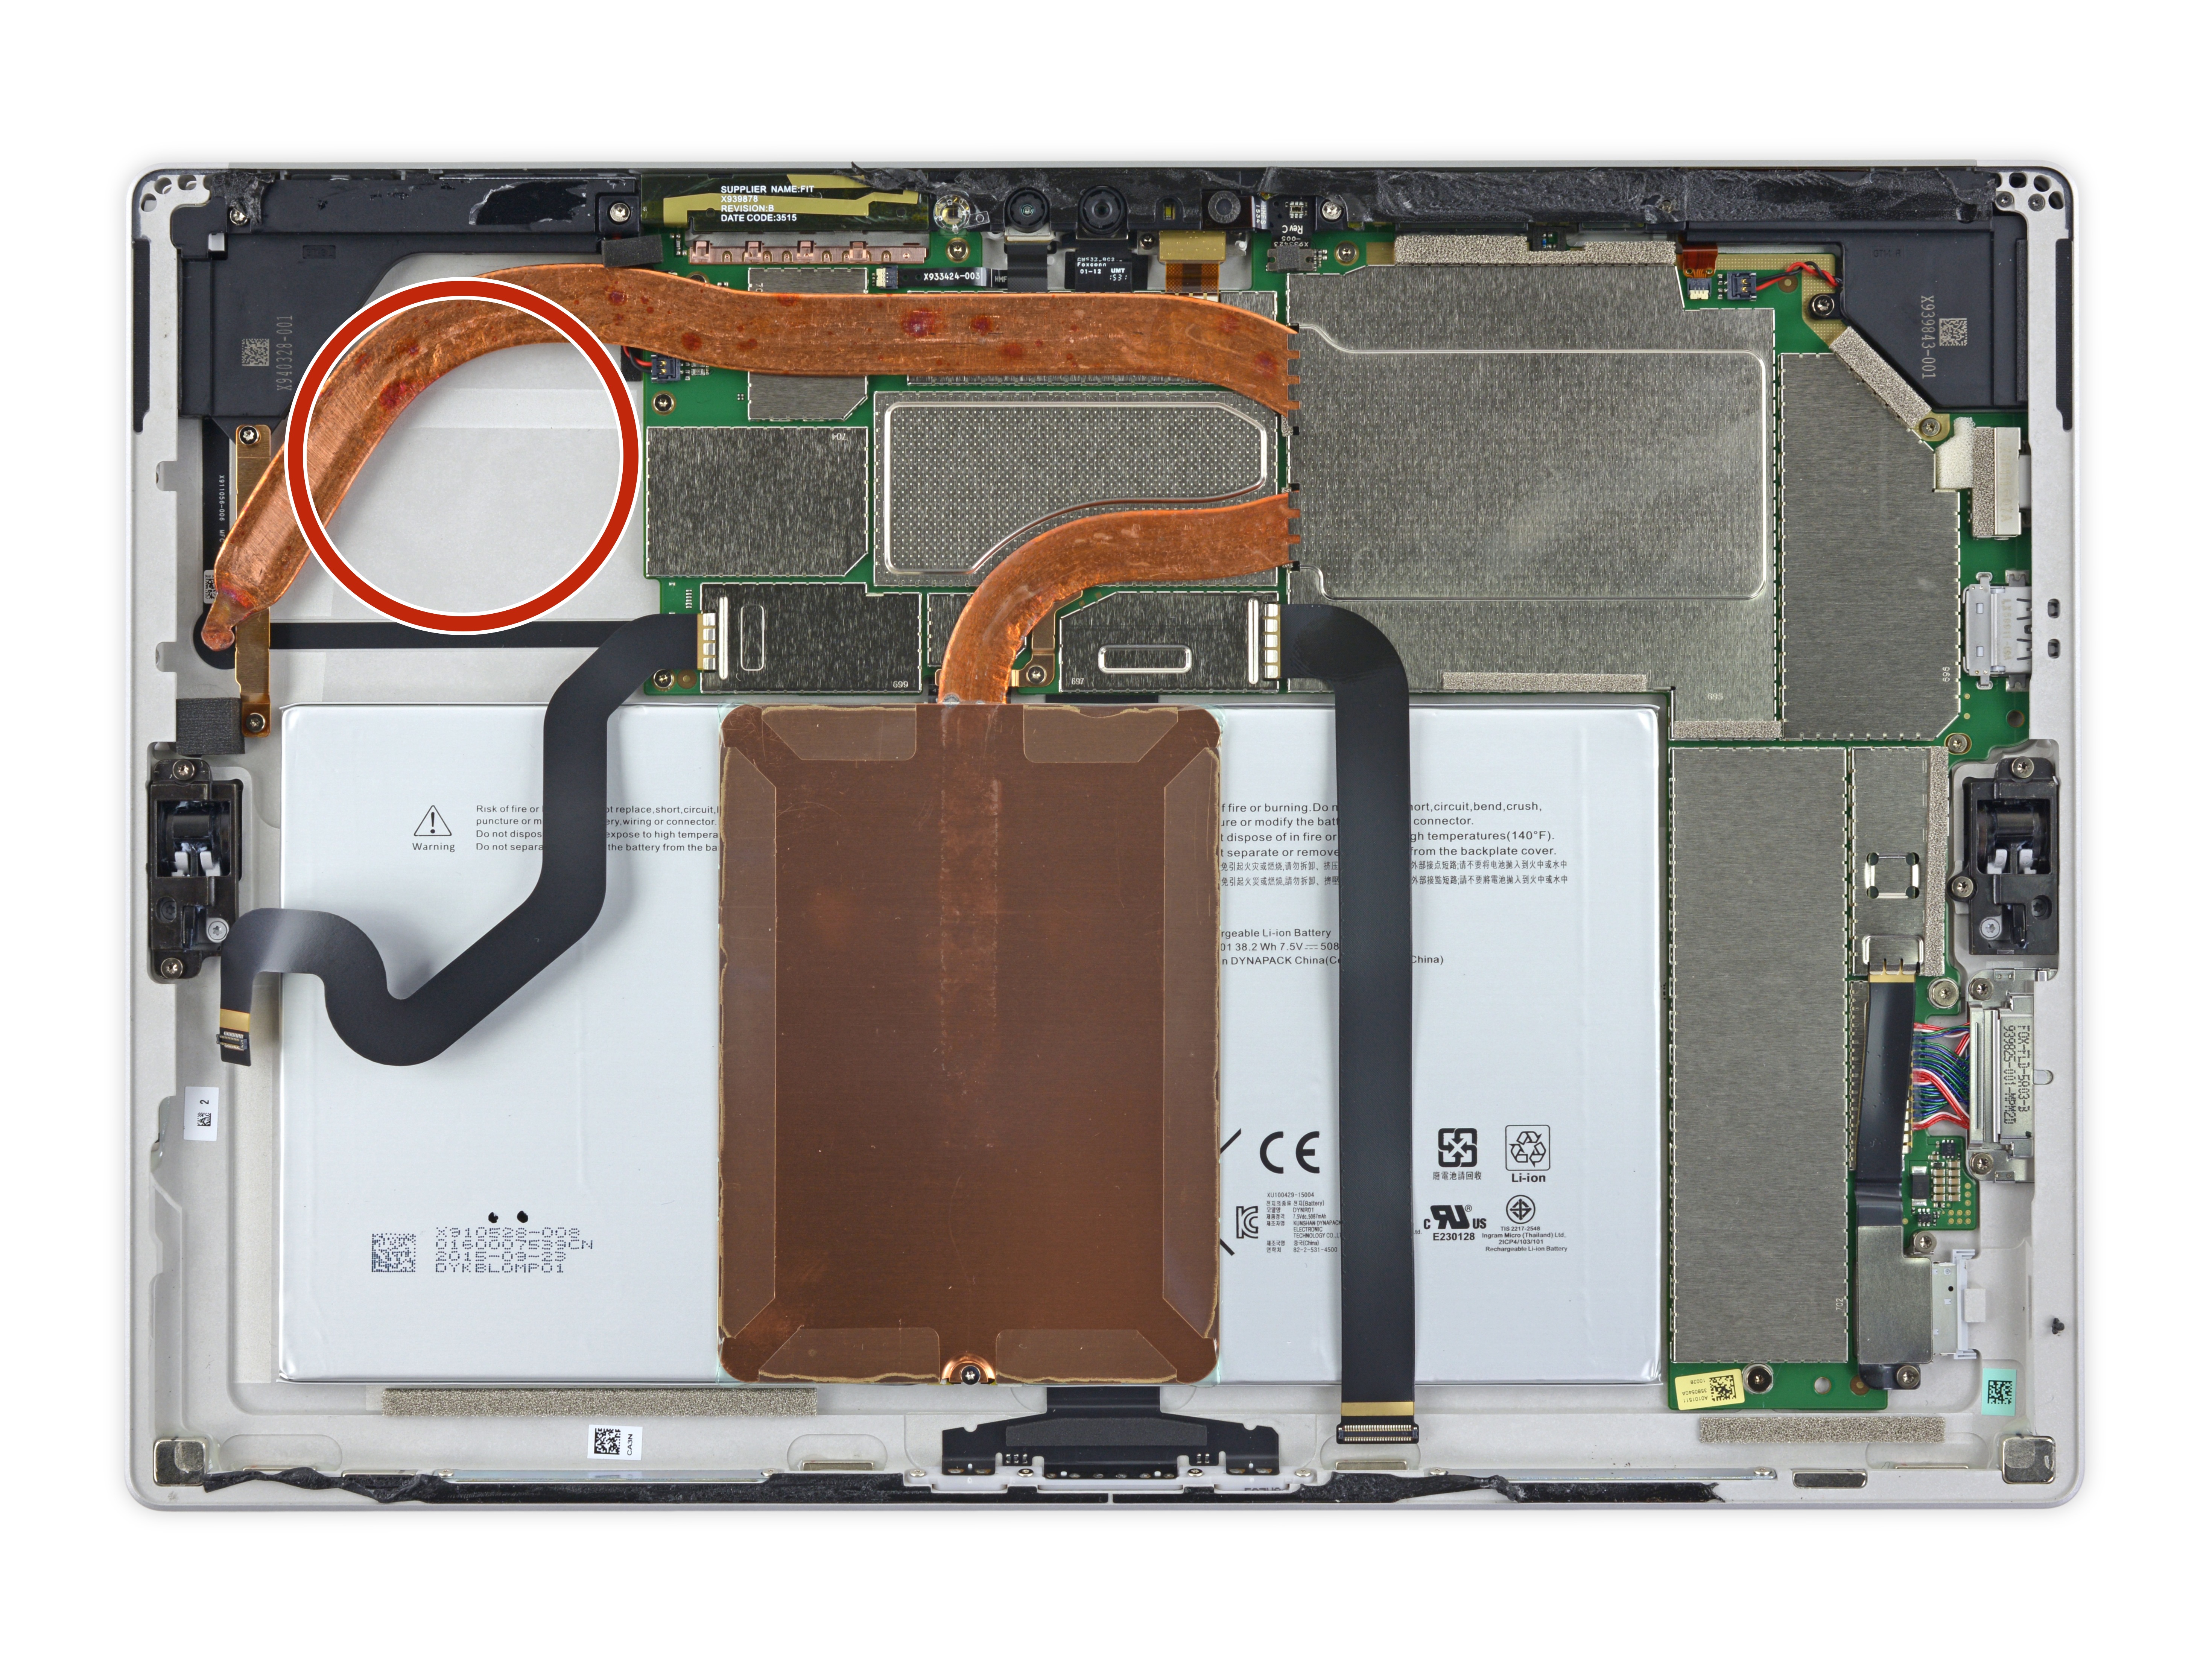
Let's take a look inside the fuselage. The red circle did not even have any components. We speculate that this position should be the location of the fan and radiator of Sophie's hybrid cooling system, but since we disassemble the Core m3 processor version with only 4.5 watts of power, the heat output is lower, so there is no fan assembly.
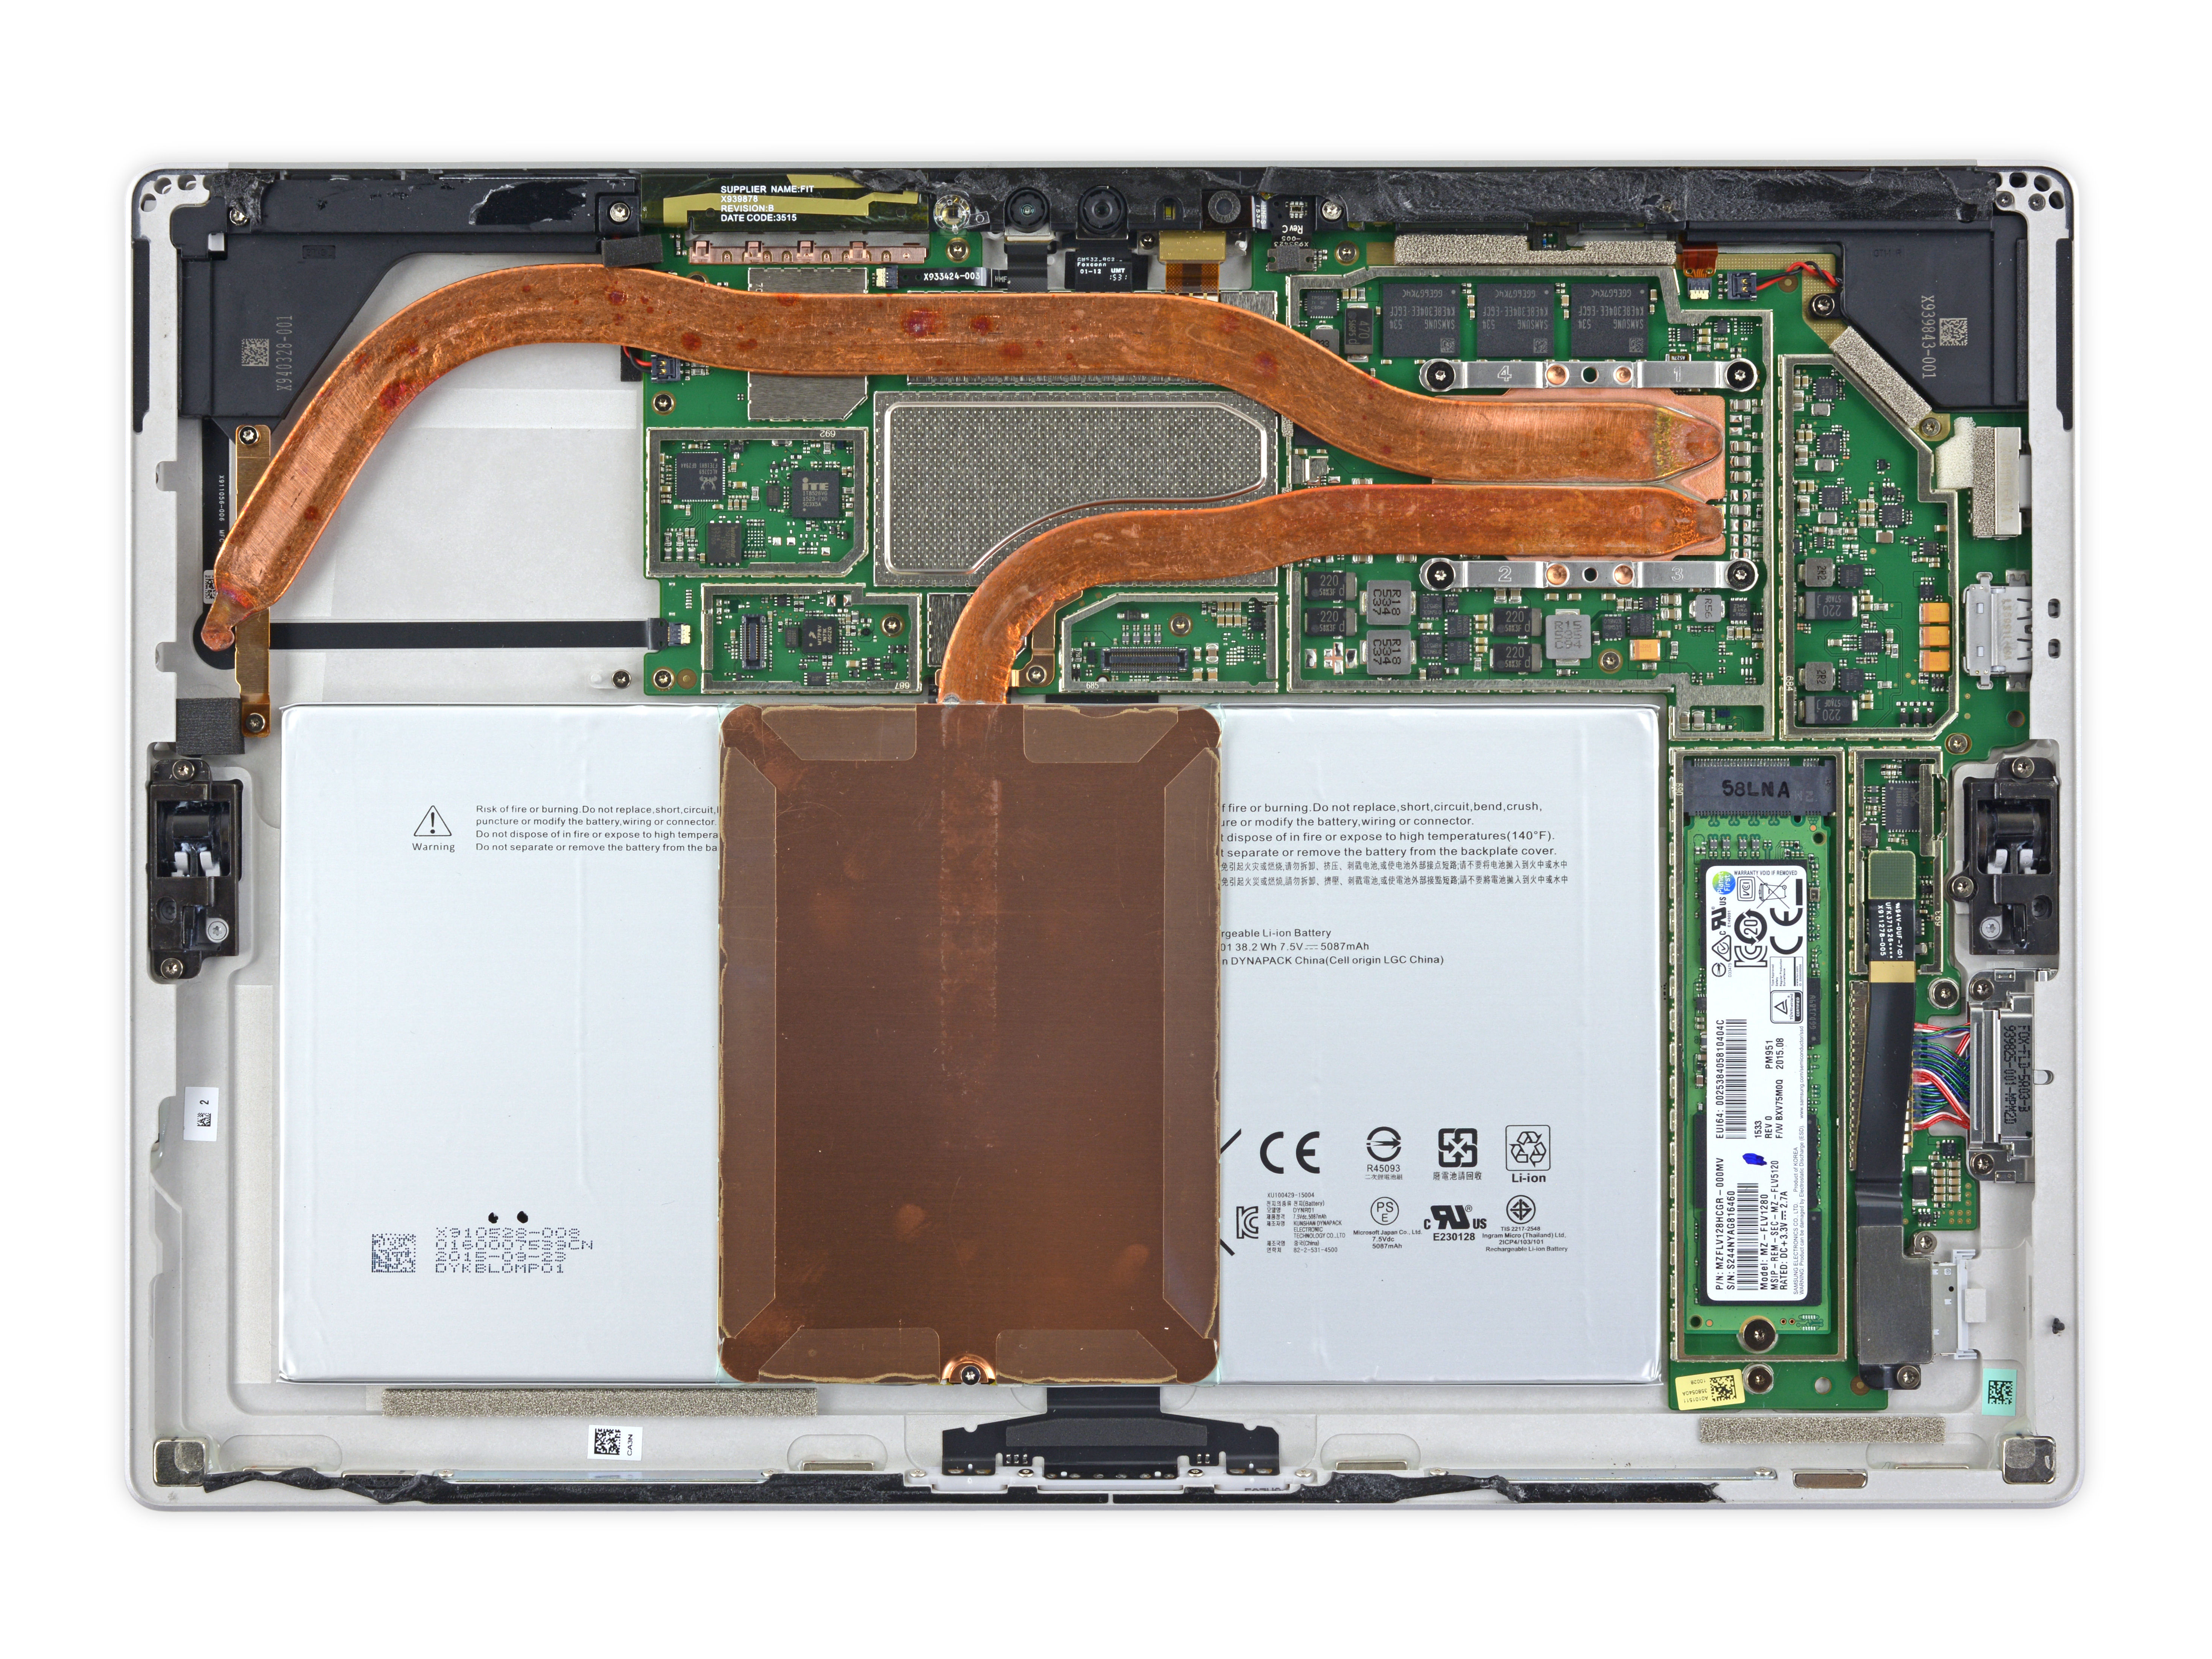
Remove all metal shields and cables from the motherboard.
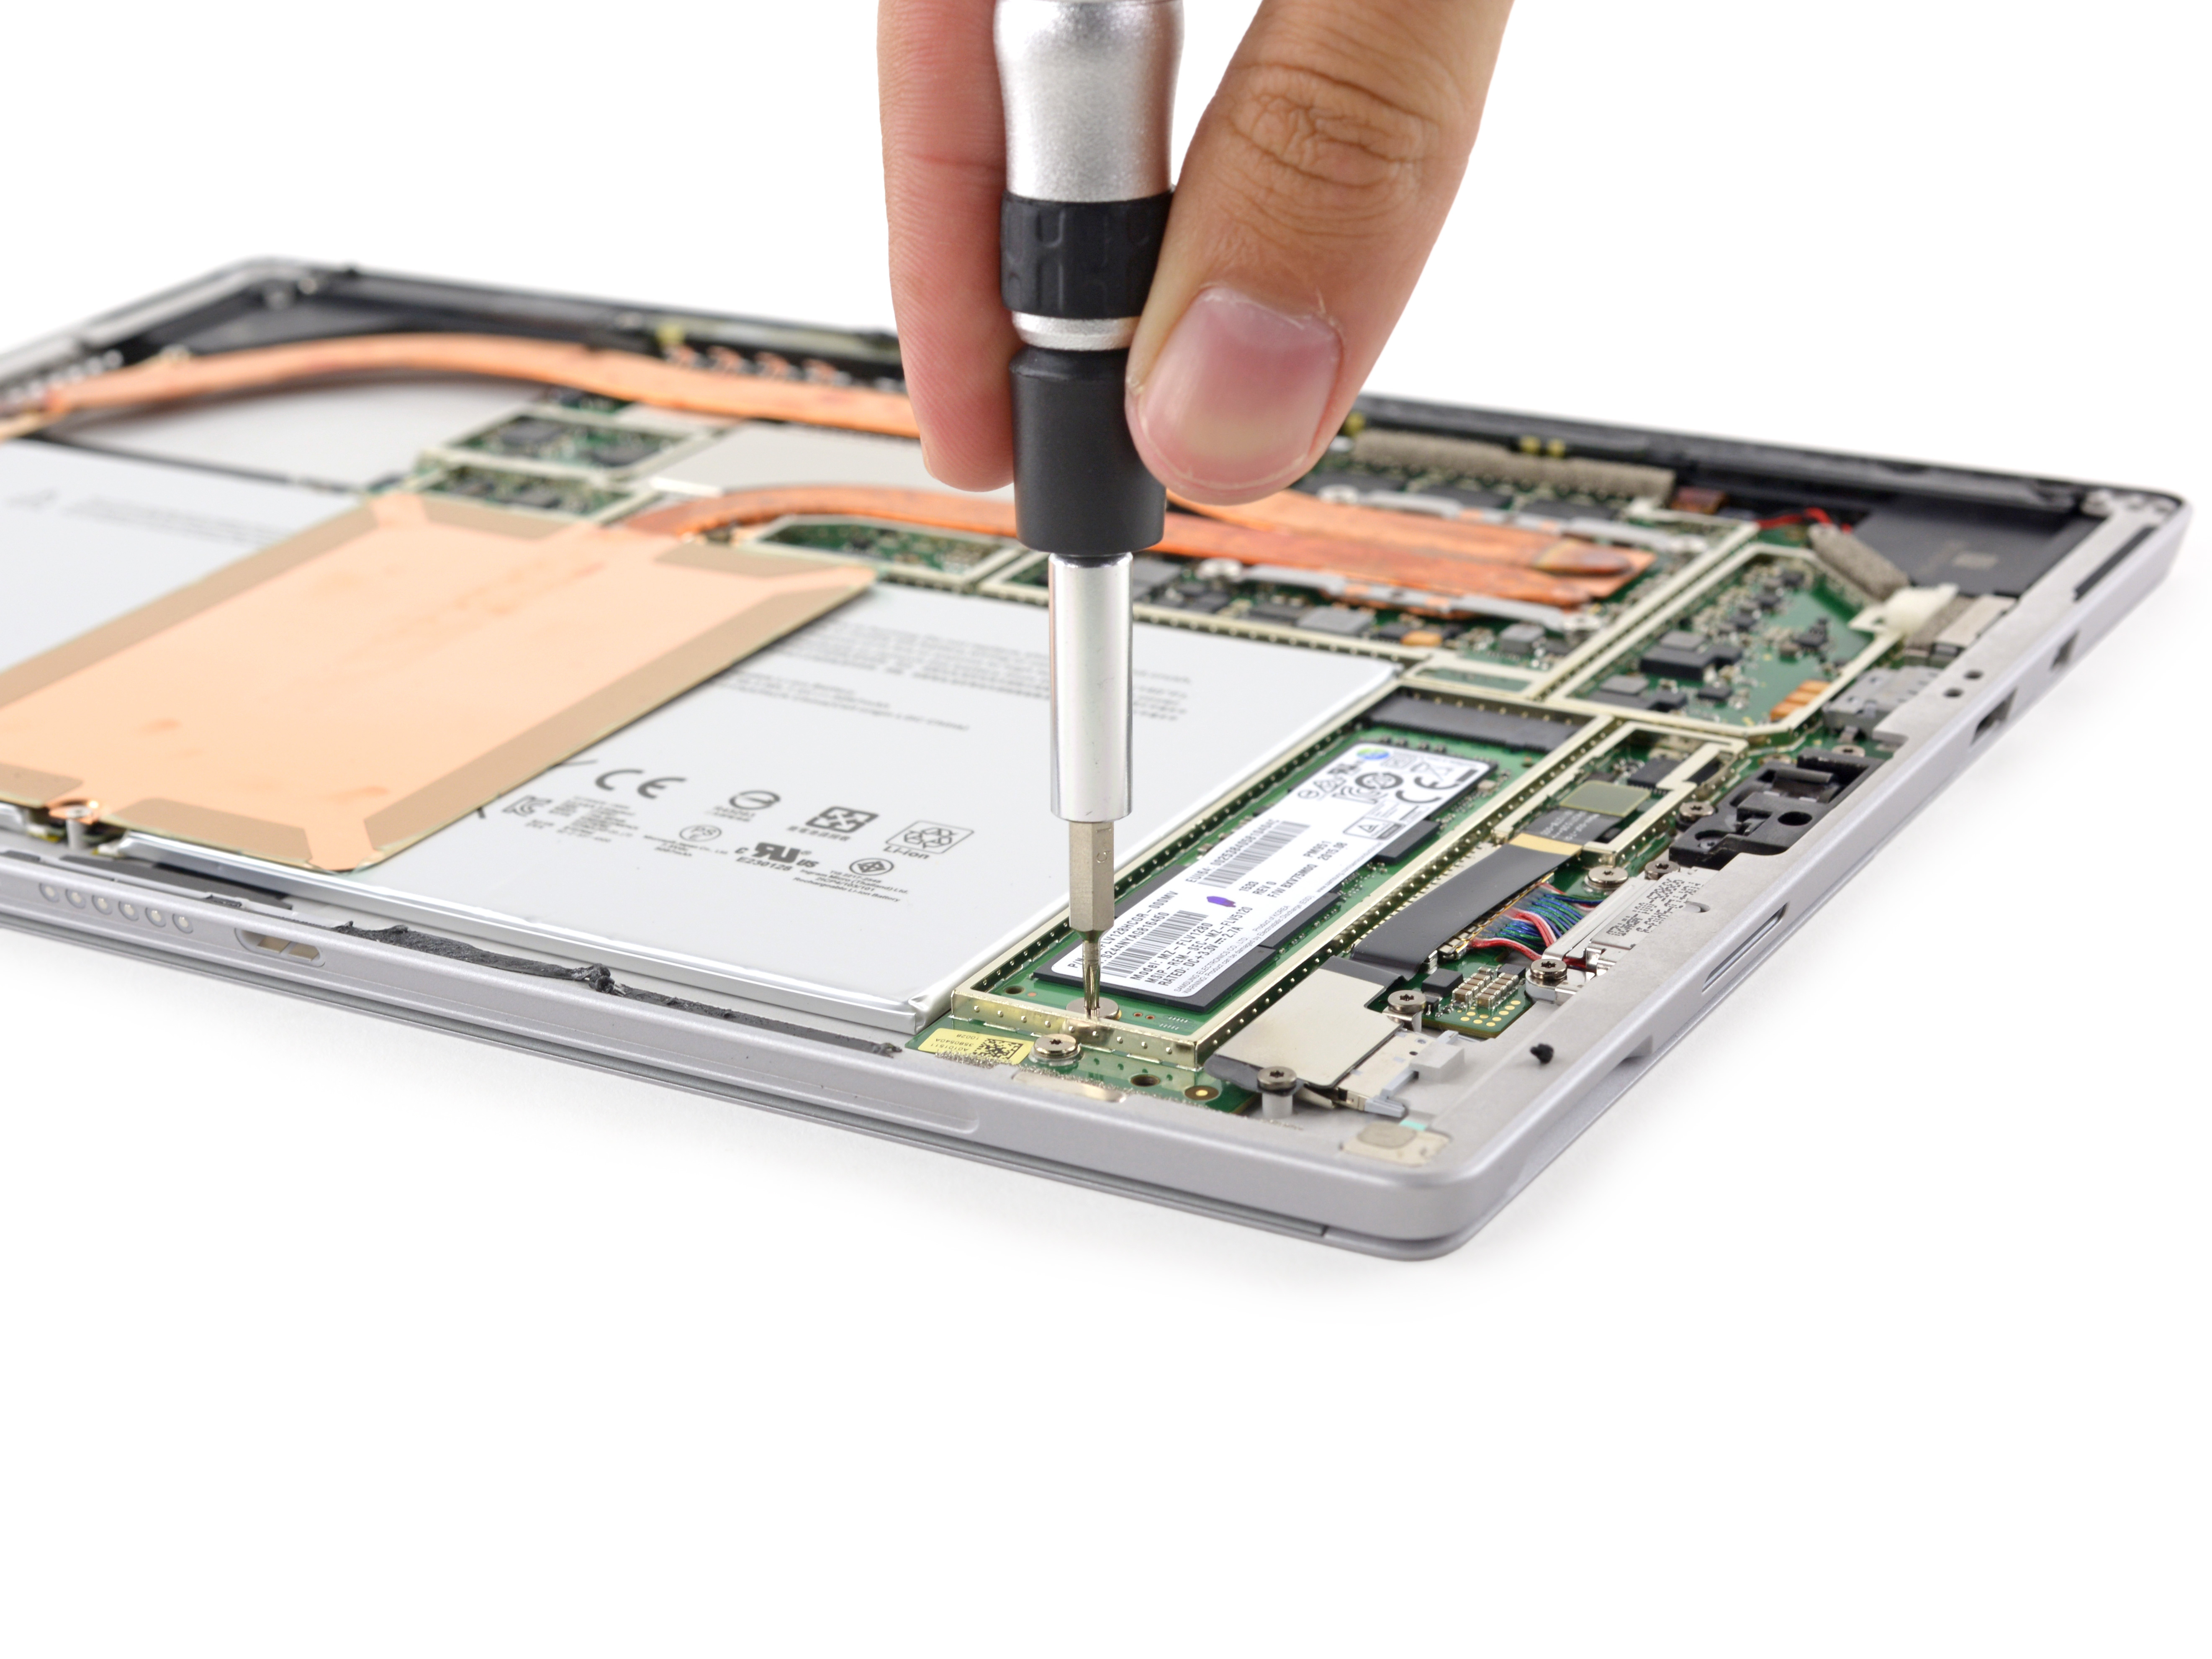
The motherboard is very compact and most parts are tightly assembled. We first remove the SSD and remove it with a screw.
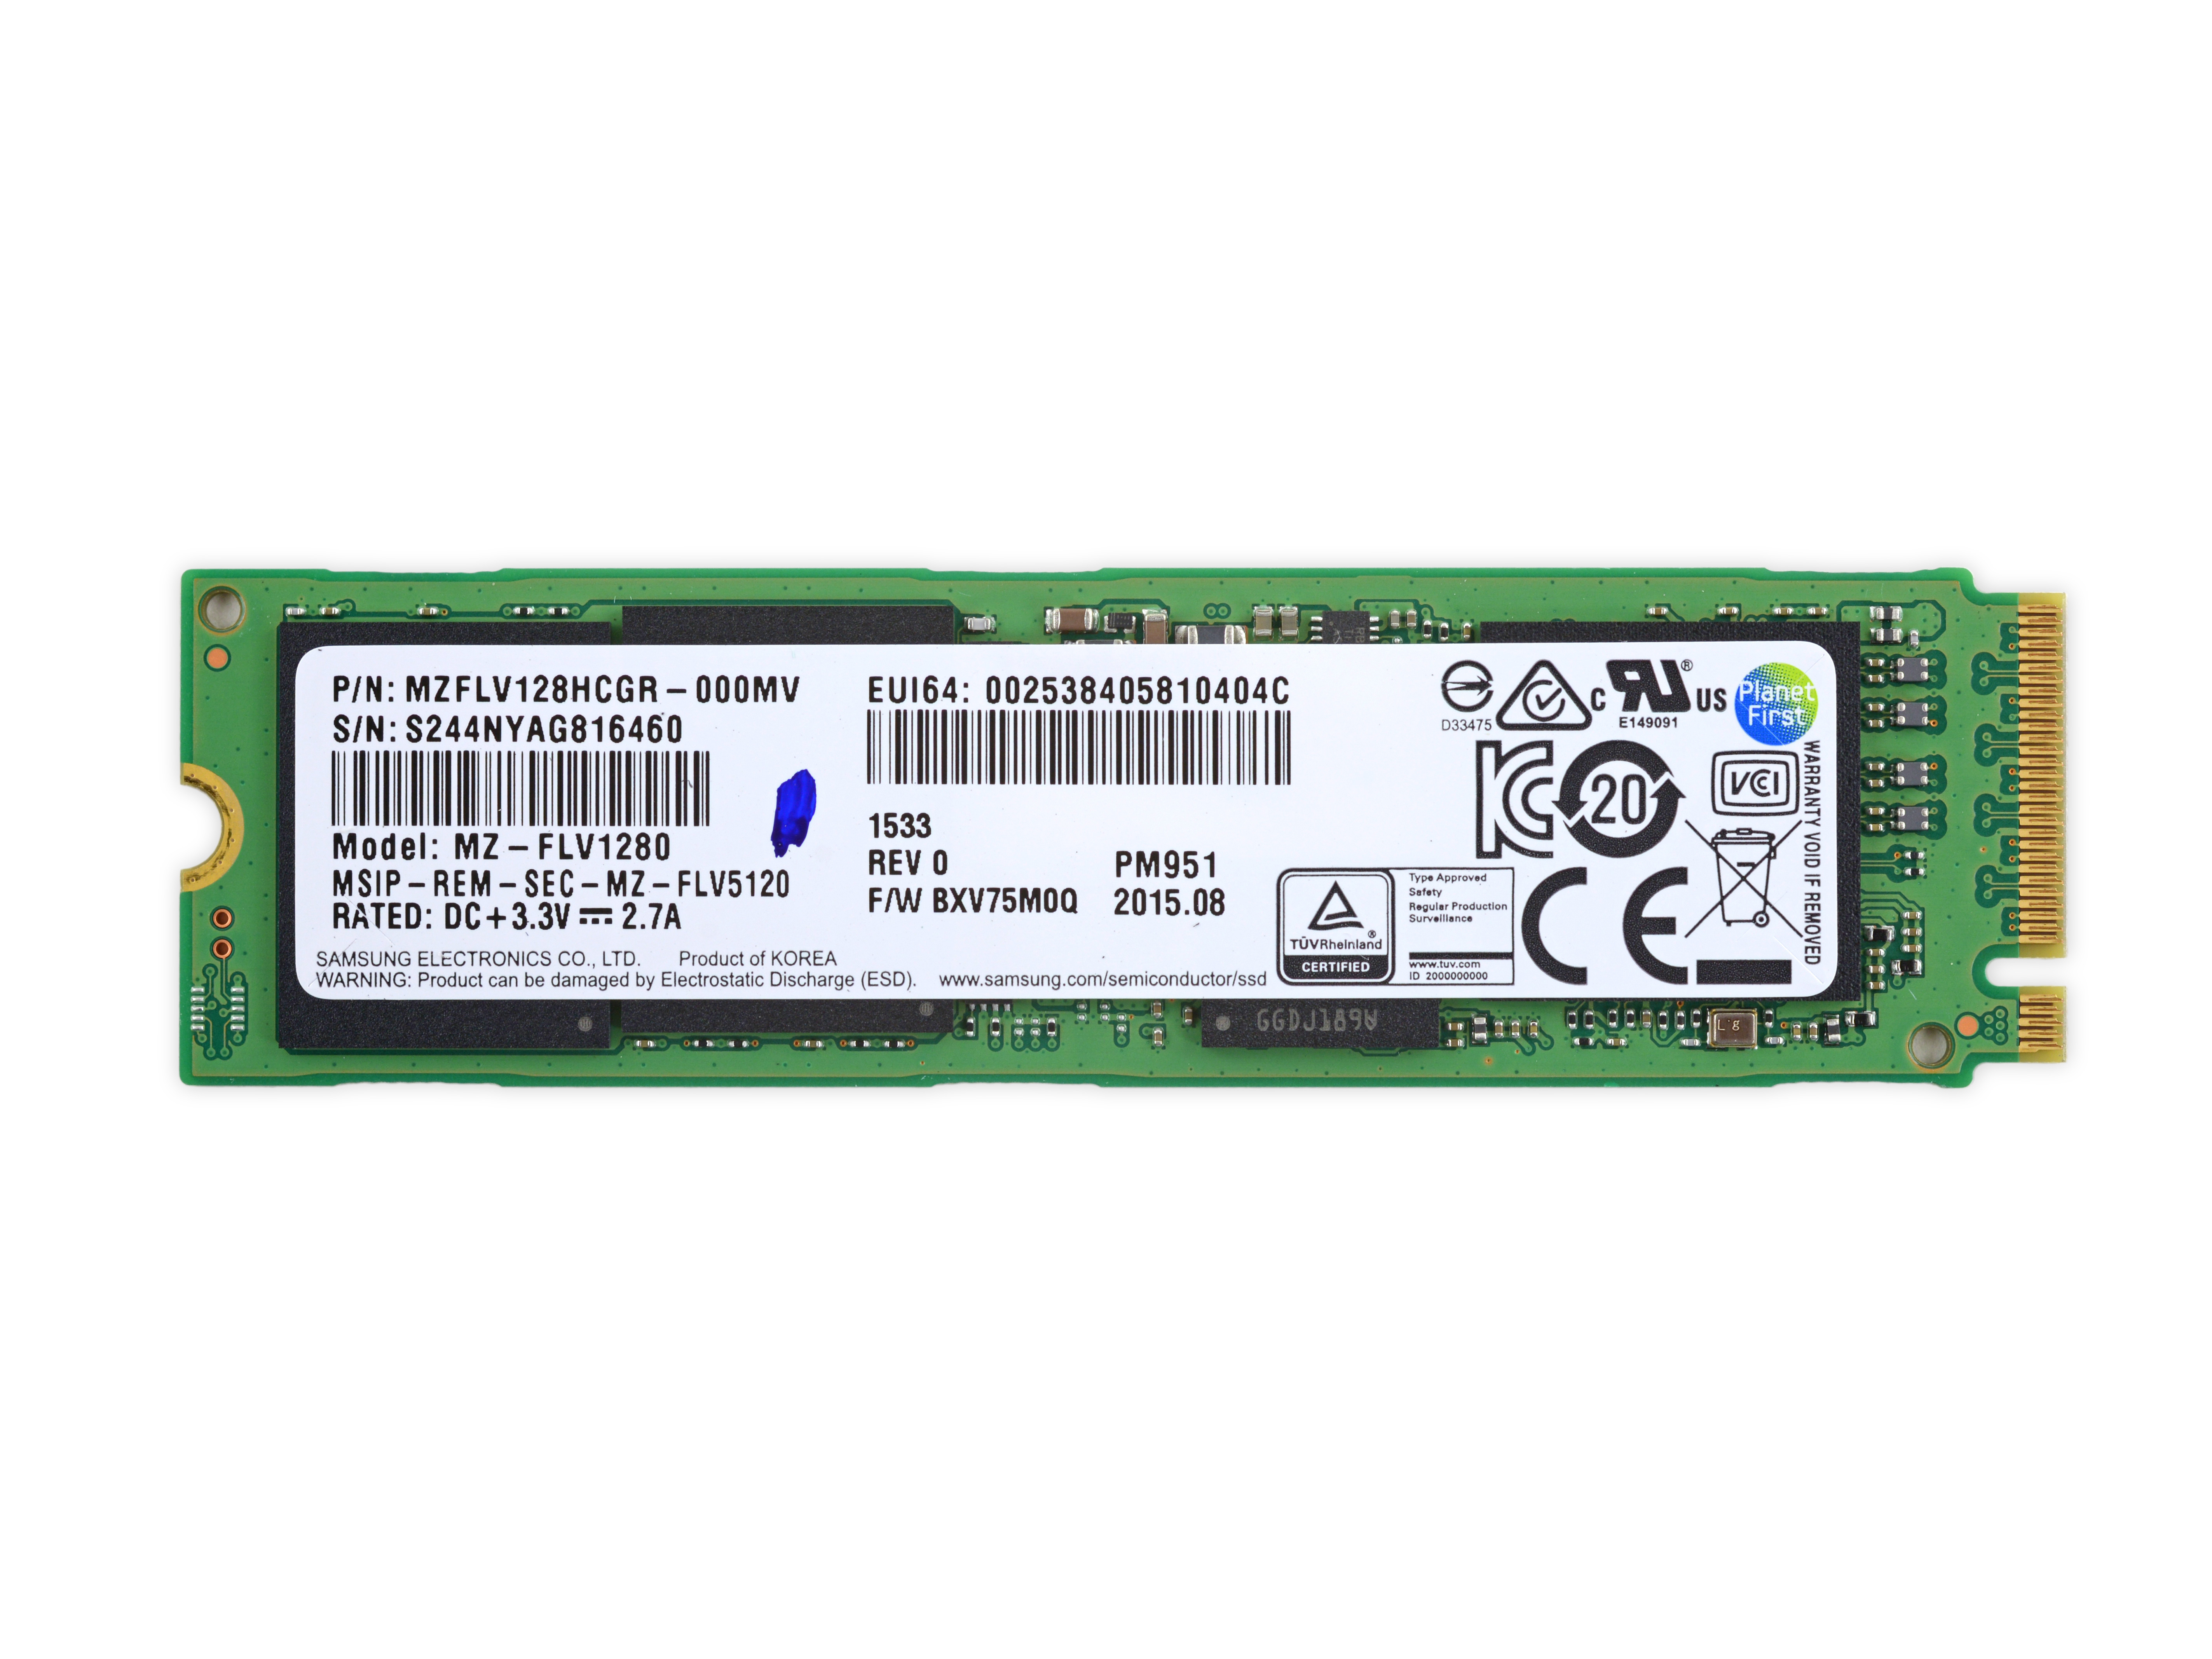
Sophie 4's hard drive is Samsung's PCIE interface SSD, model PM951.

Let's take a look at what chips are on this SSD.
Red: Samsung S4LN058A01 CIE 3.0 x4 NVMe Flash Controller
Orange: Samsung K9CHGY8S5C 64 GB NAND Flash
Yellow: Samsung SEC 525 K4E4E32
Green: Texas Instruments TPS22966 5.5V, 6A, 16mΩ, Dual Channel Load Switch
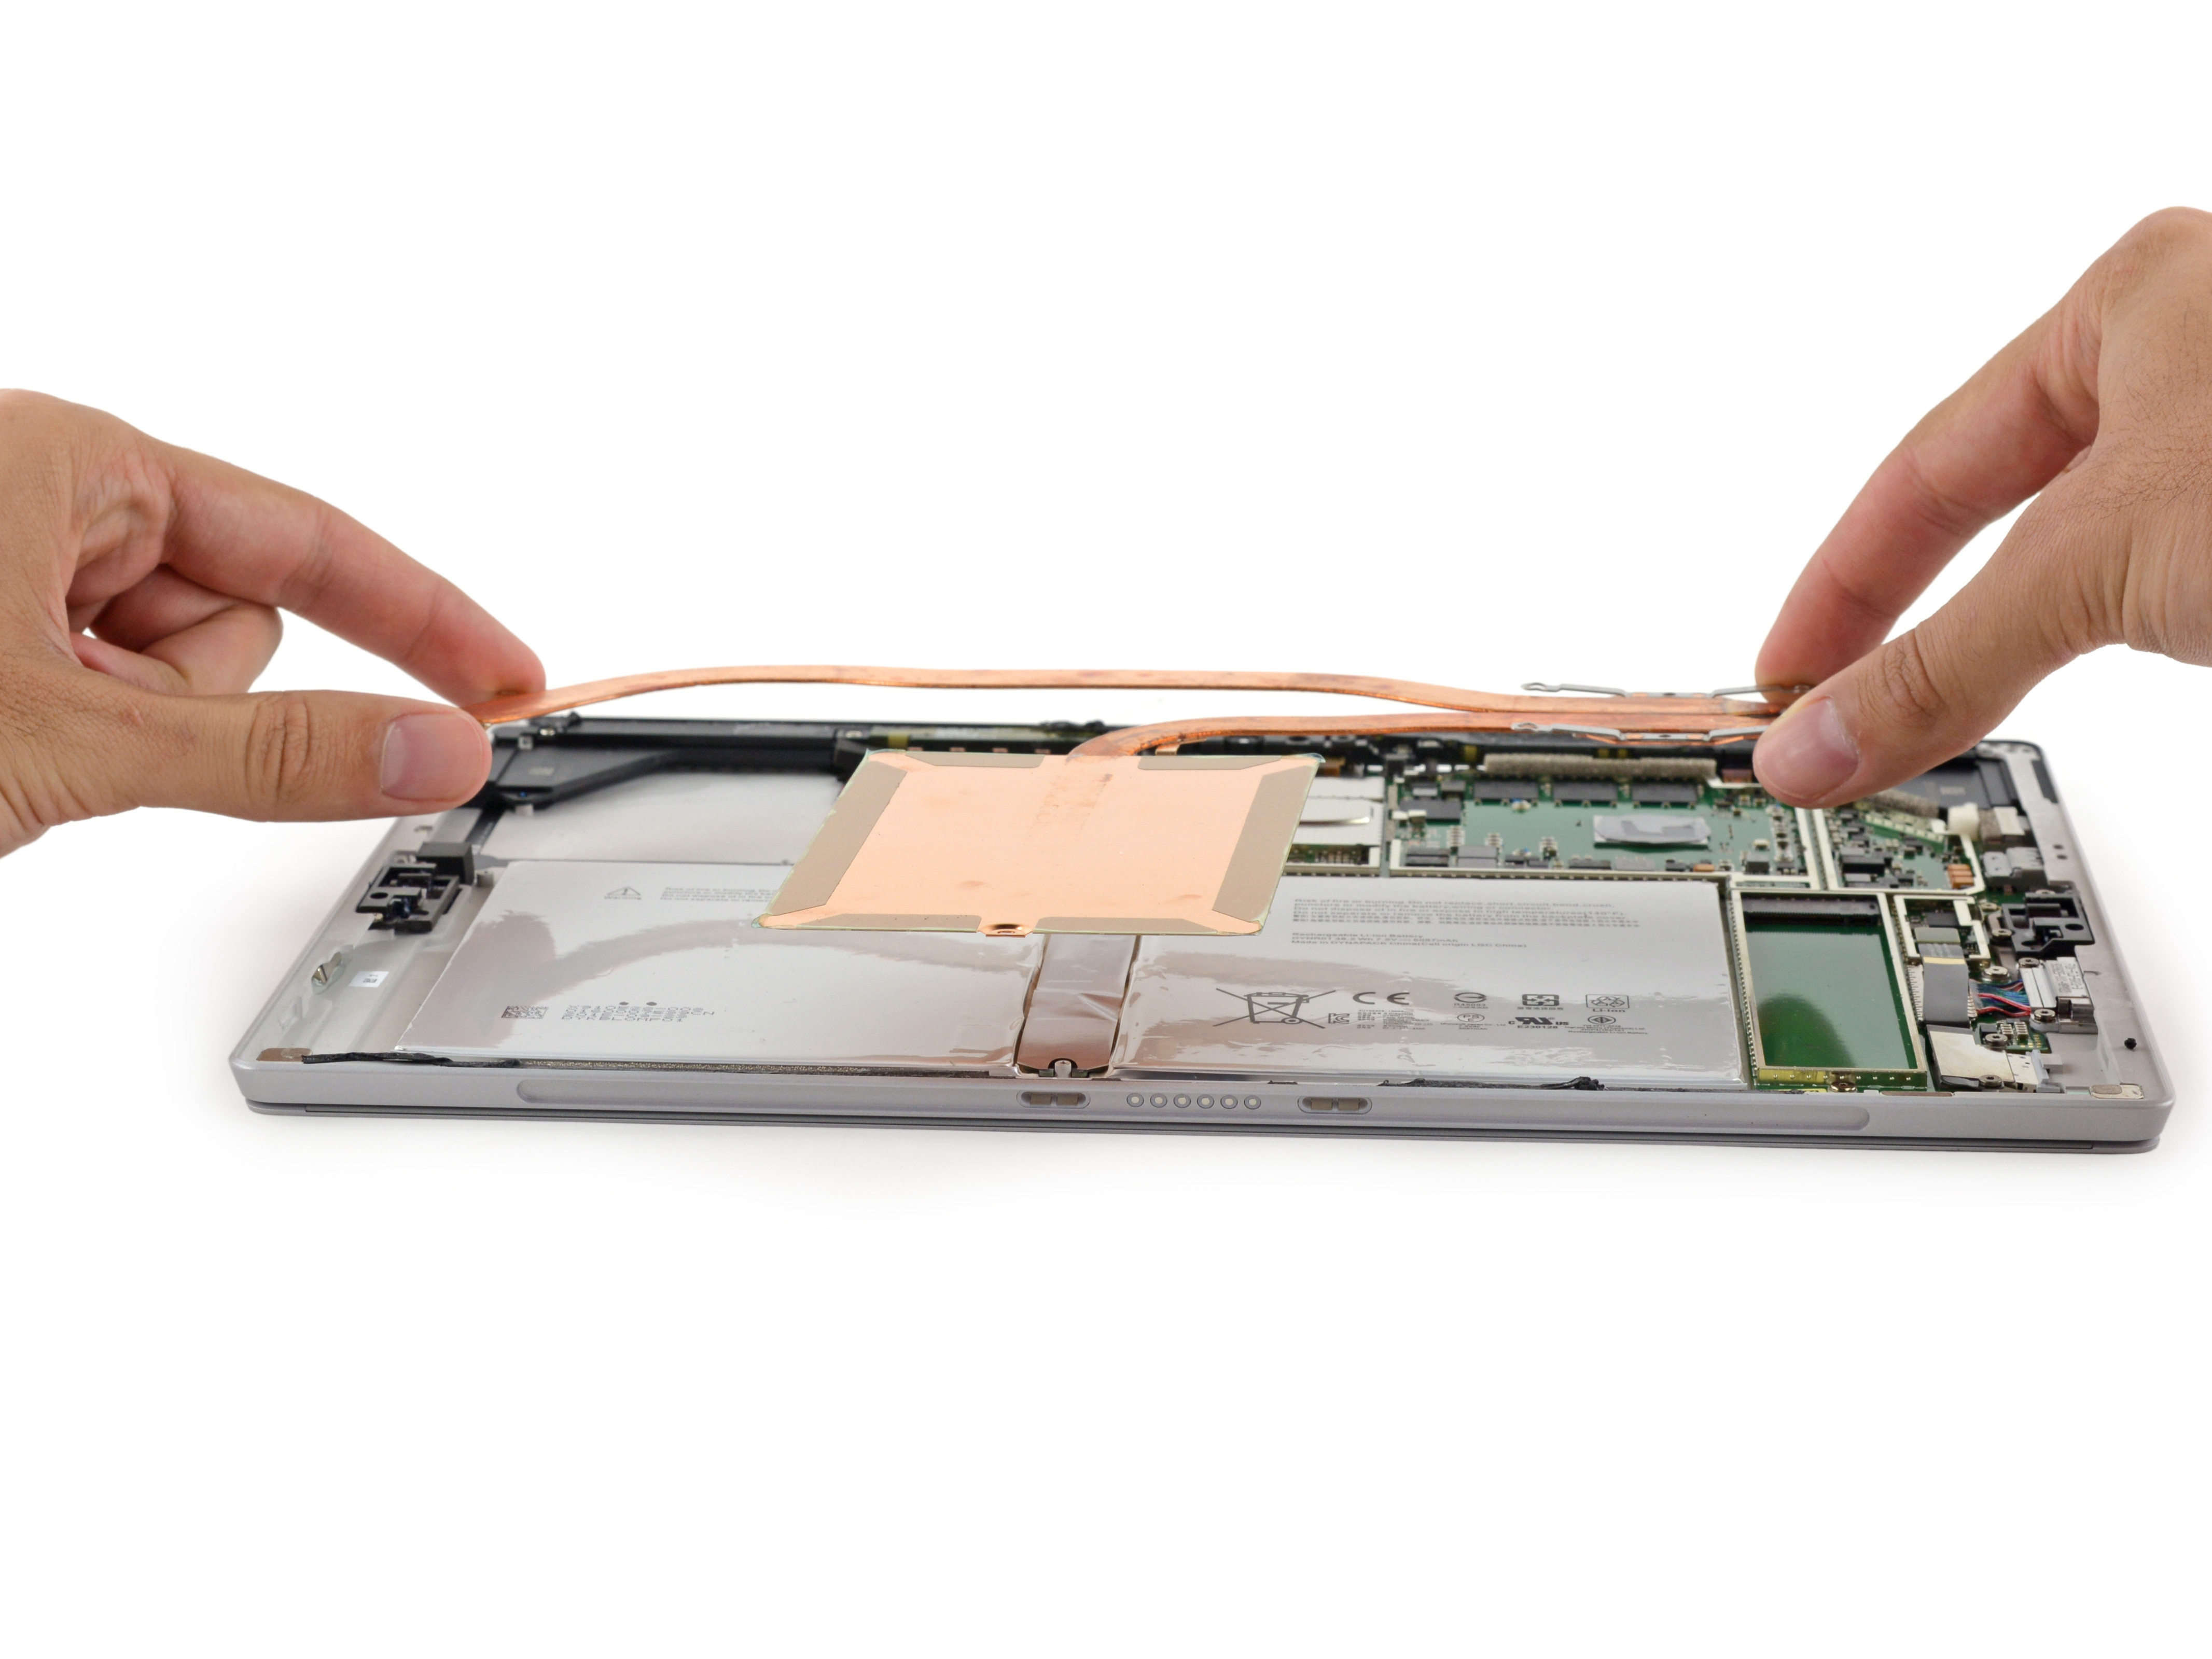
Sophie 4's cooling module gives a very deep impression, with a long heat pipe and a large area of ​​pure copper heat pipe.

This is a hybrid cooling system that combines active cooling with passive cooling. Passive cooling is used when the temperature is low, and the active cooling fan is activated when the temperature is higher.
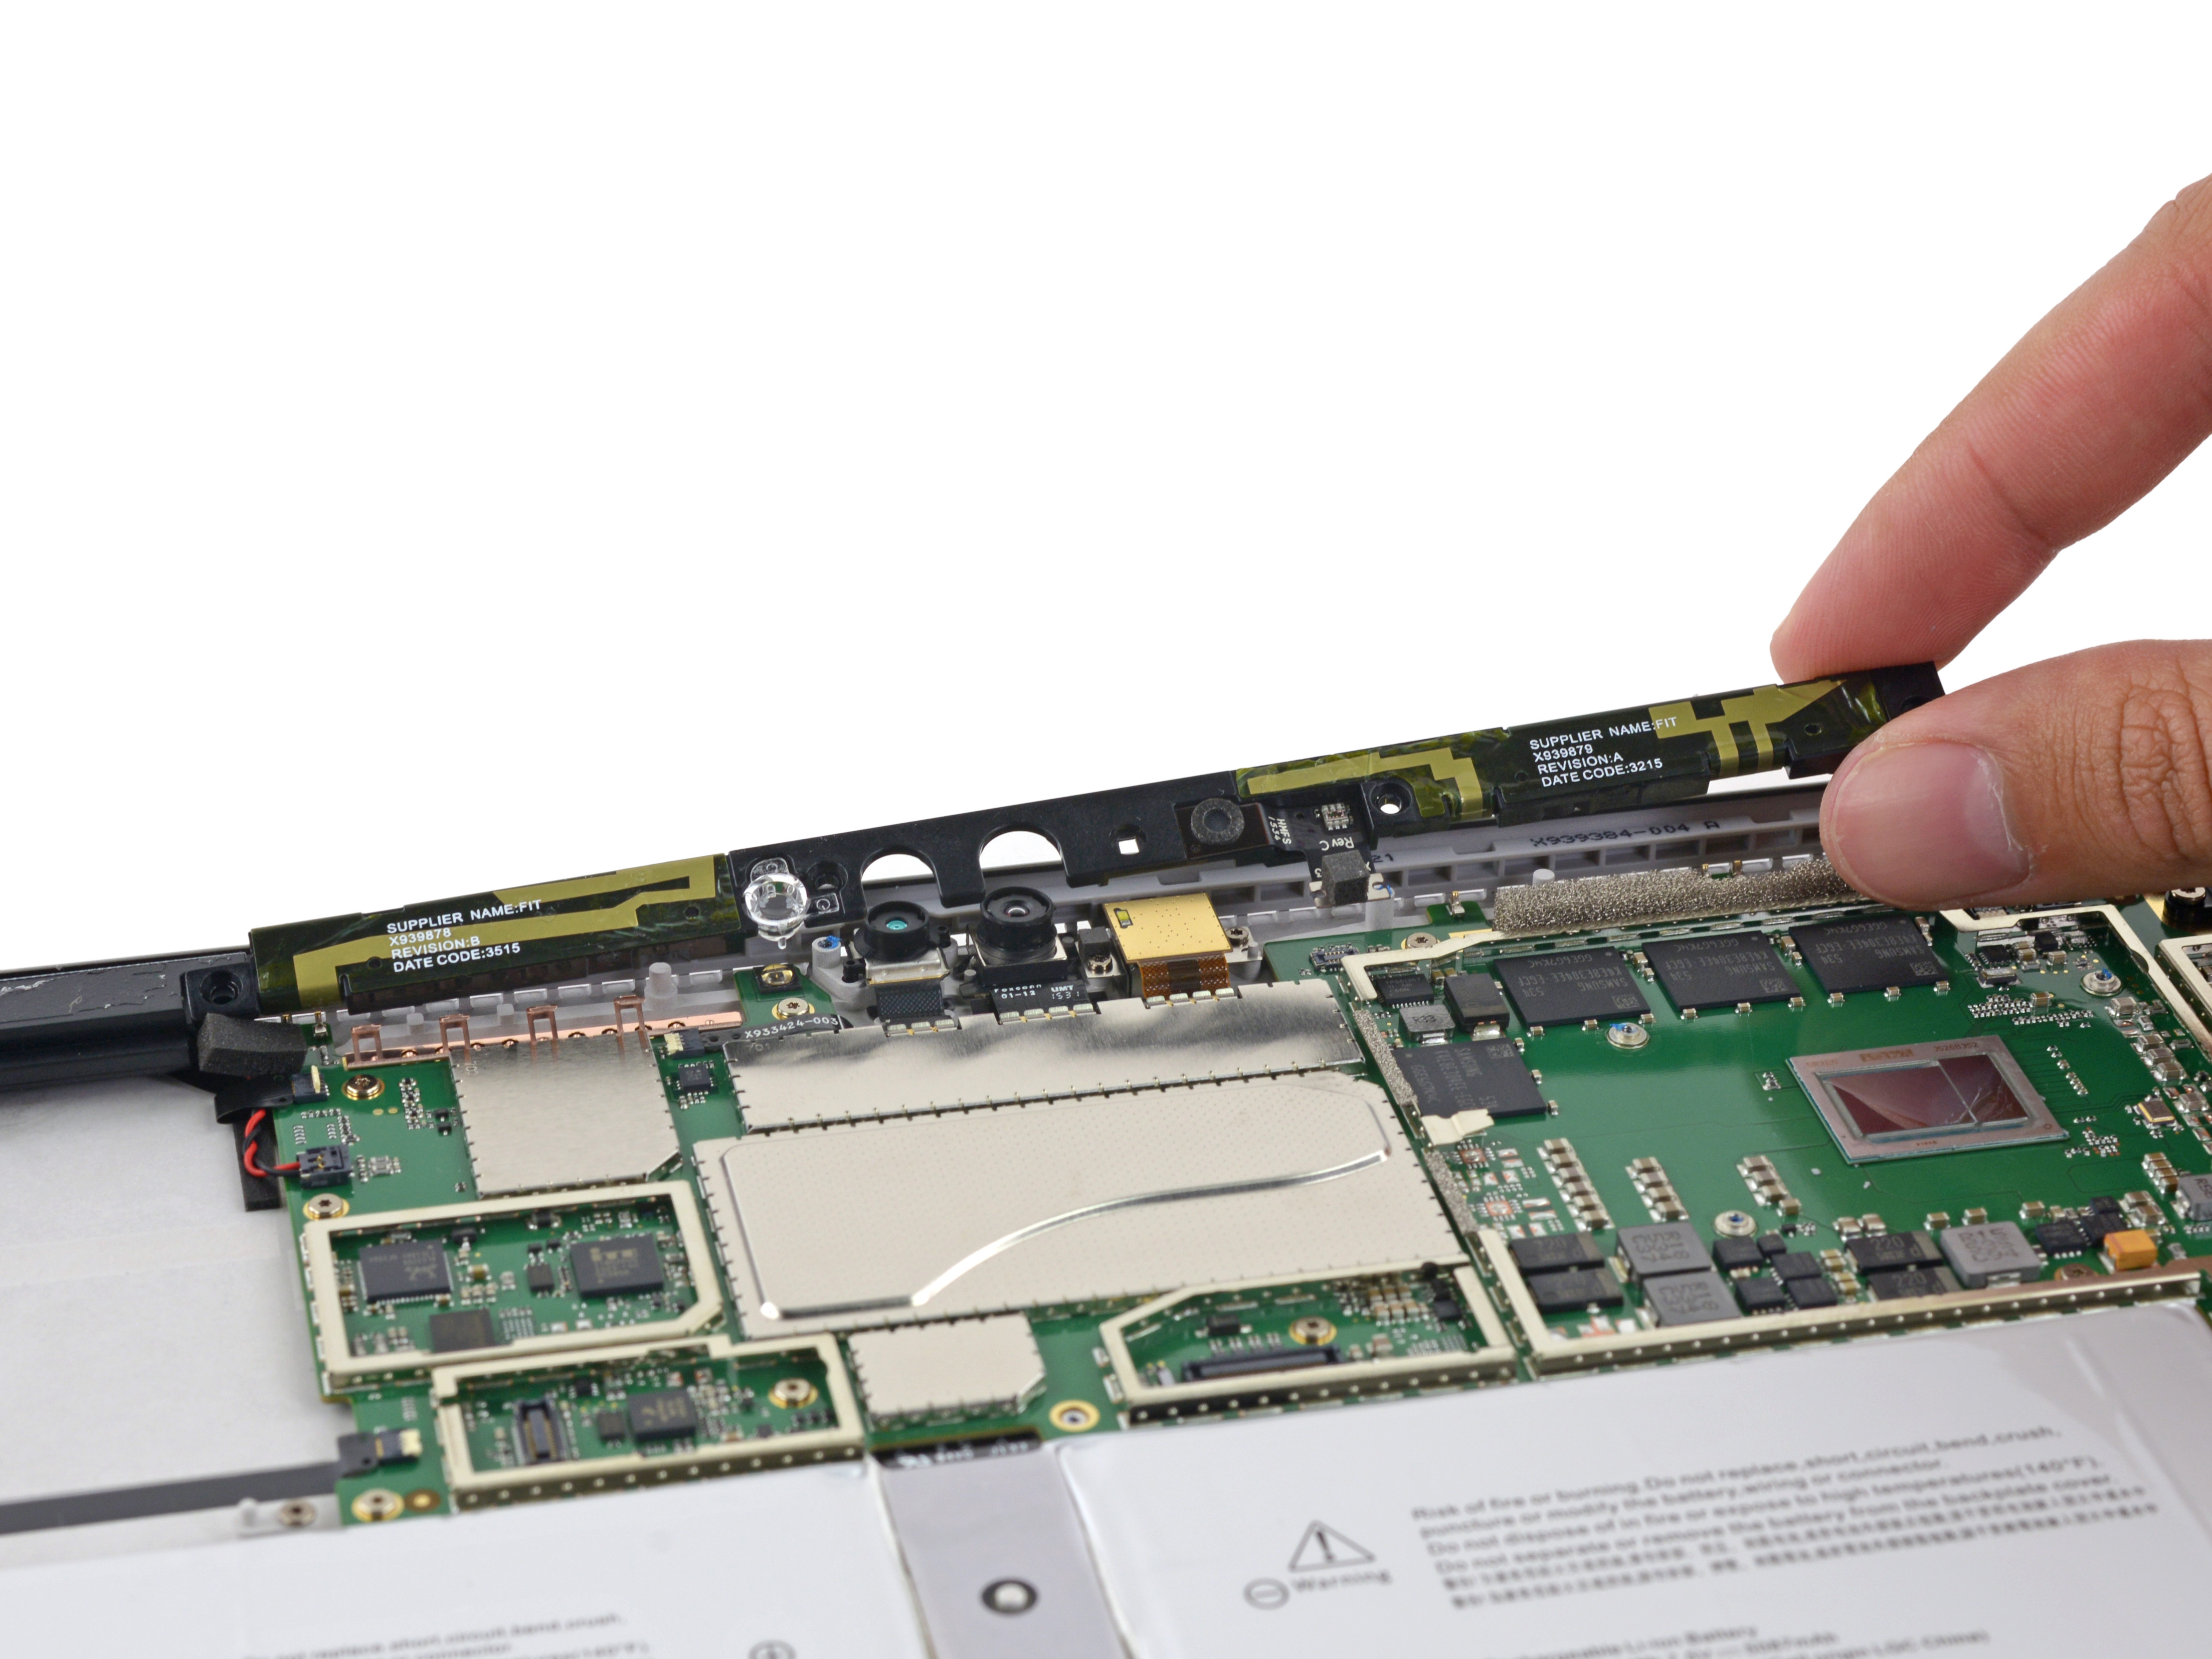
Remove the camera module attachment plate by removing the screws.

Let’s take a look at this mysterious camera module
Red: Infrared emitter
Orange: Front camera
Yellow: infrared camera
Green: "Privacy light" indicator for rear camera
Light blue: microphone
Dark blue: light sensor
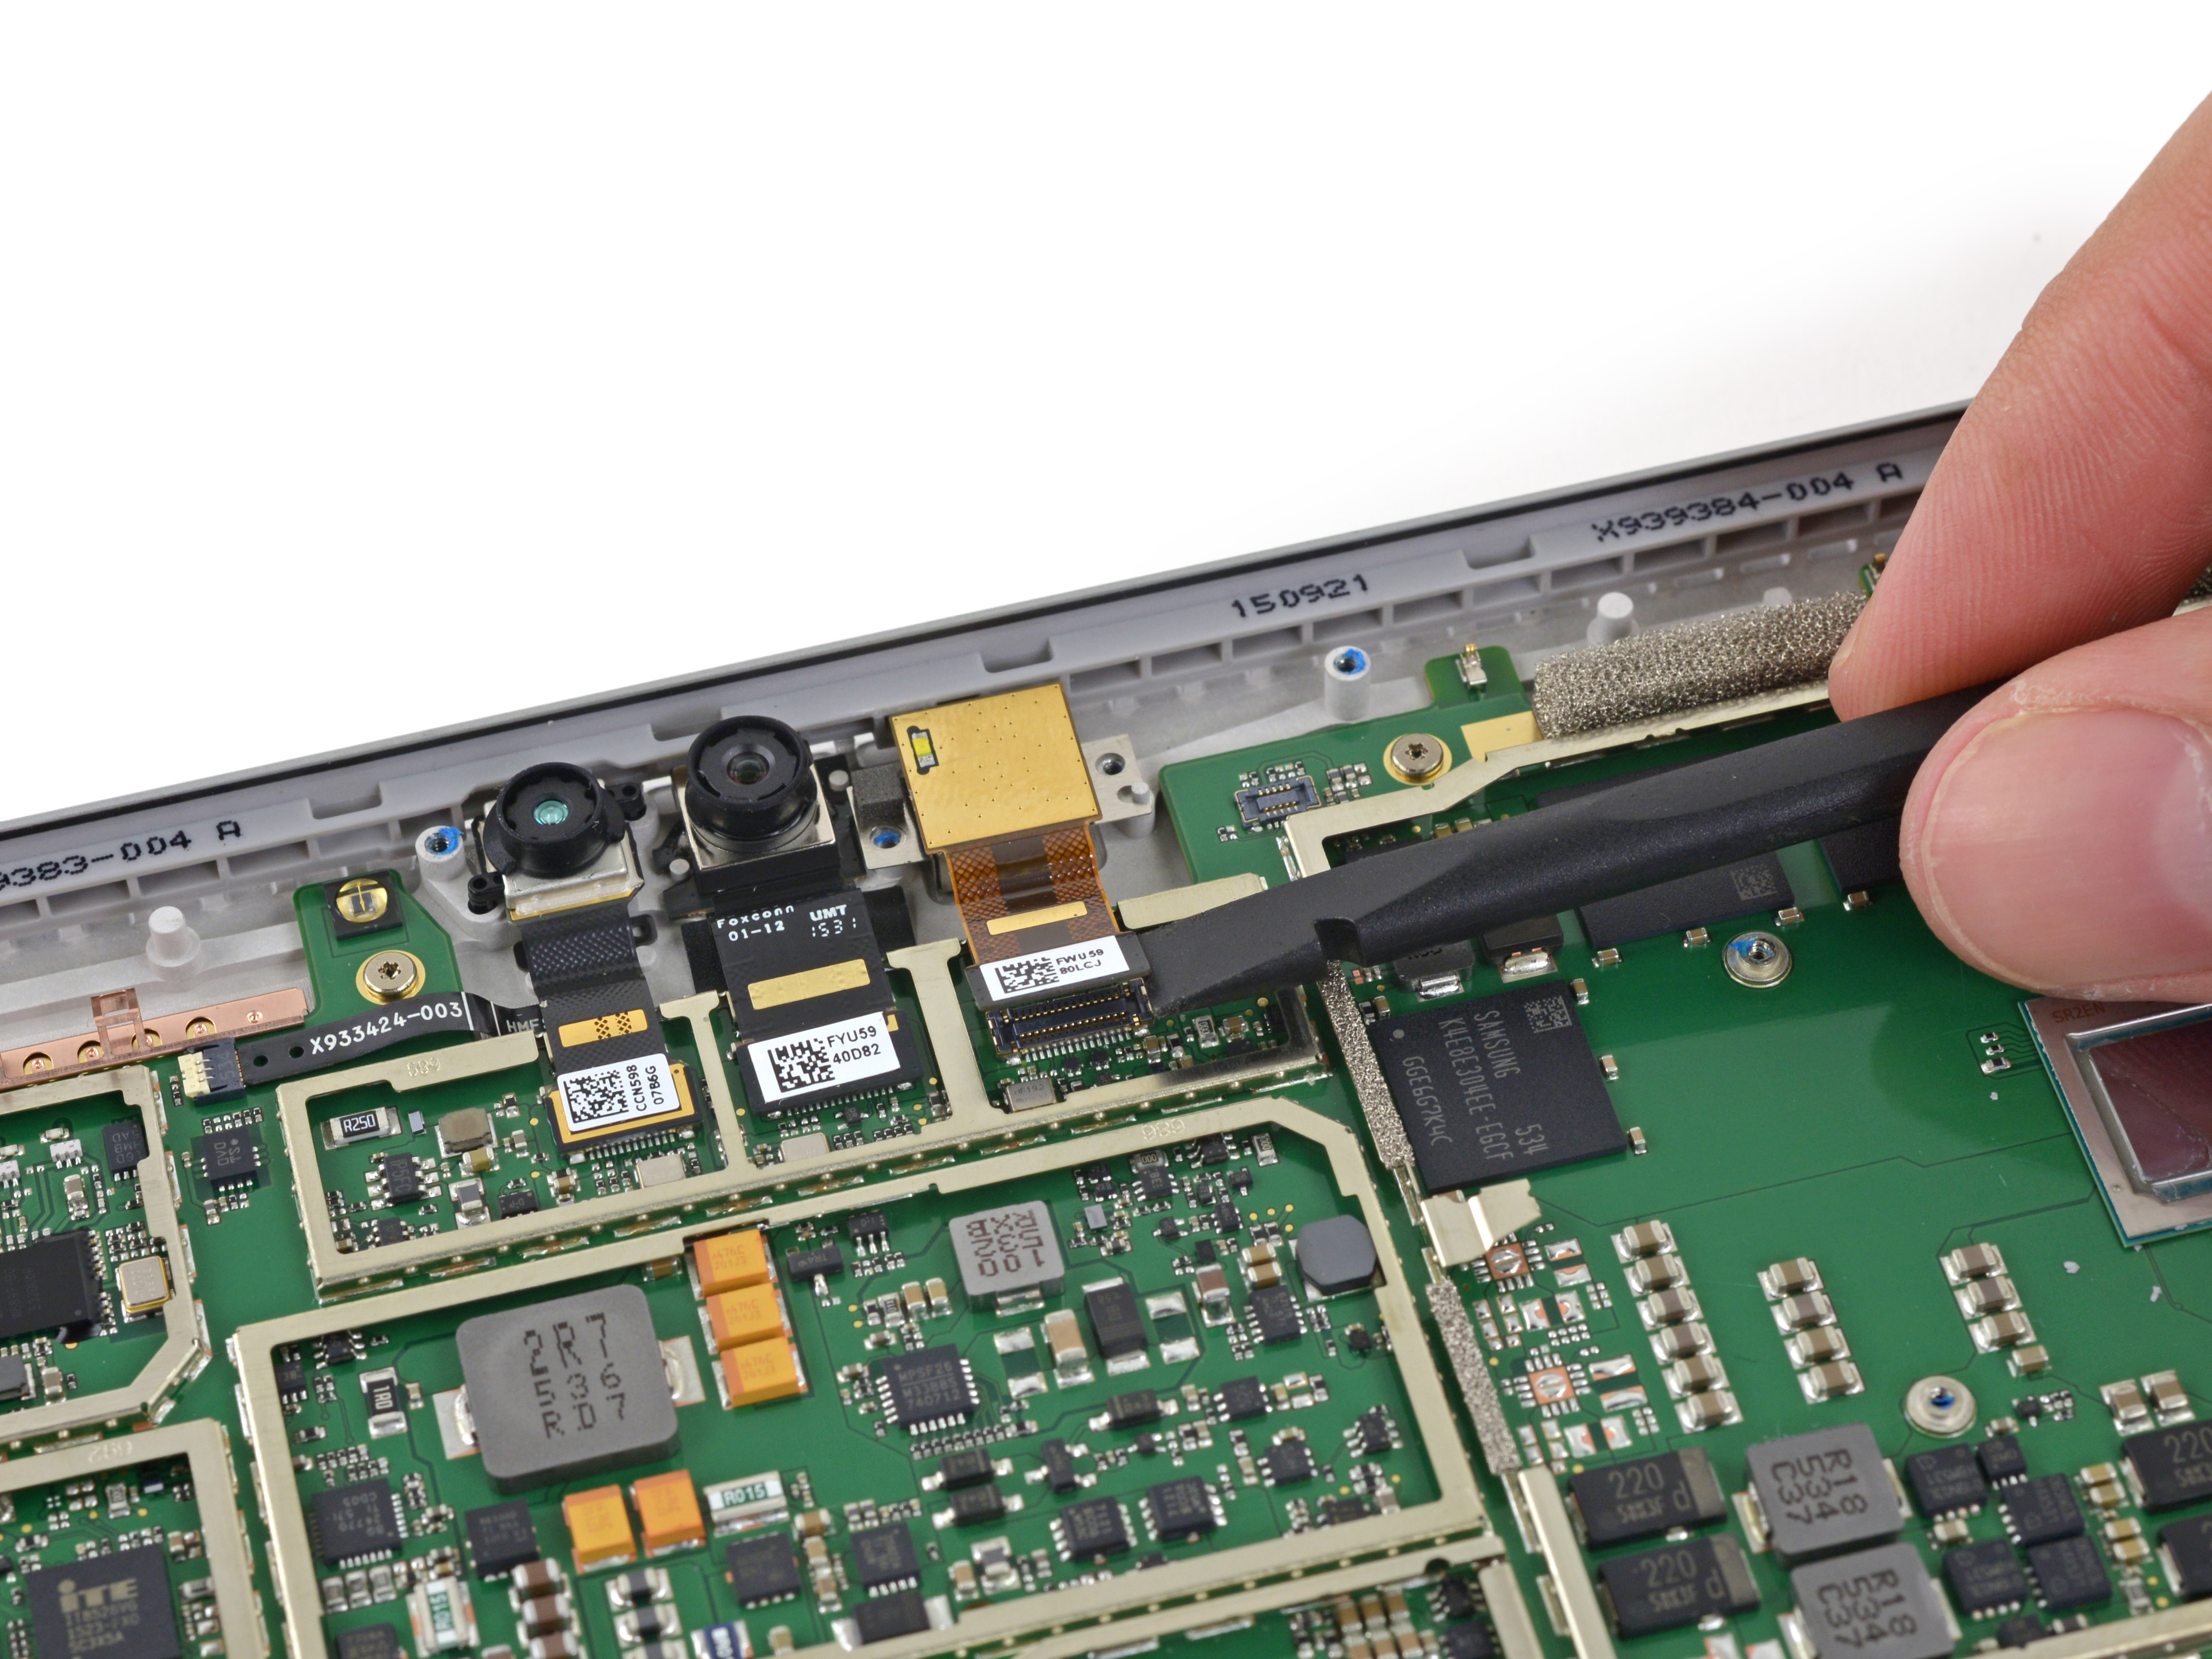
Use a crowbar to unplug the camera cable one by one.
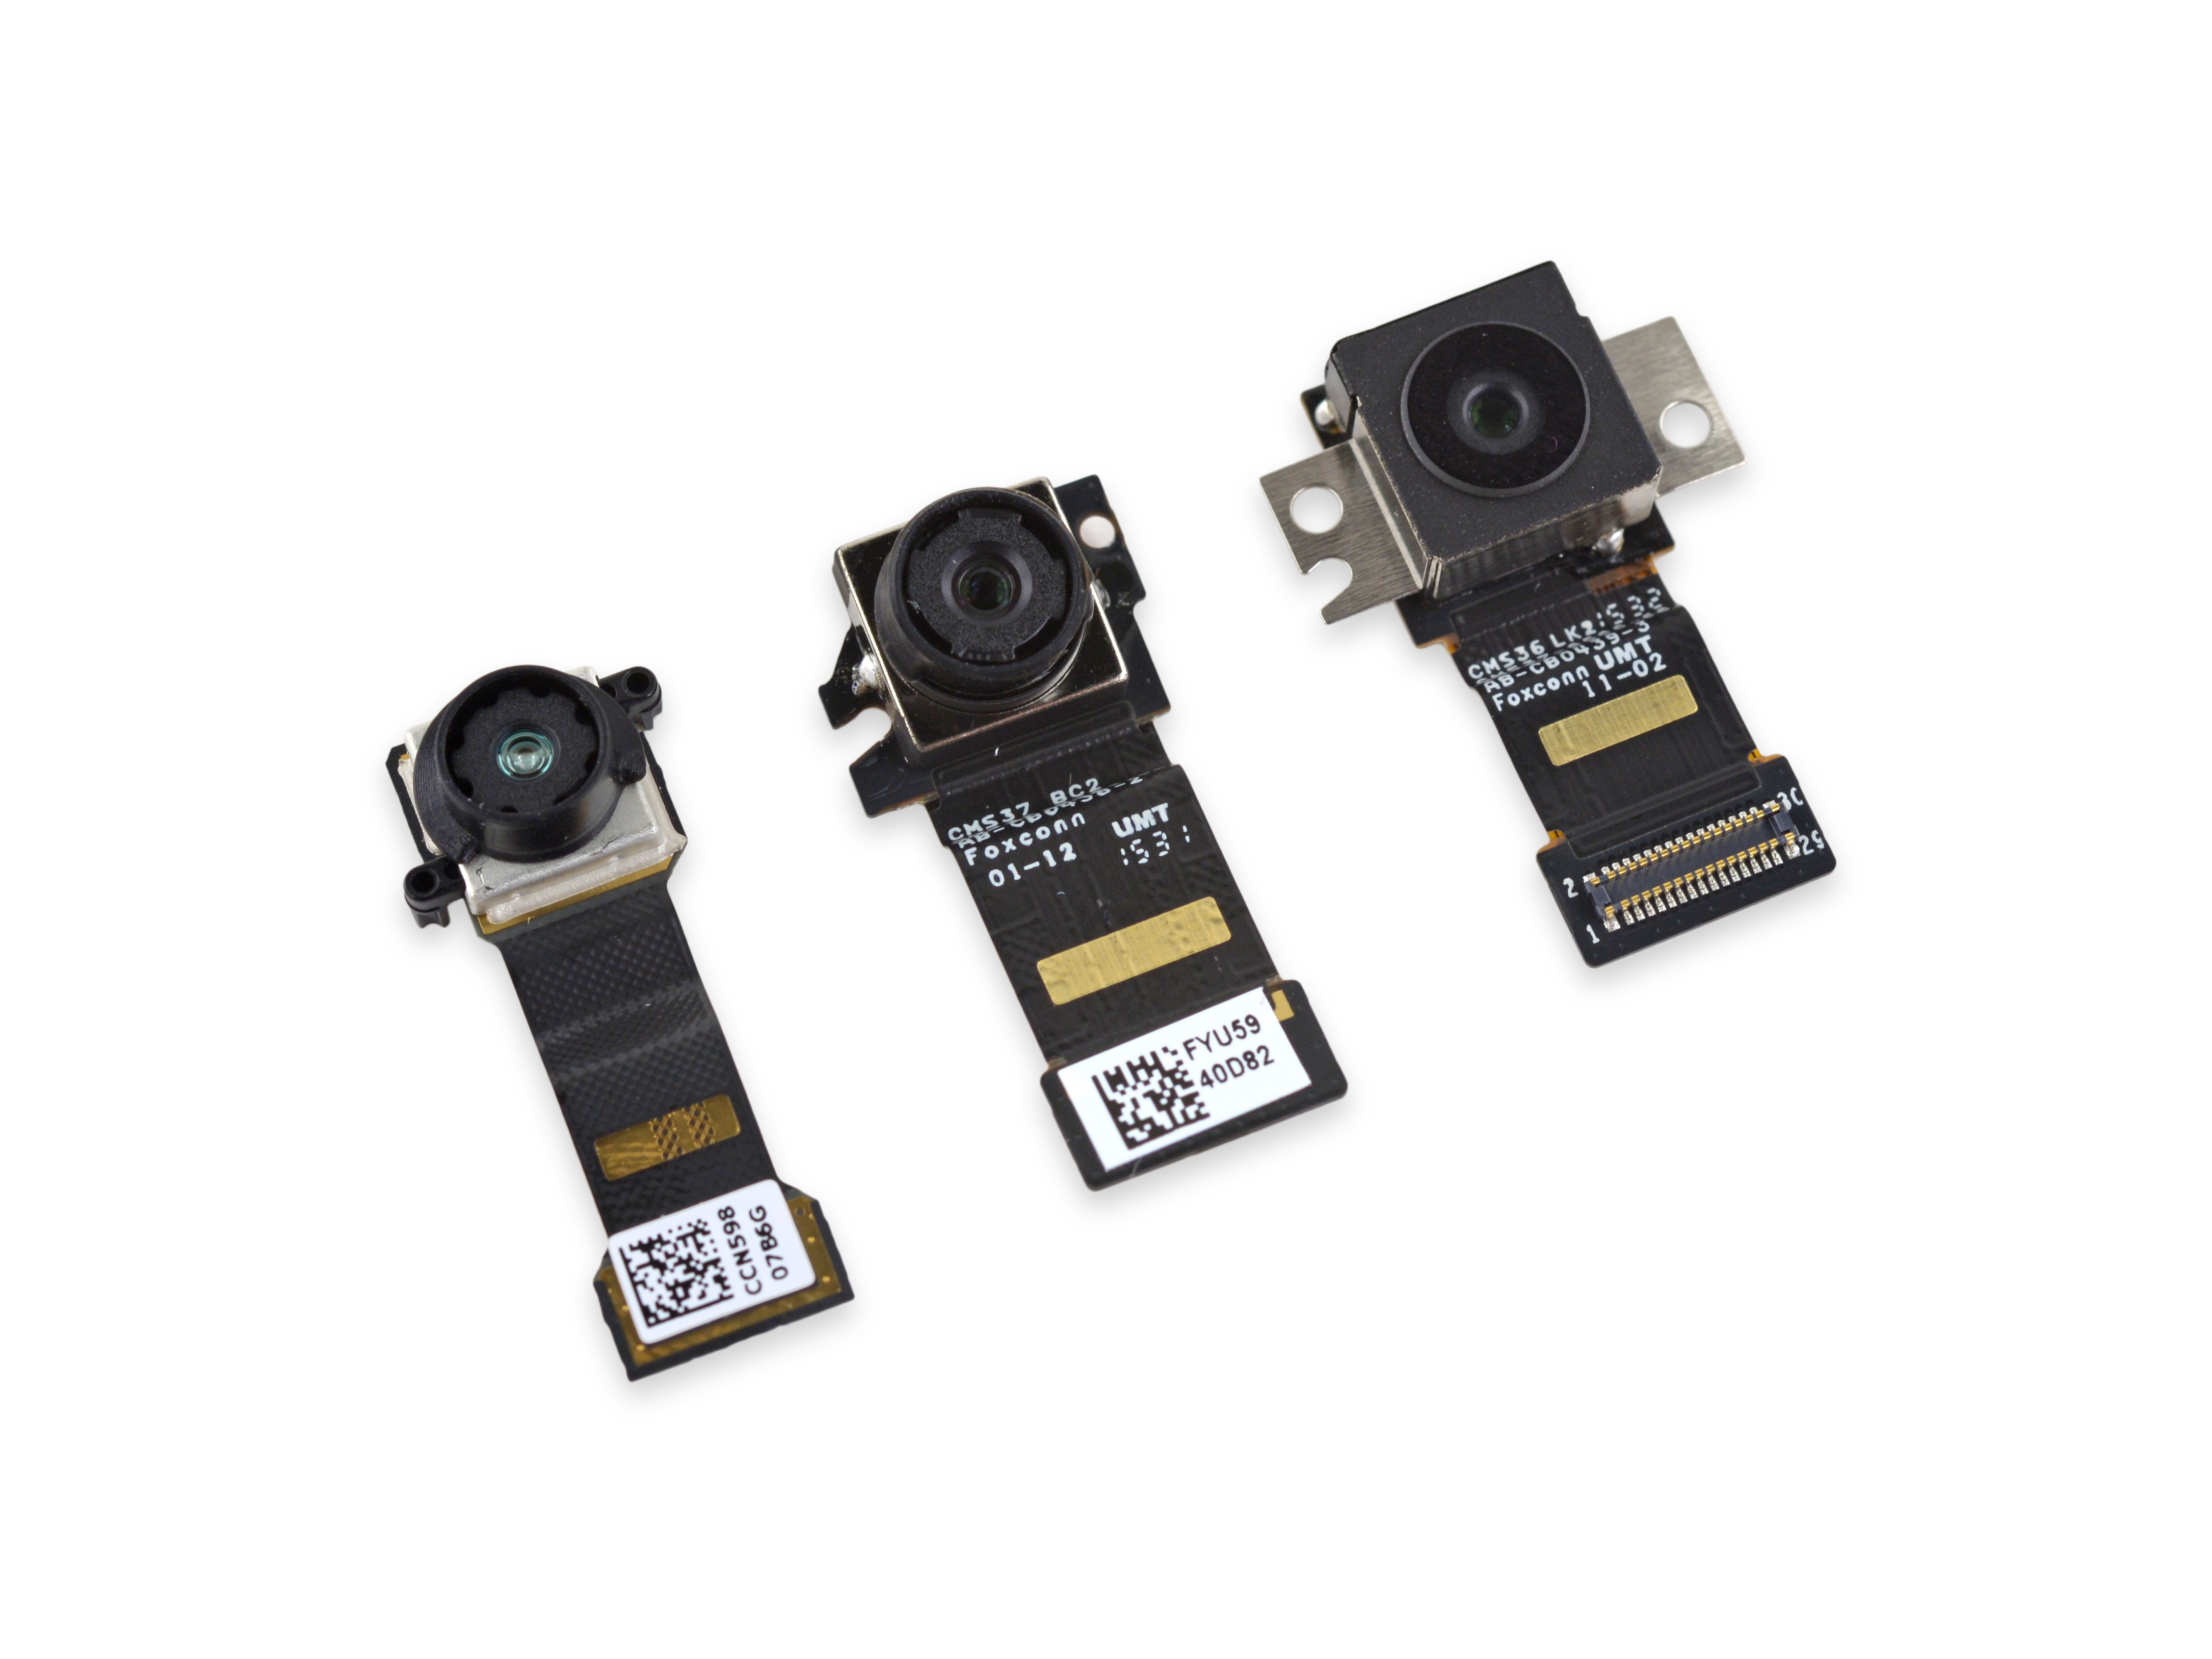
From left to right are: front 500 million pixel camera, infrared facial recognition camera (support Windows Hello), rear 8 million pixel camera.

After unplugging the cables and cables, we can remove the two speakers in the two corners.
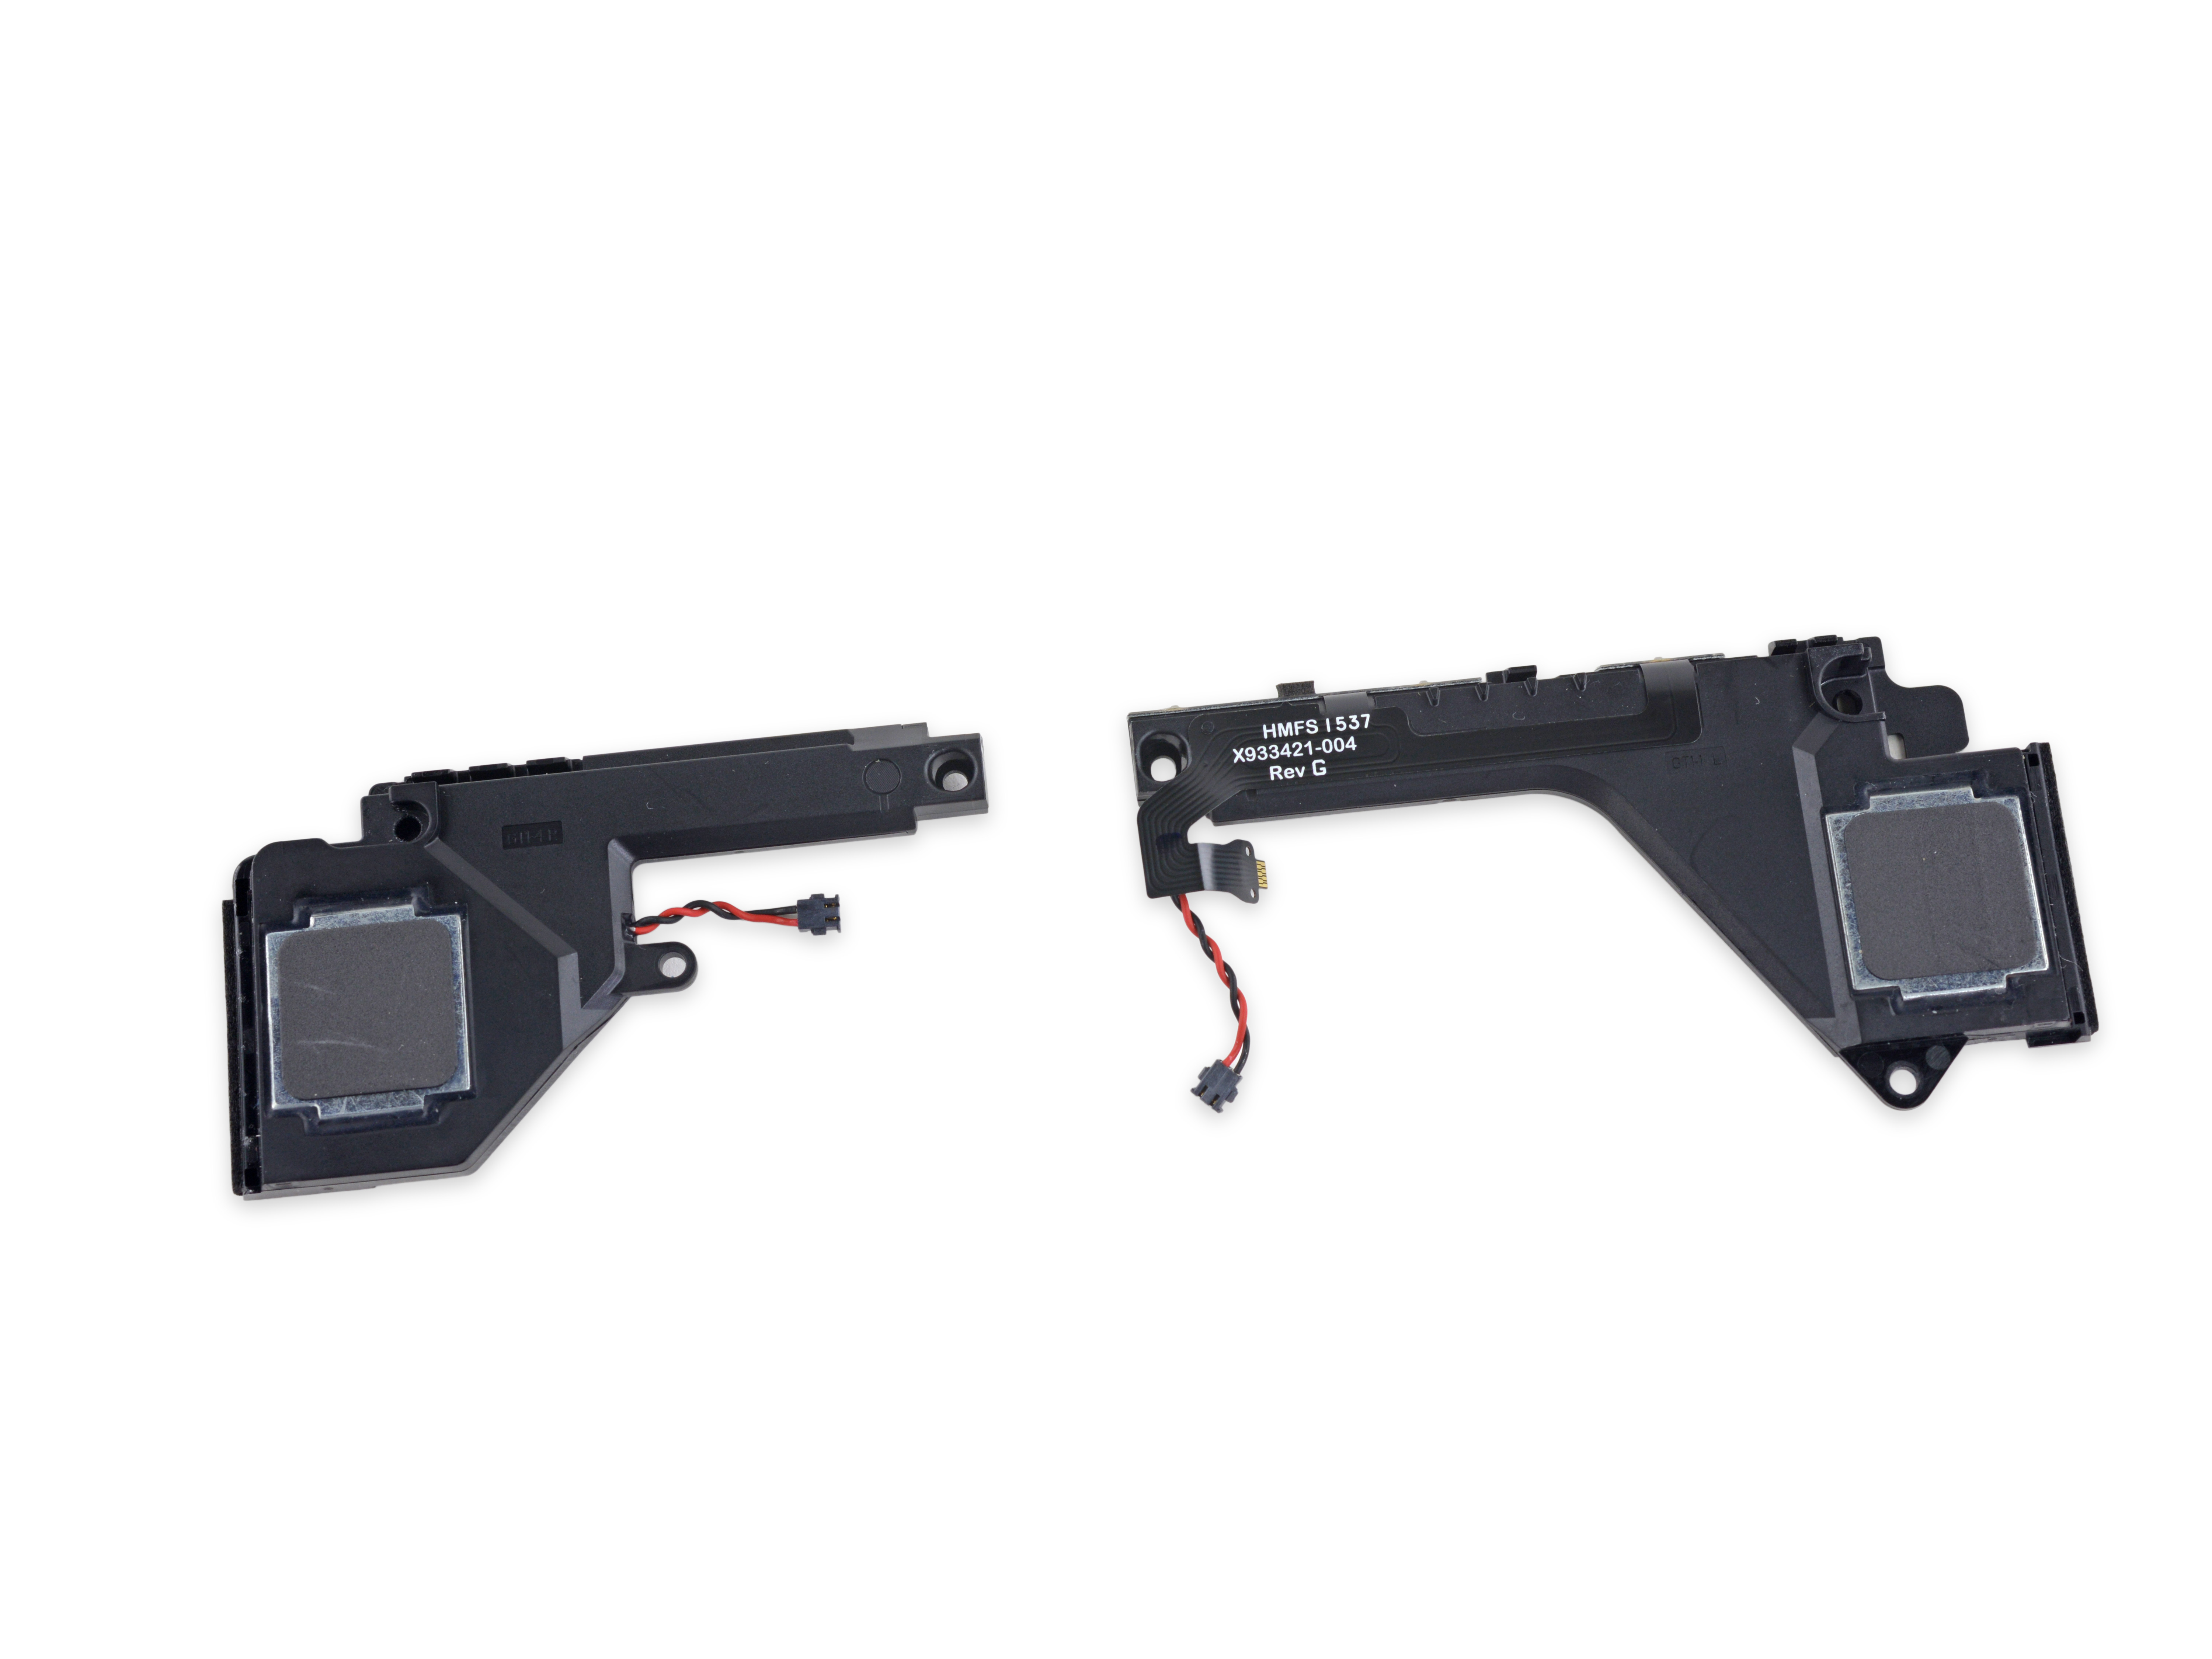
The power button and the volume button are integrated on one of the speakers. Although this design can make the internal structure more concise, if the damage occurs, it must be replaced together with the speaker, which increases the maintenance cost.
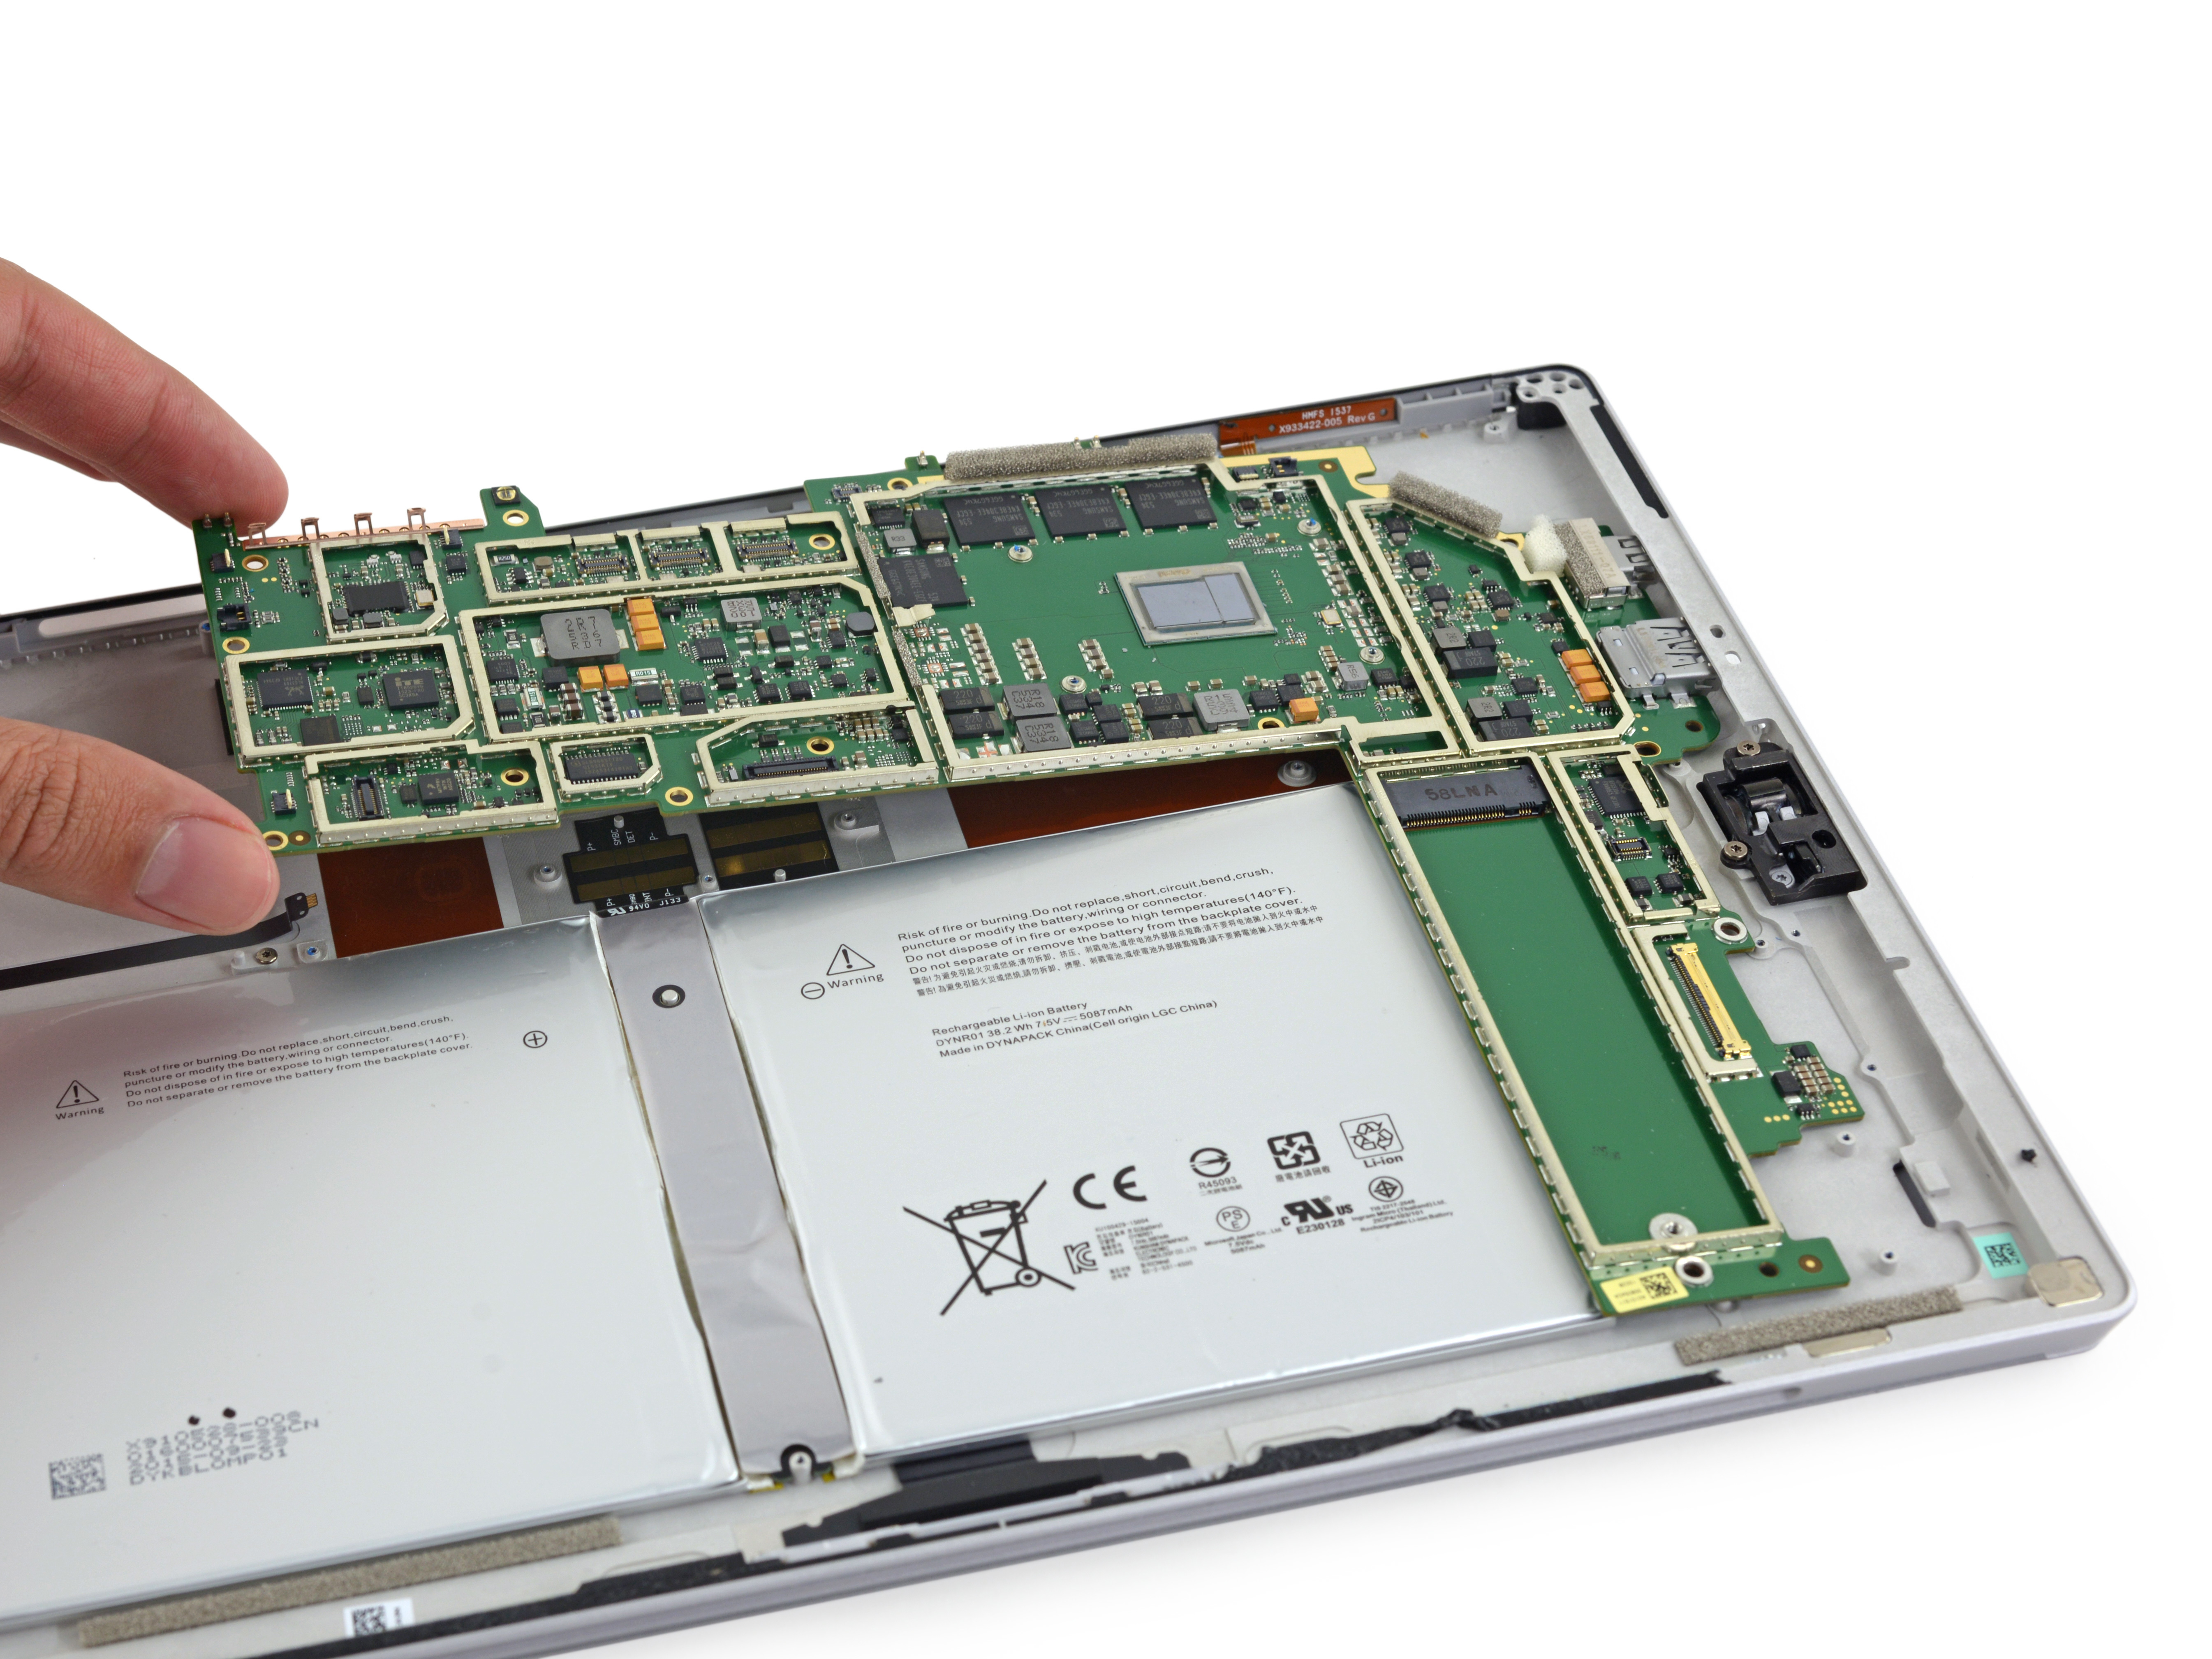
The board can finally be removed. Be careful not to damage the side connector when removing the motherboard.

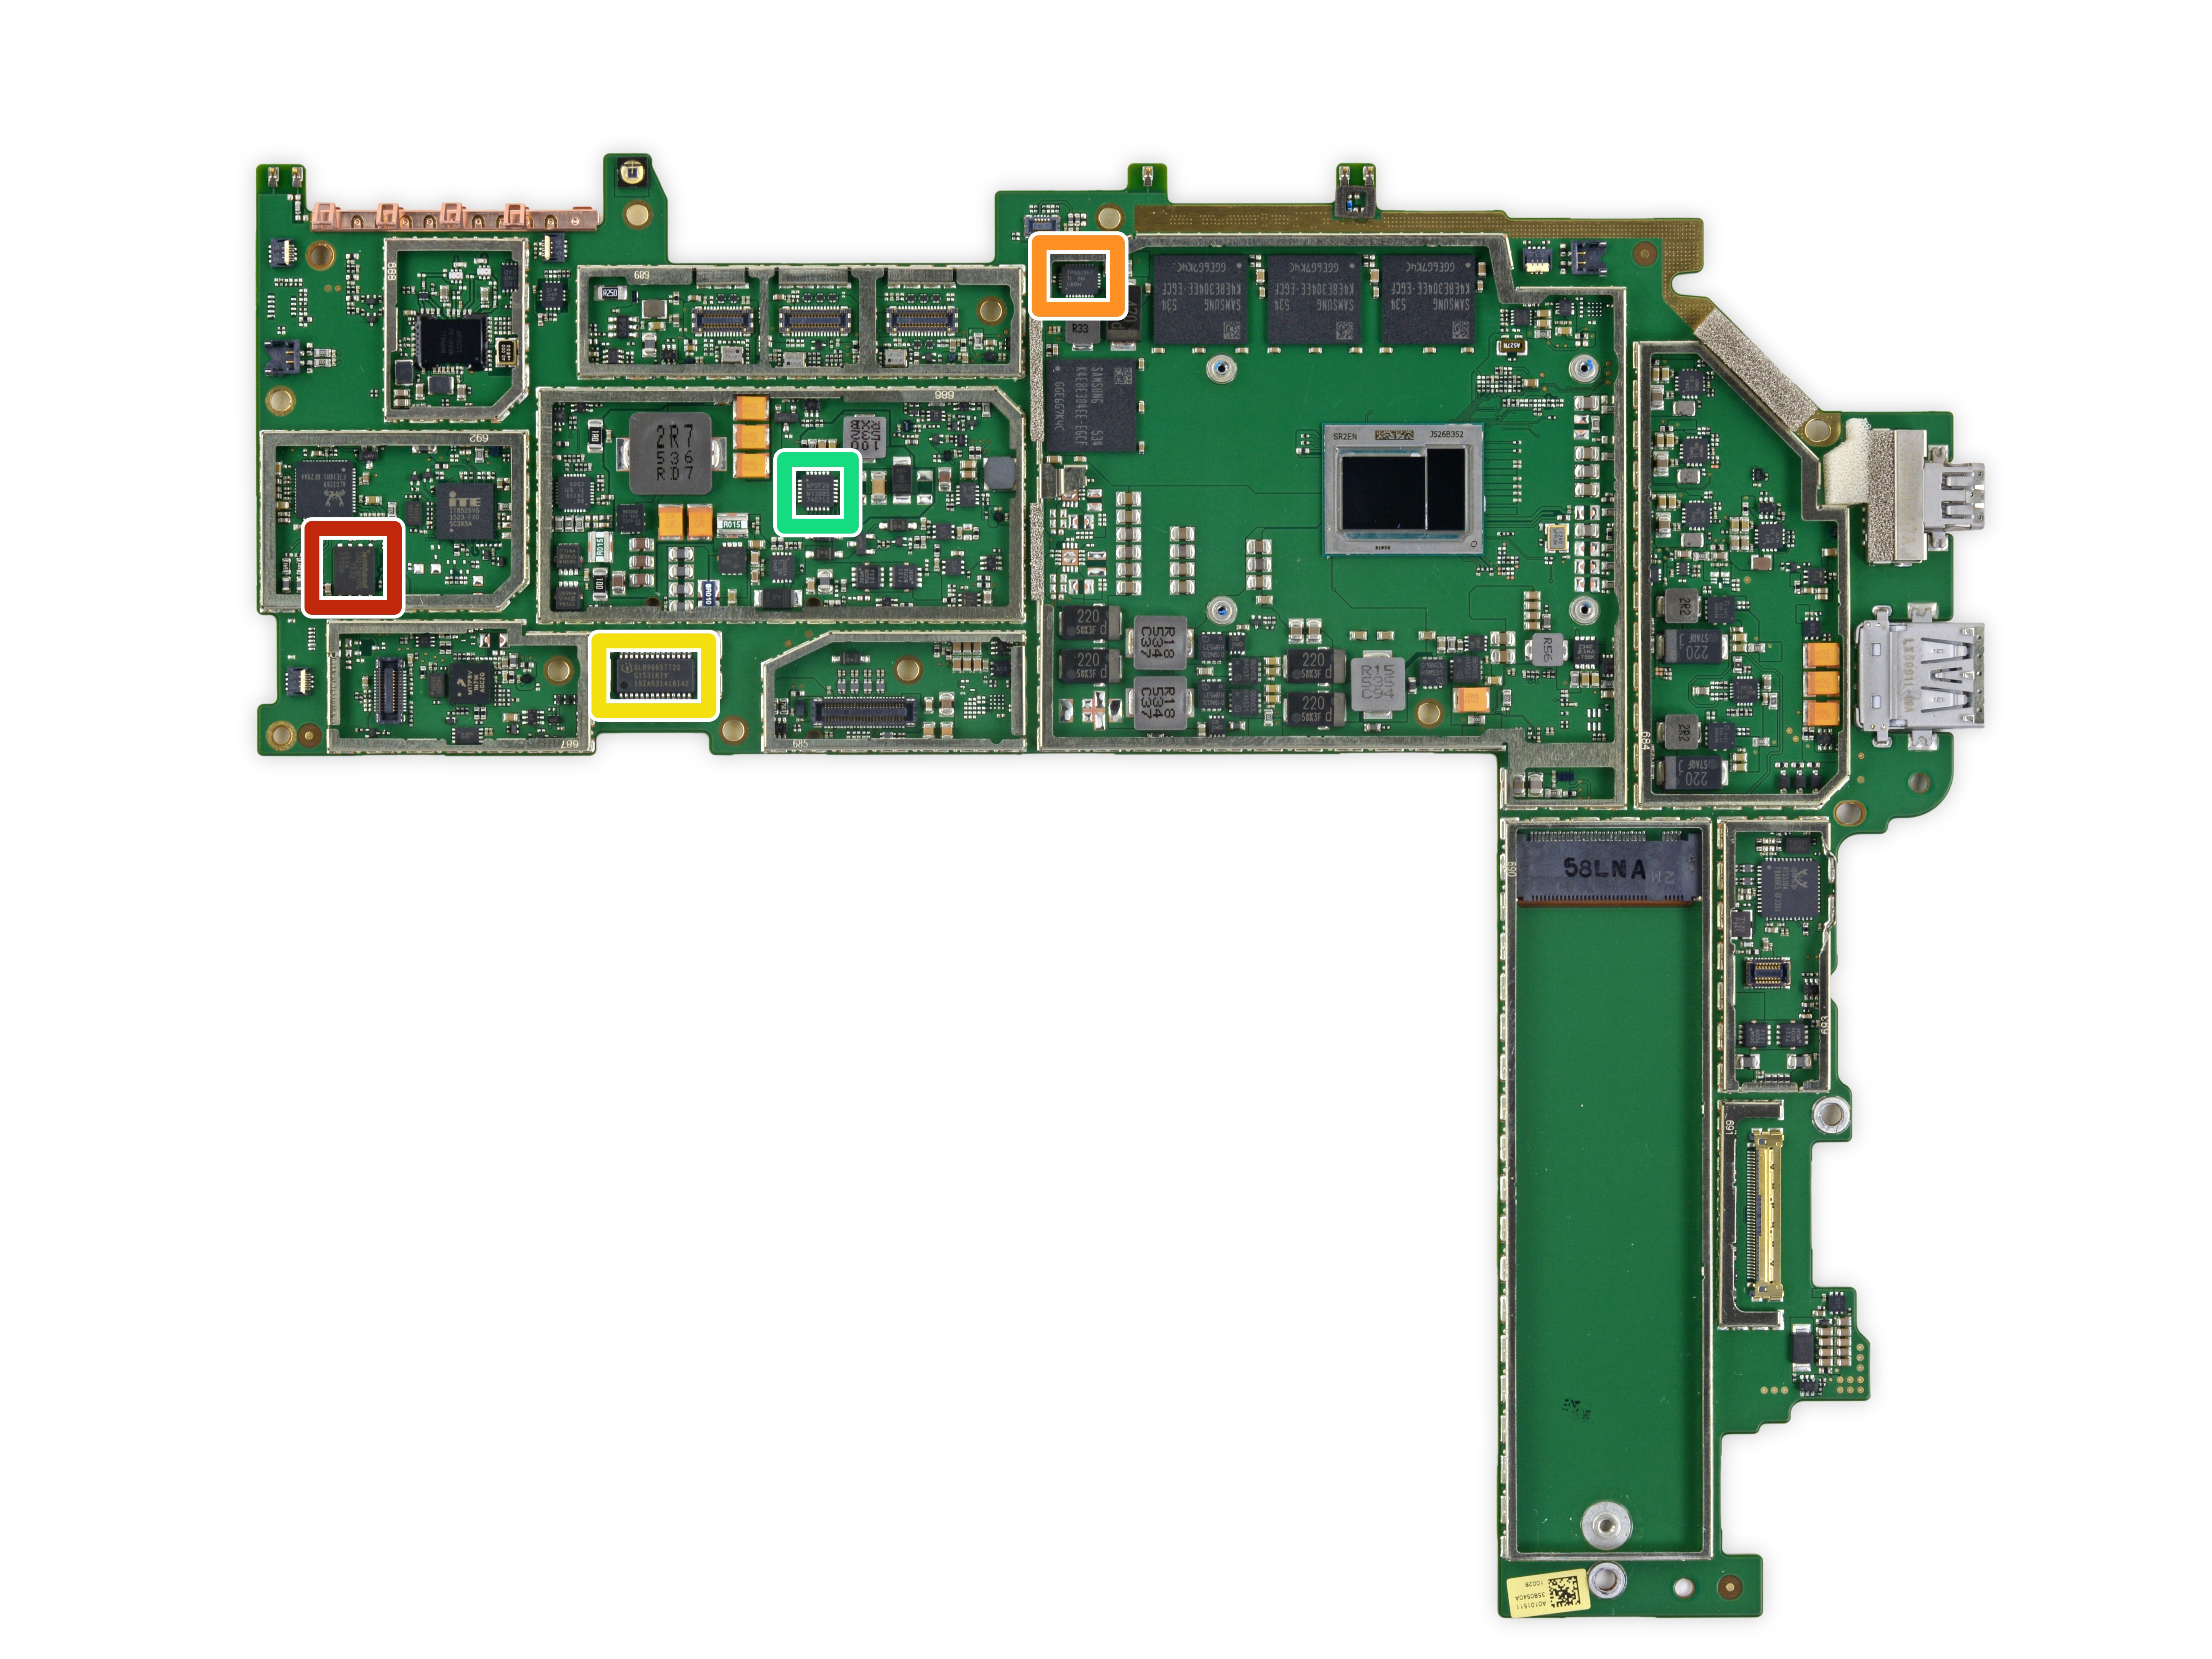
Let's look at what chips are on the motherboard.
Red: Intel SR2EN Core M3-6Y30 processor (4M cache, maximum frequency 2.20 GHz)
Orange: Samsung K4E8E304EE-EGCF 8Gbit LPDDR3 memory (4 x 1 GB, total 4 GB)
Yellow: Marvell Avastar 88W8897 802.11ac/NFC/Bluetooth SoC
Green: Freescale Kinetis KL17MKL17Z256VFM4 48MHz ARM Cortex-M0 +
Light blue: ITE IT8528VG
Deep Blue: Realtek ALC3269 Audio Encoder
Purple: Realtek RTS5J04 micro-SD Reader Controller
Red: Winbond 25Q128FV Serial NOR Flash
Orange: Texas Instruments TPS51367 FET Converter
Yellow: Infineon SLB96659TT20 Trusted Platform Module
Green: Monolithic Power Systems MP3388S 50V, 8-String, Step-Up, White LED Driver
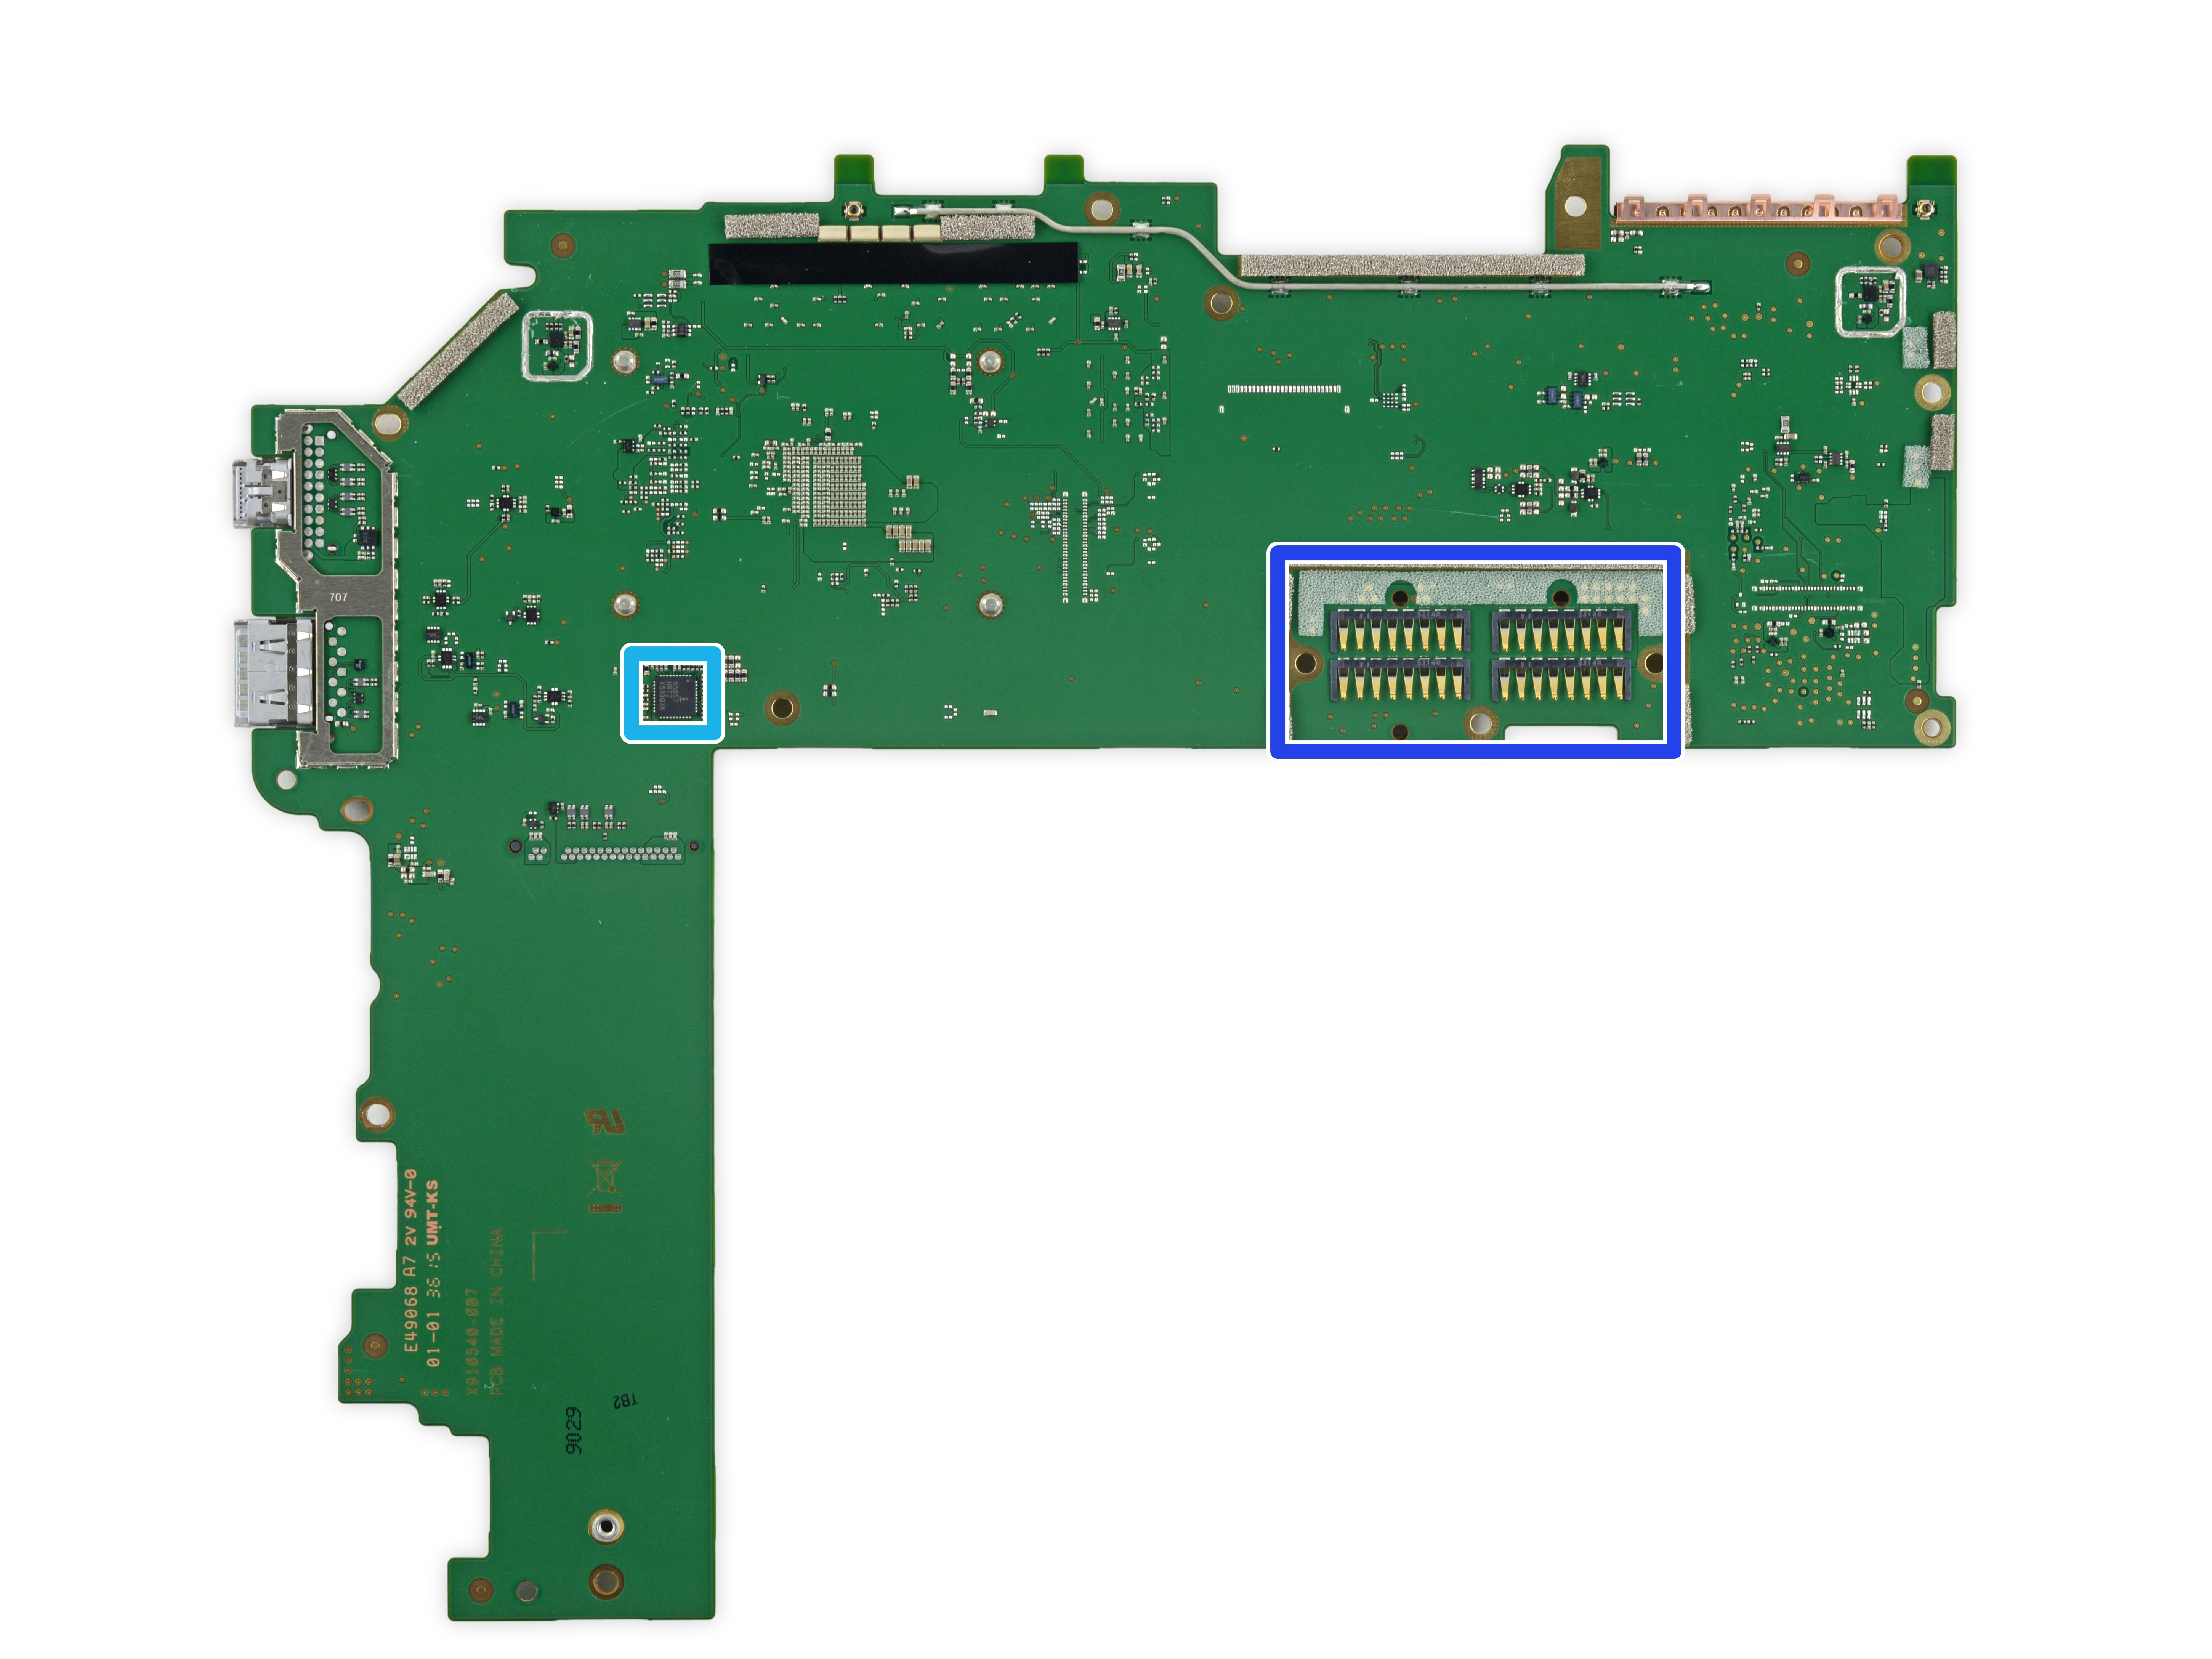
Look at the opposite again.
Light Blue: Intersil ISL95857 1 + 2 + 1 Voltage Regulator
Dark blue: This spring contact array is responsible for connecting the battery and keyboard base
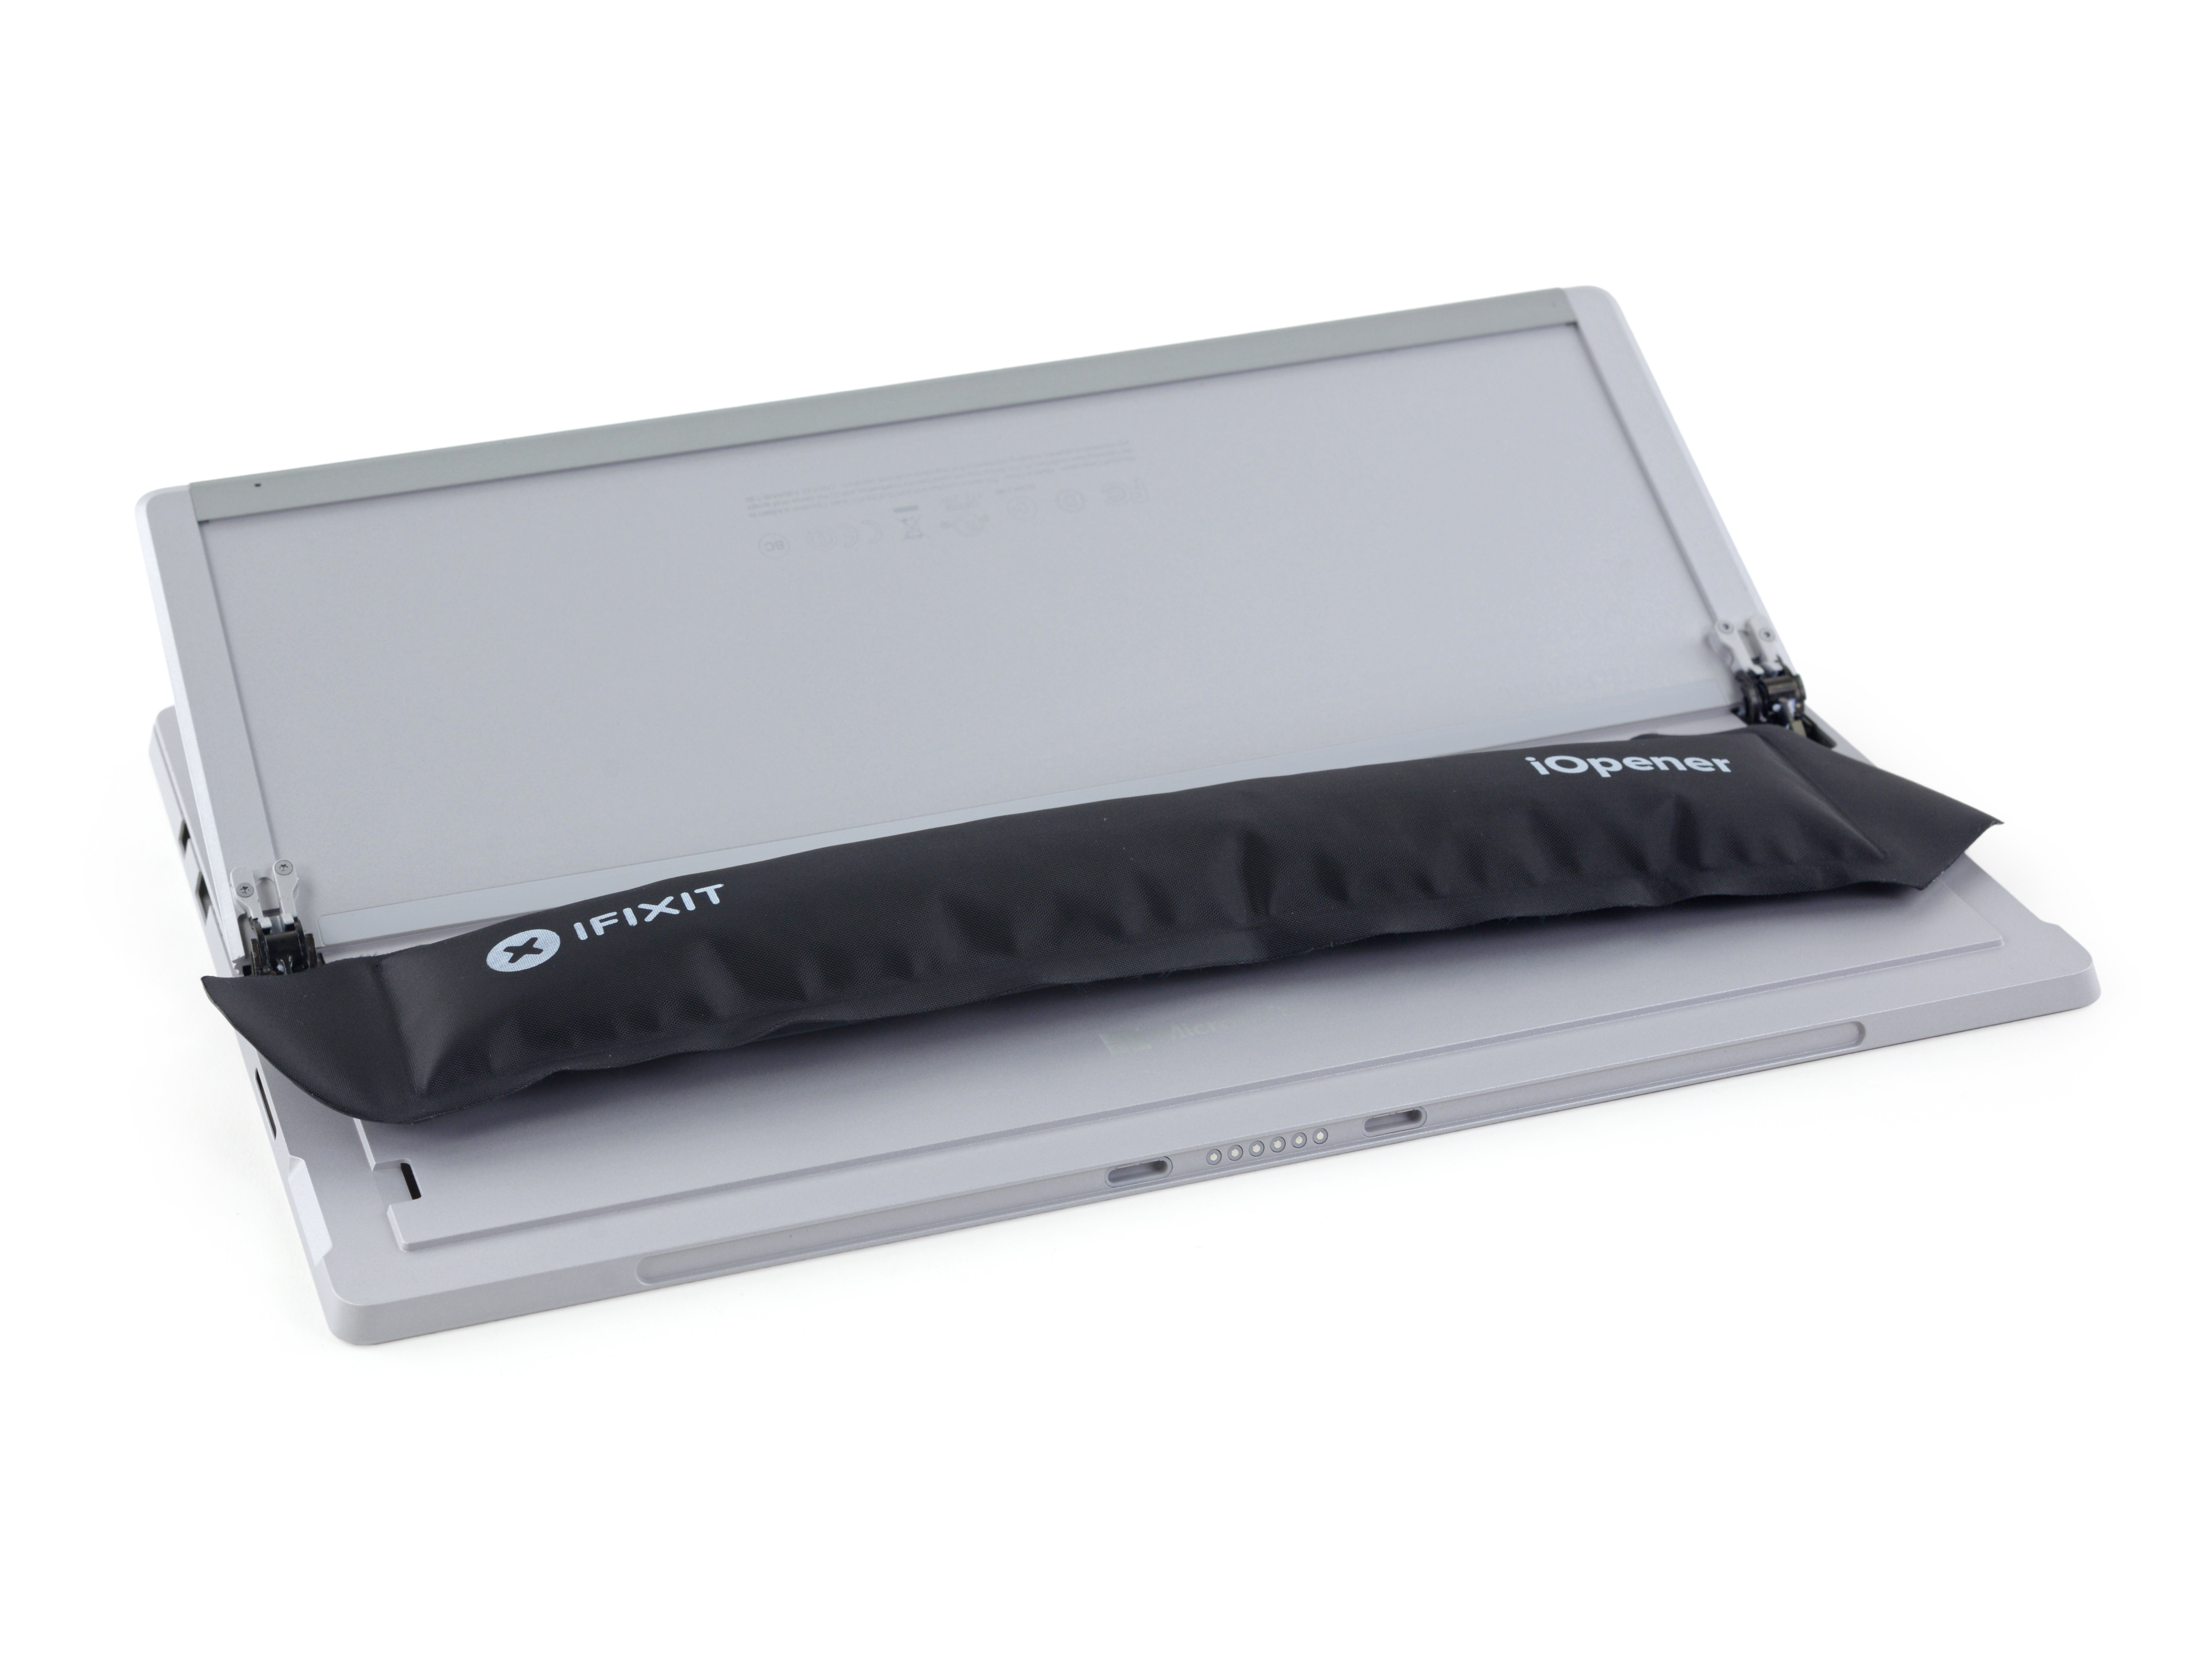
The internal components of the fuselage will not be dismantled and removed. Now we are starting to disassemble the battery. First heat the back cover to soften the glue.
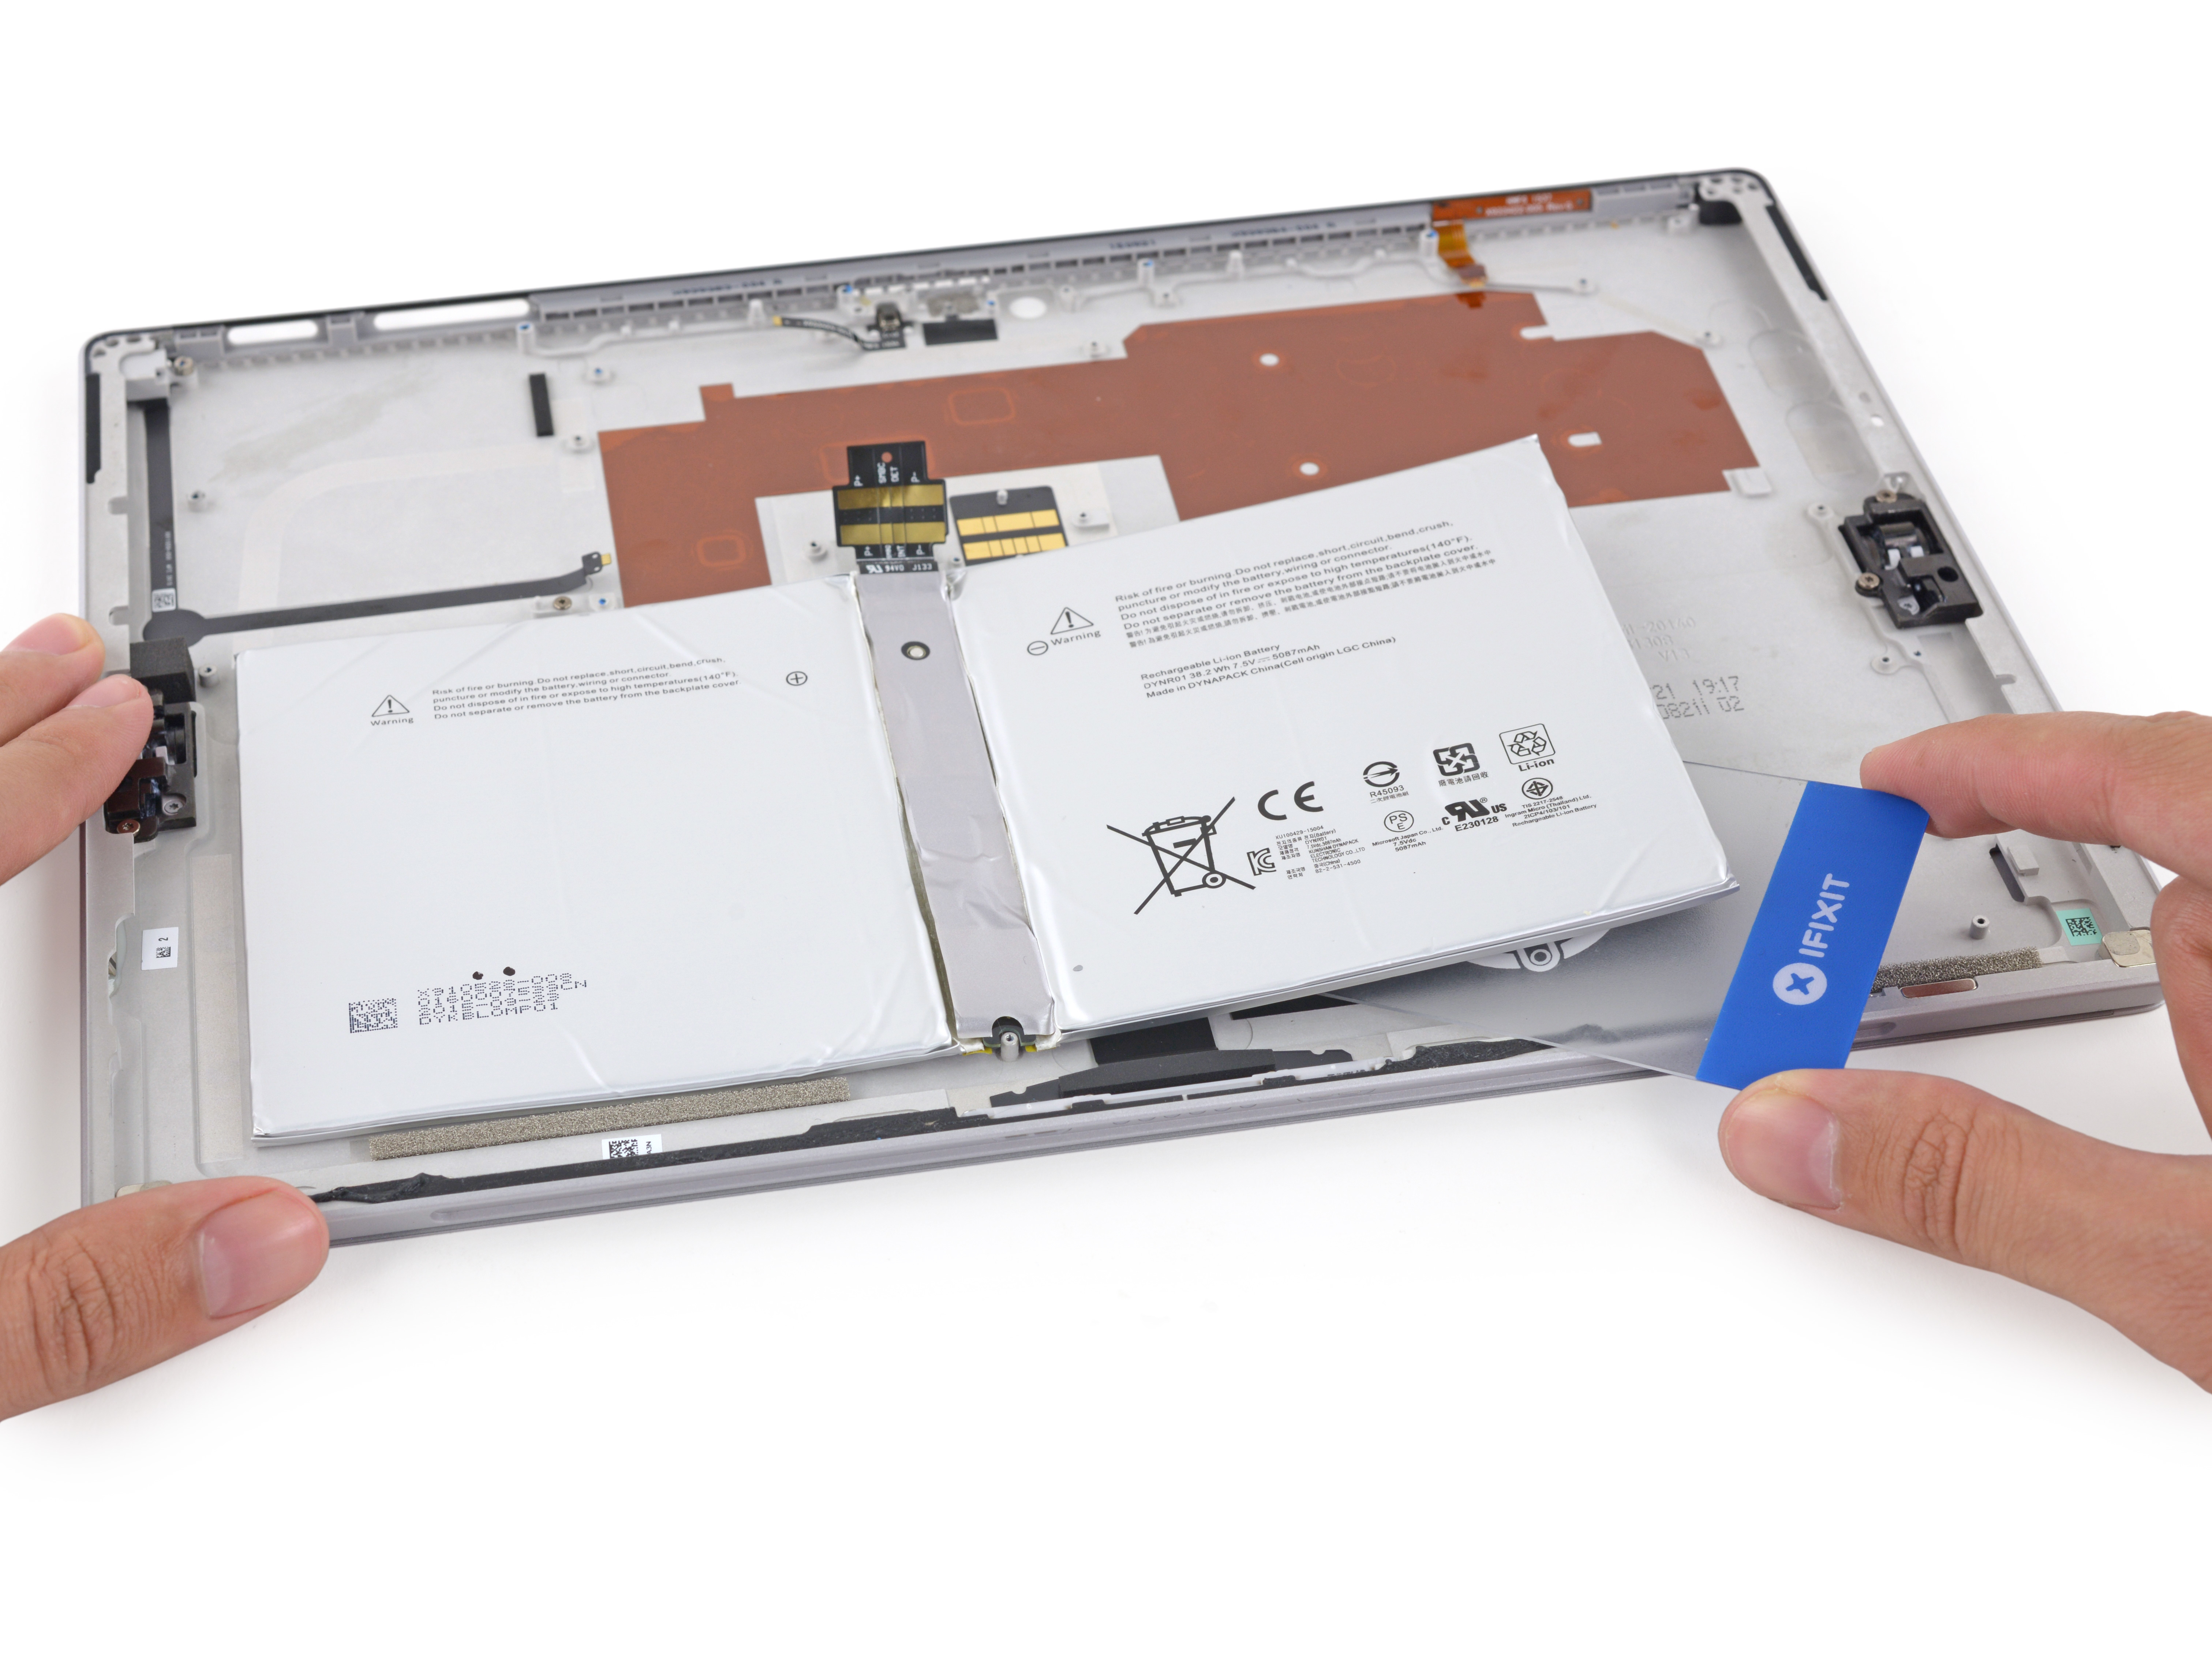
Use a card to slowly separate the glue under the battery.

The Sophie 4 is equipped with a 7.5V 38.2Whr battery with a capacity of 5087mAh, a reduction of about 9% compared to the previous generation Sophie. Although the capacitance of Sophie 4's capacitance has shrunk, but due to the use of a new generation of processors, motherboard chips and more energy-efficient screens, Sophie 4's battery life may increase.

Well, our dismantling is completed here, and the old rule is to come to a family portrait. iFixit scored 2 points for the maintenance of the Surface Pro 4 (10 is the easiest to repair), which is a very low score, maintenance is very difficult. The internal design is very compact, almost all of the components are welded on the motherboard, only the SSD can be replaced on its own, but the whole machine is glued by a lot of glue, and it is very difficult to dismantle it by itself.
(Source: iFixit, Translation: Love Machine)
