The Dell XPS13 2015 is the best designed laptop today. Its ultra-narrow frame design has the most stunning appearance today. Dell in the 11-inch size of the fuselage to accommodate a 13-inch screen, would like to know how Dell designed such a stunning XPS13 2015, please follow our dismantling graphics at a glance. (The following pictures are from iFixit)
Let's take a look at the parameters of Dell XPS 13
13.3-inch UltraSharp QHD+ multi-touch display with a resolution of 3200 x 1800
8 GB Dual Channel DDR3L-RS 1600 MHz "Onboard" Memory
128 GB Solid State Drive
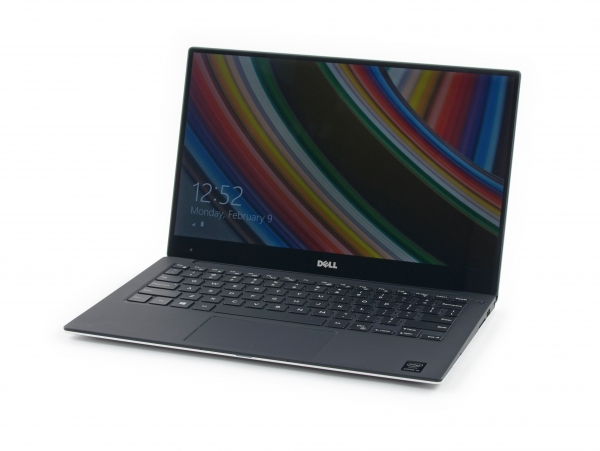
Because of the ultra-narrow frame, the camera is designed in the lower left corner of the display.
Dell's ultra-narrow frame design allows the XPS13 to be the size of a typical 11-inch notebook.
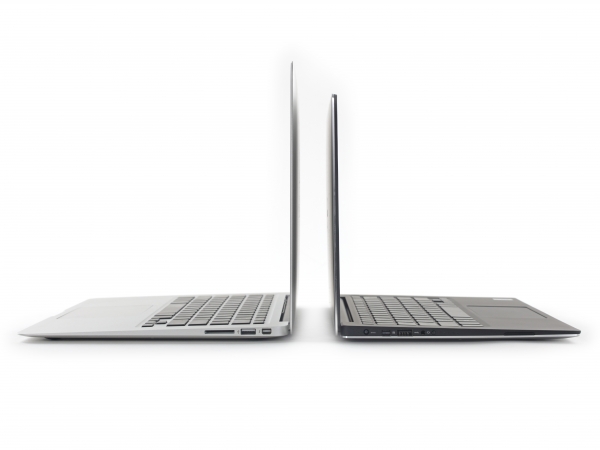
We use the Macbook Air 13 as an example. It is also 13.3 inches. The XPS13 is smaller than the MBA.
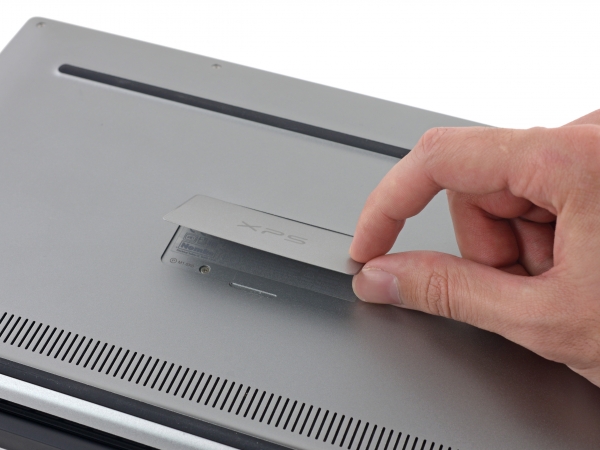
The XPS13 does not have any warning or model information at the bottom... but what about the XPS logo?
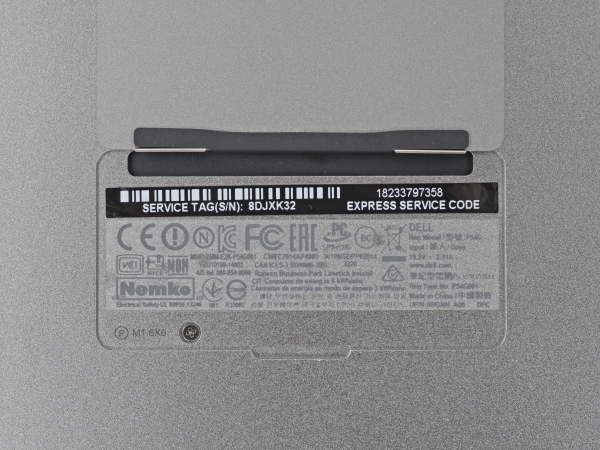
Open this, XPS13 sign, below the FCC, model information and service identification.

We started from the back and first removed the screws with a T5 screwdriver. There are nine T5 screws.
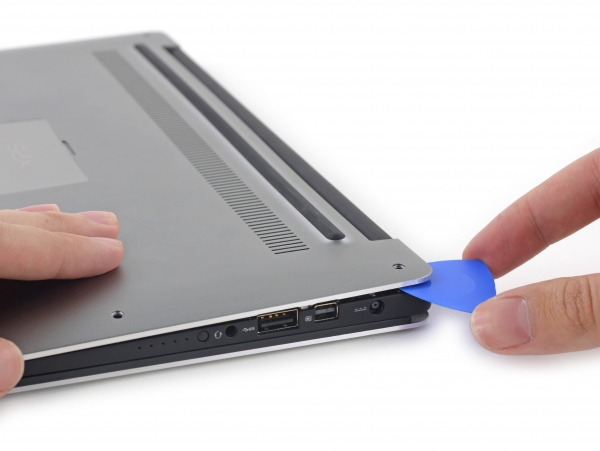
Then use the paddle to slowly open the buckle along the edge of the gap and we open the back cover.
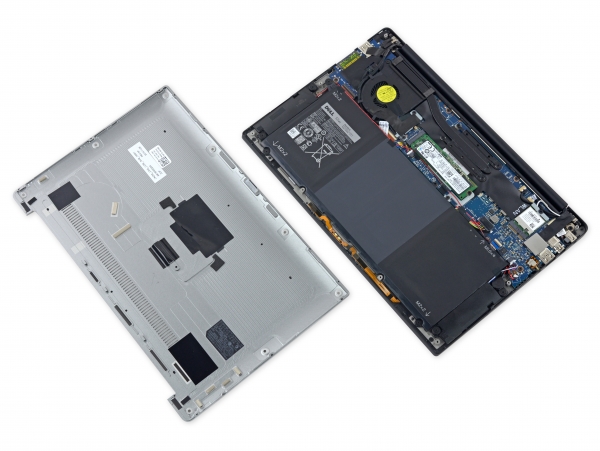
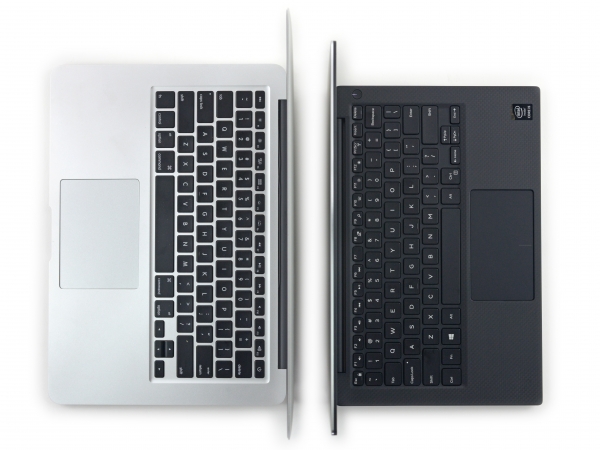
The shell is made of aluminum alloy. The huge battery takes up most of the space in the fuselage. The XPS13 cooling system consists of a heat pipe and a fan. The interior design is very similar to Macbook Air.
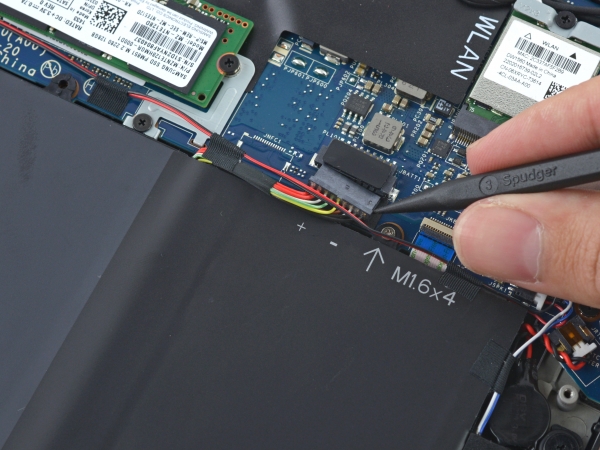
The battery cable is not easy to pick up, and it is necessary to operate it carefully with a tweezers to pull out the cable from the socket.
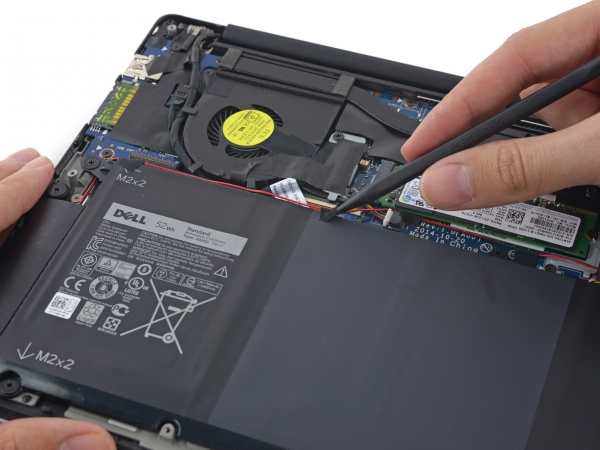
The speaker wire sticks to the side of the battery and prevents us from removing the battery. We remove the wire before we can remove the battery. It seems that XPS design has some problems.
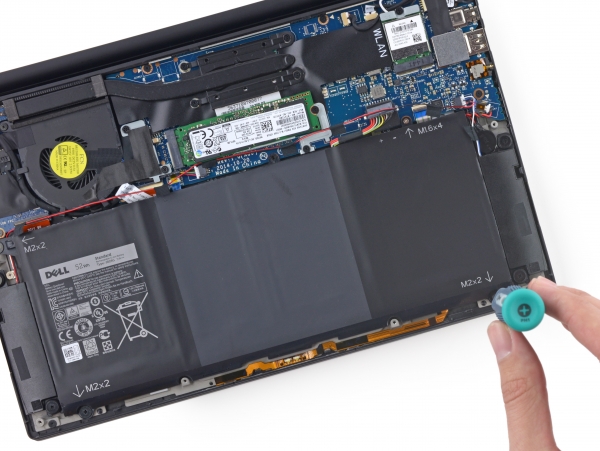
As for the screws, there are clear labels that remind us which screws need to be removed, and there are four screws on the battery.
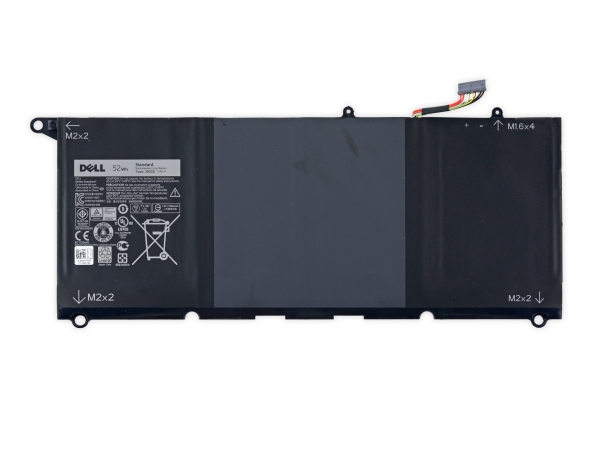
The Dell XPS 13 uses a four-cell, 7.4V, 52Wh battery and is officially rated for up to 11 hours of runtime. (2014 Macbook Air is equipped with a 54Wh battery)
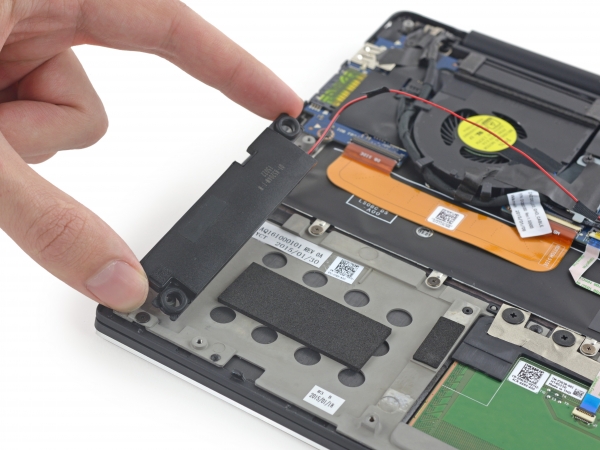
After removing the battery, the speaker is easily disassembled, and the speaker can be removed by unplugging the cable.
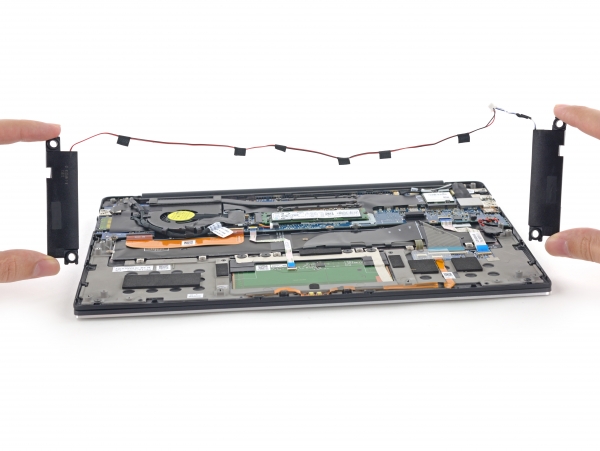
The left and right speakers are connected together by wires.
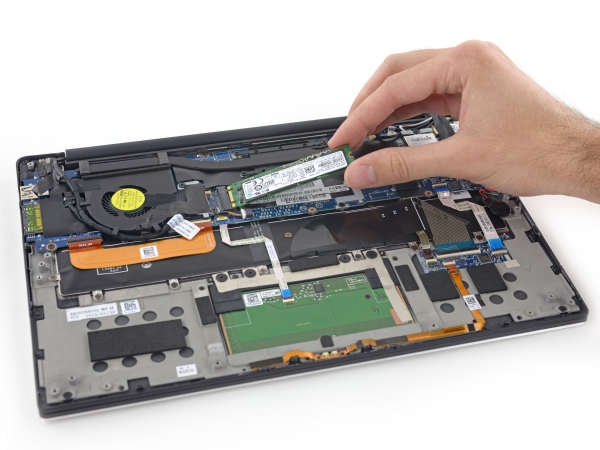
Unscrew the screw on the SSD, we can remove the SSD hard drive, XPS13 is a Samsung M.2 interface 128 GB PM851 SSD hard drive.
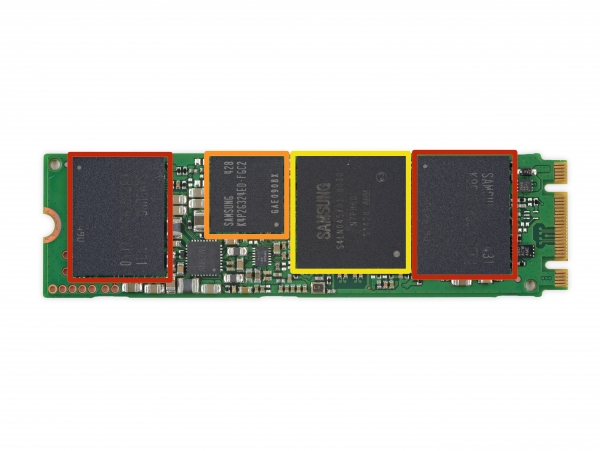
Red: 2 x Samsung 431 K9CHGY8S5M-CCK0 64 GBTLC NAND flash memory chips
Orange: Samsung 428 K4P2G324ED-FGC2 512 MB DRAM LPDDR2 Cache
Yellow: Samsung S4LN045X01-8030 MDX Controller

Use tweezers to remove the grounding bracket that secures the wireless network card.

Dell uses Broadcom's DW1560 wireless network card with Wi-Fi and Bluetooth 4.0 capabilities
Red: Broadcom BCM4352KML 5G WiFi 802.11ac Transceiver
Orange: Broadcom BCM20702 Bluetooth 4.0 module
Yellow: Skyworks SE5516 dual band 802.11a / b / g / n / ac WLAN module
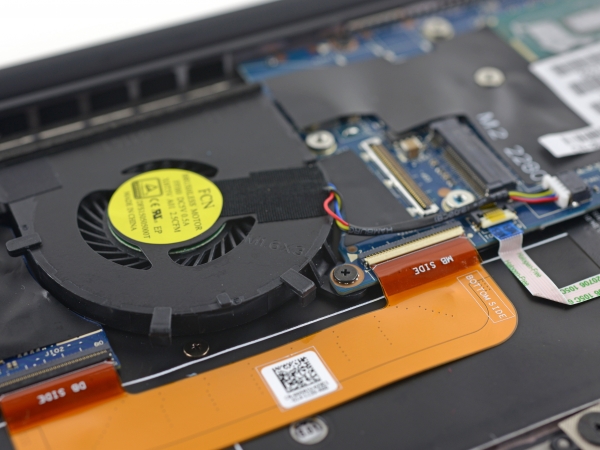
The XPS13 uses a single-fan single copper heat dissipation design. It looks like the 2014 MacBook Air.
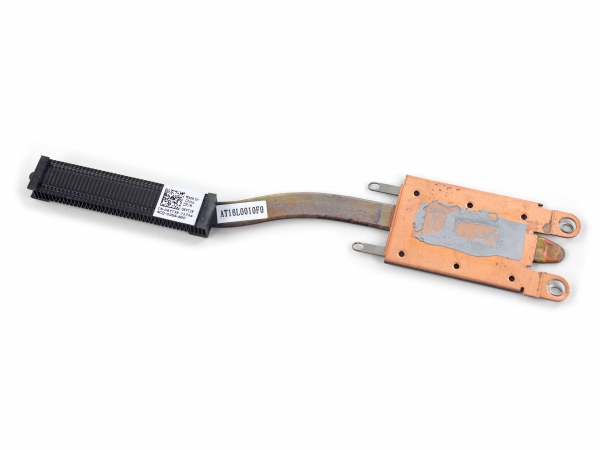
In the past two years, Intel has reduced the amount of heat generated by the processor. We can already see that the heat sink is developing toward miniaturization. The thermal design of the i5-5200U used in the XPS 13 consumes only 15 watts.
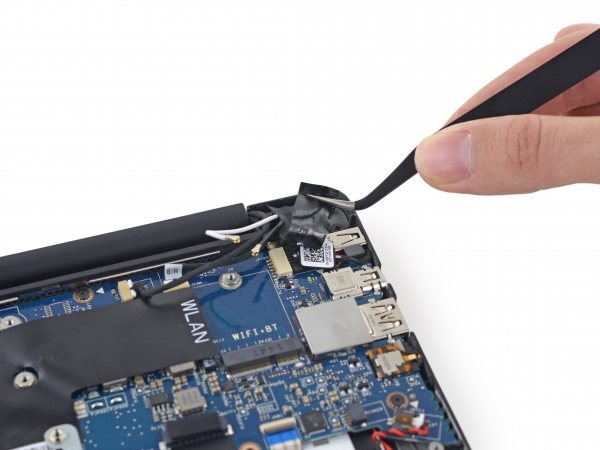
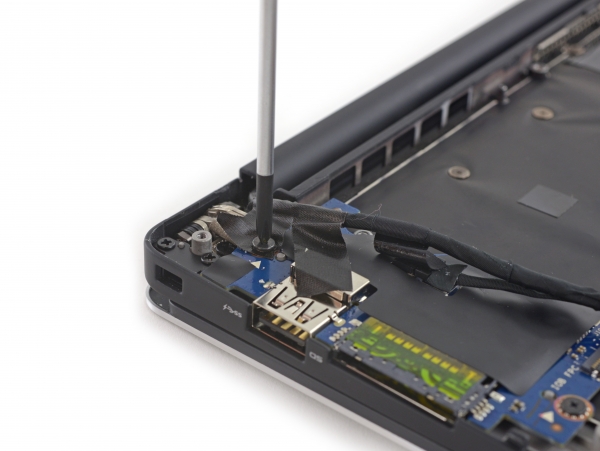
Tear the tape off, and hide the cable connecting the DC power connector to the motherboard. Pull the cable out.
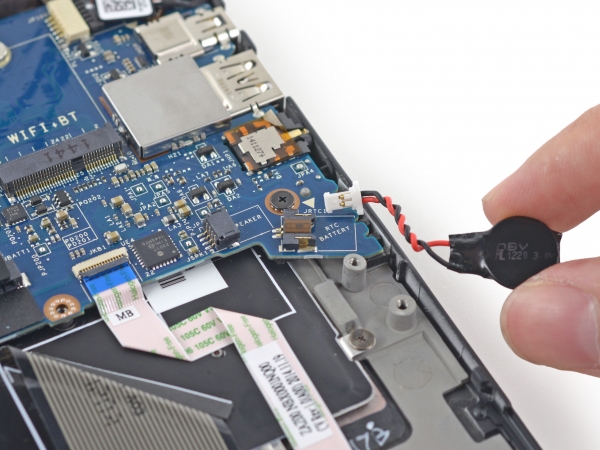
Unplug the coin cell battery on the motherboard.
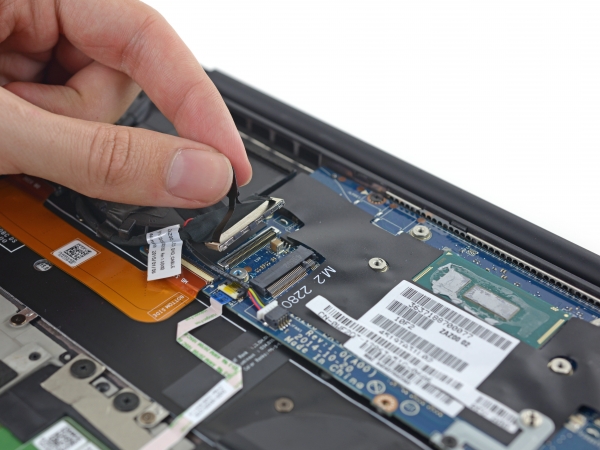
Remove the screen cable, Dell reserved a handle for disassembly on the screen line.
Pull out the cable of the SD card reader and the touchpad and pull the fan's cable together.

Now we can finally remove the motherboard.
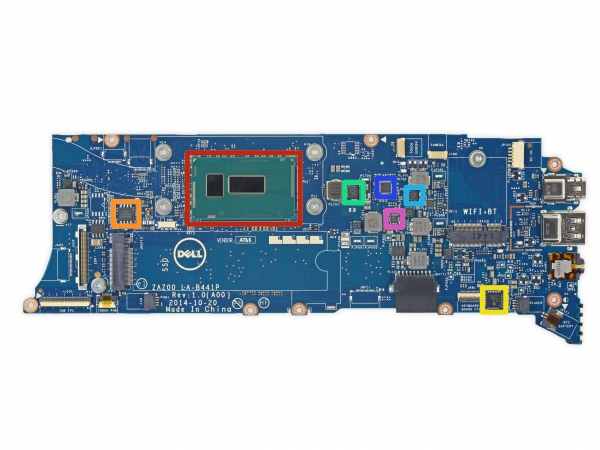
After removing the motherboard, we take a look at the above chip:
Red: Fifth-generation Intel Core i5-5200U processor (up to 2.70 GHz) & Intel HD5500 graphics card
Orange: Winbond 25Q64FVS10 64 M-bit Serial Flash
Yellow: Microchip MCP23017 16-bit Input/Output Port Expander
Green: Texas Instruments CSD97374Q4M high frequency synchronous buck NexFET power stage
Sky Blue: Texas Instruments CSD87330Q3Dsynchronous buck NexFET power module
Deep Blue: Texas Instruments TPS51624 4.5 V to 28V, 1/2-phase step-down driverless controller
Purple: Power Solution for ANPEC APW8813 / A DDR2 & DDR3 1.5 A LDO Synchronous Buck Controller

The reverse of the motherboard is:
Red: Elpida/Micron J8416E6MB-GNL-F 8 GB (8 1 GB) DDR3L-RS 1600 MHz dual-channel memory (Note: The memory chip is soldered on the motherboard and cannot be replaced)
Orange: Realtek ALC3263 Audio Codec
Yellow: SMSC MEC5085 low-power embedded flash memory
Green: Texas Instruments SN74CBT3257C 4-bit 1-of-2 FET multiplexer/demultiplexer, 5 V bus switch
Blue: ON Semiconductor NCP4545 controlled load switch
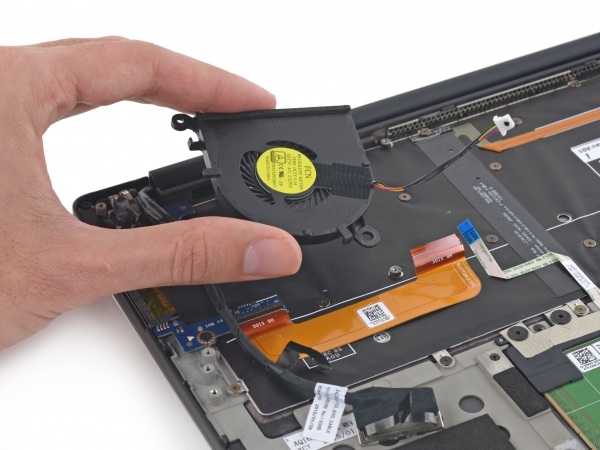
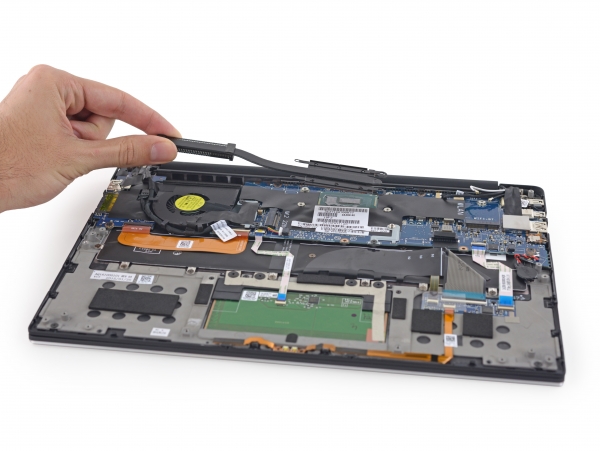
Now you can take the fan down, this is a 5V 0.5A ultra-quiet centrifugal fan.
Dell screwed the fixing tape for the screen cable to the screw fixing the SD card reader module.
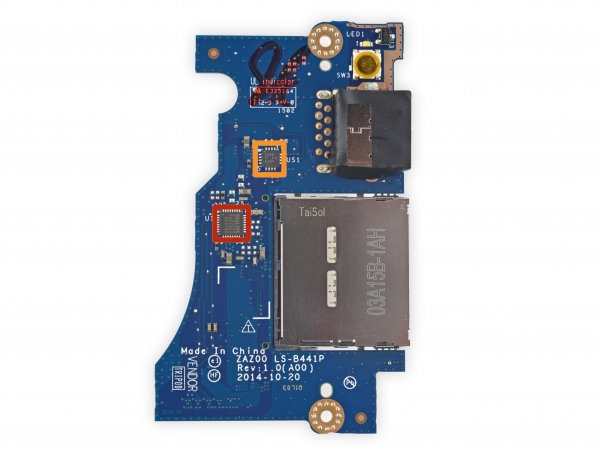
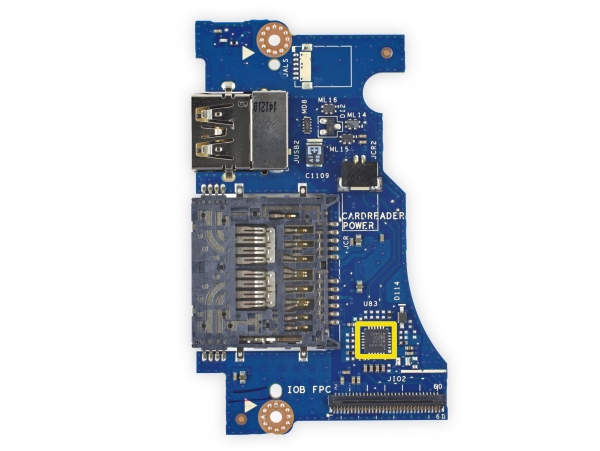
After some dismantling, we finally removed the SD card reader module and circuit board.
Red: Realtek RTS5249 Reader Controller
Orange: Texas Instruments TPS2544 USB Charging Port Controller and Power Switch
Yellow: Parade PS8713B Single Port USB 3.0 Repeater/Redriver
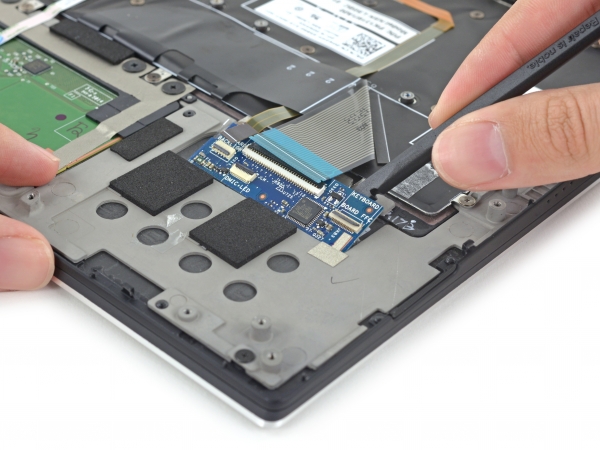
Remove the connection board between the keyboard and the motherboard. XPS may be due to the motherboard size is too small, many components are not integrated on the motherboard, connected to the motherboard through some small connection board, cable.

Now start disassembling the screen. Unscrew the screws on the shaft and we can remove the entire screen.
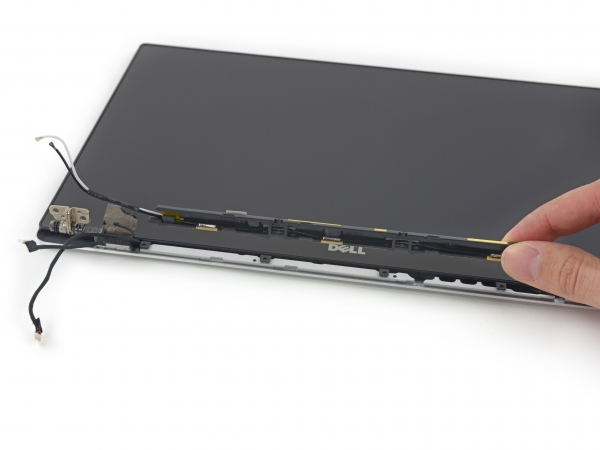
Remove the hinge plate, the new XPS13 uses the same design as the Macbook Pro, and the antenna is hidden here.
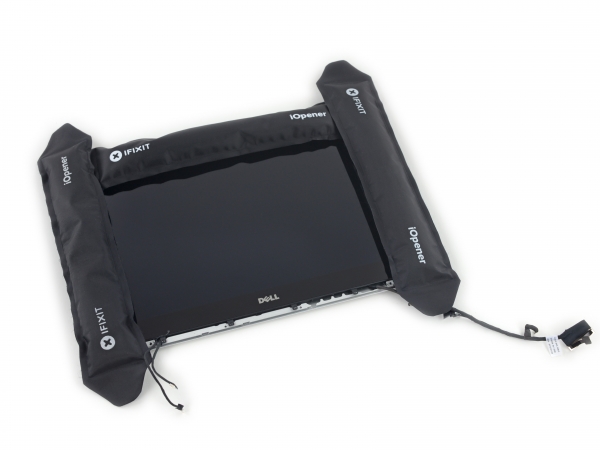
We heated the screen around and softened the glue to facilitate dismantling.
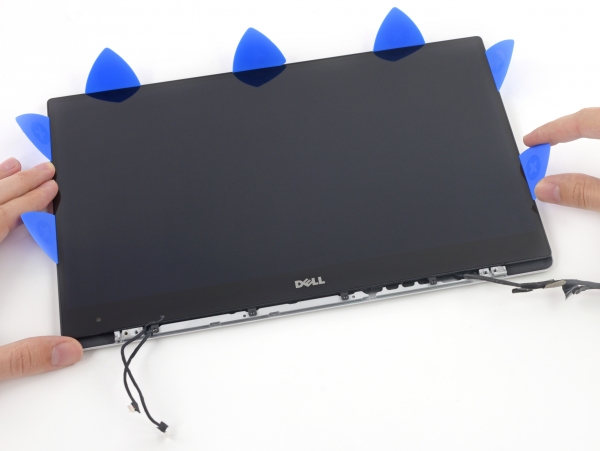
Use the paddle to slowly open the screen along the gap around the screen.
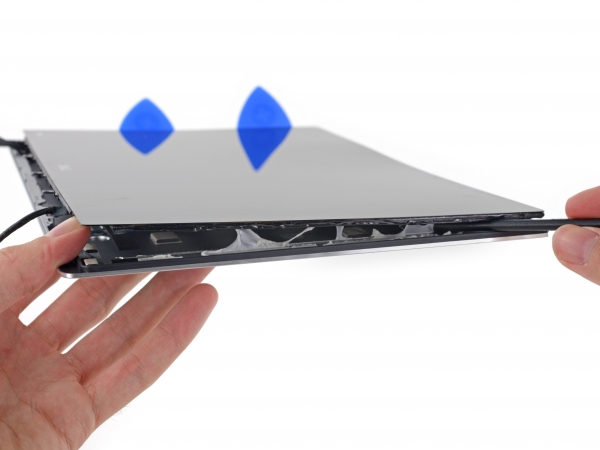
Slowly separate the screen. The glue is very firm, if it is difficult to dismantle, please heat the edge of the screen again.
Continue to slowly separate the screen from the metal panel below. The screen glass is very thin. Please be careful not to use too much force and the screen will break easily.
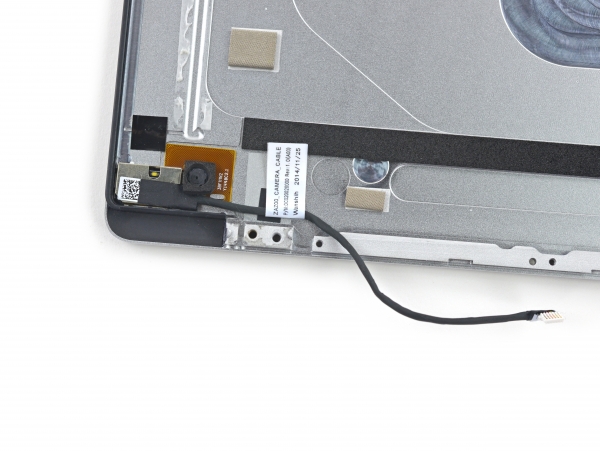
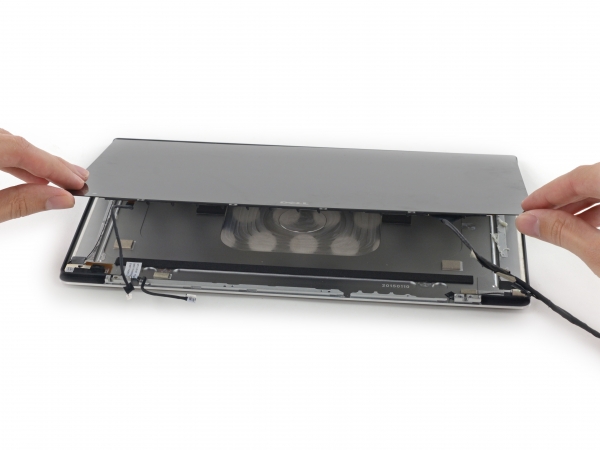
After removing the screen we can finally see the camera. Because of the ultra-narrow frame design, the camera cannot accommodate the camera at any other position in the frame, so Dell installed it in the lower left corner of the screen. The position in actual use is a little inconvenient, and Dell is expected to improve the design in the next generation.
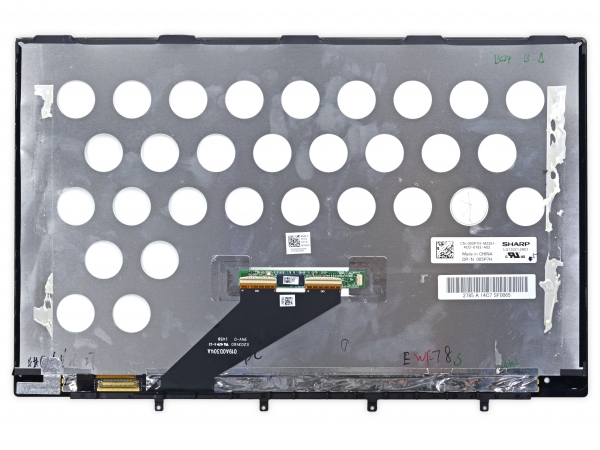
After removing the display, we found that this is a Sharp provided monitor. The screen touch control chip is located in the center of the screen, the display circuit is located at the bottom of the screen, and the circuit board is covered with aluminum foil.
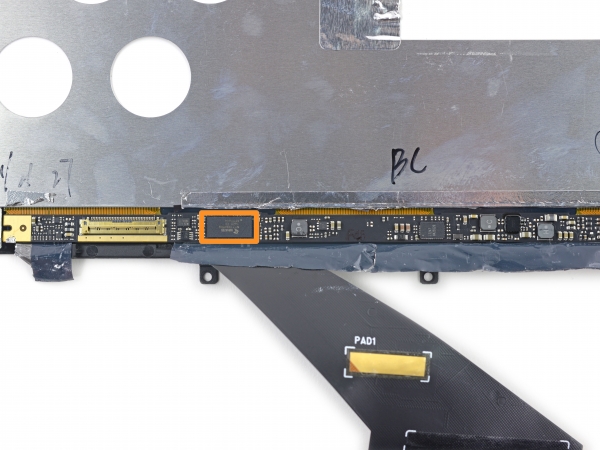
Remove the foil and we can see the display control circuit. The model is Novatek NT71394MB8 displaydriver IC.
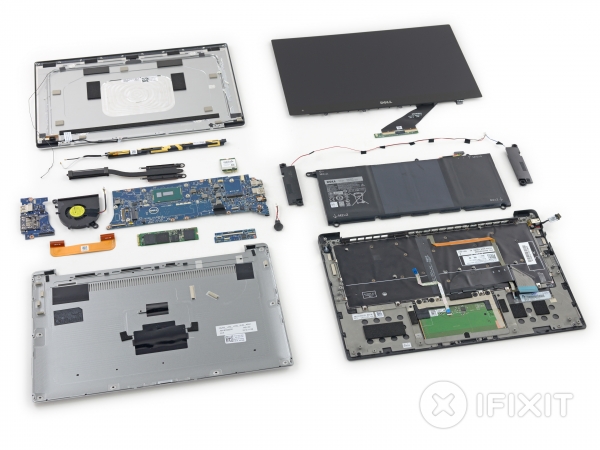
Well, our dismantling is finally completed, and finally a family portrait. iFixit scored 7 points for XPS13 maintenance, which is considered very good. As a main portable notebook, this score is very difficult to understand. iFixit only has 1 point for the 2015 Macbook Pro. The XPS13 balances the performance of the ultra-narrow frame with the ultimate in thinness and thinness. It is indeed a very well designed business notebook.
More fresh hot disassemble video, please pay attention to micro signal: jiuyaochai